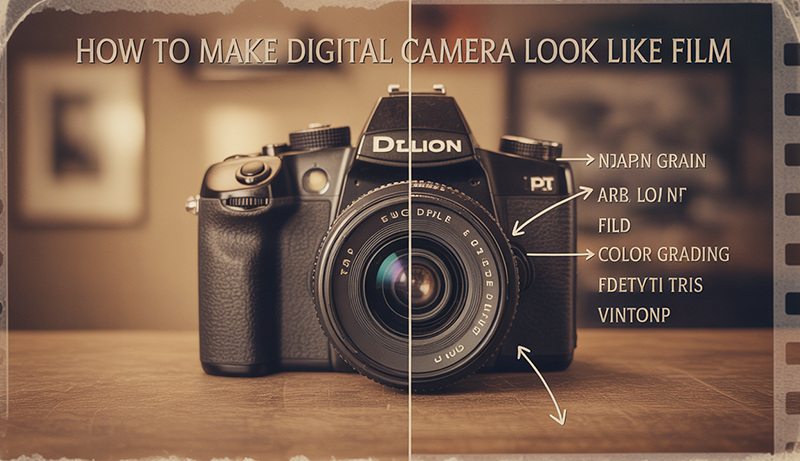
How to Make Digital Camera Look Like Film
Digital photography is fast, convenient, and incredibly sharp—but for many photographers, something still feels missing. Film images often carry a softness, color depth, and emotional texture that modern digital photos don’t naturally produce straight out of the camera.
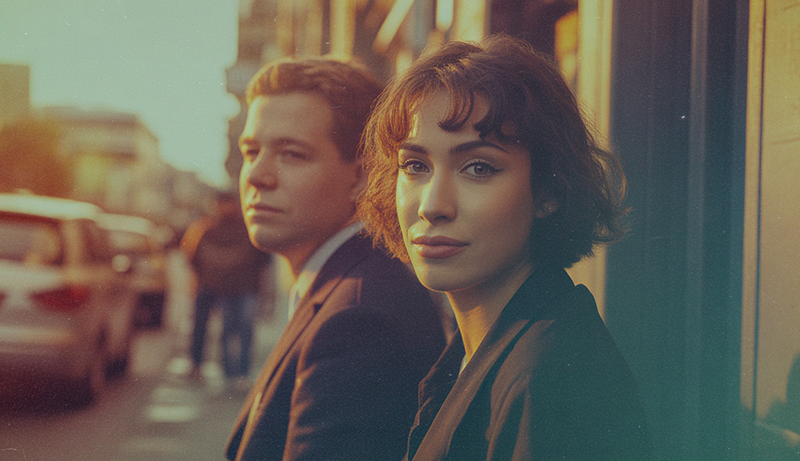
That nostalgic film look isn’t just about grain. It’s about imperfect highlights, gentle contrast, muted colors, and a sense of character shaped by decades of analog photography. These qualities are why film-inspired visuals remain popular in portraits, street photography, and cinematic storytelling.
The good news is that you don’t need to abandon your digital gear to achieve this aesthetic. Learning How to Make Digital Camera Look Like Film is more about technique, creative choices, and thoughtful editing than expensive equipment or rare presets.
From camera settings and lighting decisions to color grading and grain control, subtle adjustments can dramatically change the mood of an image. With the right approach, digital photos can capture the timeless feel of film while keeping the flexibility and convenience of modern technology.
How to Make Digital Camera Look Like Film?
Achieving a film-like look with a digital camera starts with how you shoot, not just how you edit. Film photography often relies on intentional exposure, so slightly underexposing highlights can help preserve detail and create softer tonal transitions. Avoid overly sharp settings in-camera, and use lower contrast picture profiles if your camera allows it. Shooting in RAW is essential, as it gives you greater flexibility to shape colors and tones later.
Lighting plays a major role in recreating the film aesthetic. Natural light, especially during golden hour or overcast conditions, produces gentle shadows and smoother highlights similar to film stock behavior. Harsh artificial lighting can make digital images look clinical, so diffused or indirect light works best when aiming for a more organic result.
Lens choice also matters. Older prime lenses or lenses with wider apertures often introduce subtle imperfections, softer edges, and pleasing background blur. These characteristics help digital images feel less sterile and more cinematic, closer to traditional film photography.
Editing is where the transformation truly comes together. To understand How to Make Digital Camera Look Like Film, focus on reducing contrast, slightly muting colors, and lifting blacks instead of crushing them. Film typically handles highlights and shadows more gently than digital sensors.
Adding realistic grain is another key step. Grain should be fine and subtle, enhancing texture without overpowering the image. Avoid uniform noise; film grain varies across shadows and highlights, which adds depth and realism.
Finally, consistency is crucial. Film looks cohesive because each roll shares the same color science and mood. Develop a repeatable editing style so your images feel intentional, timeless, and emotionally rich rather than overly processed.
What Makes Film Photography Look Unique
Film photography stands out because of how it records light. Unlike digital sensors, film reacts to light in a more gradual and forgiving way, especially in highlights. Bright areas tend to roll off softly instead of clipping harshly, which gives film images a smoother, more natural tonal transition that feels easier on the eyes.
Color is another defining characteristic. Film stocks are chemically designed, and each one has its own color response. This often results in subtle color shifts, warmer skin tones, and slightly muted saturation that feels organic rather than perfectly accurate. These color imperfections are a big reason film images feel emotional and timeless.
Grain also plays an important role in film’s unique appearance. Film grain is not uniform like digital noise; it varies in size and intensity depending on exposure and lighting. This randomness adds texture and depth, making images feel alive rather than overly clean or artificial.
Film photography also encourages a slower, more intentional process. With limited frames per roll, photographers tend to think carefully about composition, light, and timing. This mindset often leads to images that feel more purposeful and story-driven.
Finally, film embraces imperfection. Small flaws like light leaks, slight focus misses, or uneven exposure are often seen as character rather than mistakes. These imperfections give film photography its human quality—something that continues to attract photographers even in a highly digital world.
Camera Settings to Create a Film Look
Creating a film-like appearance begins inside the camera, long before any editing software is opened. Film does not rely on aggressive sharpness, heavy contrast, or automatic color correction, and your digital camera settings should reflect that philosophy. By choosing calmer picture profiles, controlling white balance manually, and shooting in RAW format, you give your images a softer tonal base that behaves more like traditional film when edited.
Choosing the Right Picture Profile
One of the most important steps in achieving a film look is selecting the right picture profile. Many digital cameras apply strong contrast, saturation, and sharpening by default, which can make images look harsh and overly digital. Neutral or flat picture profiles reduce these baked-in adjustments, allowing for smoother tonal transitions that are closer to how film responds to light.
Neutral or flat profiles preserve highlight and shadow detail more effectively. Film is known for its gentle highlight roll-off, and lowering contrast in-camera helps prevent bright areas from clipping too abruptly. With less contrast applied, midtones appear more balanced, giving skin tones and natural elements a softer, more organic feel.
Reducing in-camera sharpening is equally important. Digital sharpening enhances edges and textures in a way that can feel clinical. Film, by comparison, renders detail with subtle softness. Lowering sharpening settings prevents halos and hard edges, making images feel less processed and more natural straight out of the camera.
Using a restrained picture profile also improves editing flexibility. When colors and contrast are not aggressively applied in-camera, adjustments during post-processing behave more predictably. This allows you to shape colors, contrast, and grain in a way that closely resembles the nuanced character of film stocks.
Adjusting White Balance Manually
White balance plays a major role in the emotional tone of an image, and automatic white balance often works against a film-inspired look. Auto white balance constantly adjusts colors based on the scene, which can result in inconsistent tones across a series of images. Film, on the other hand, maintains a consistent color bias throughout an entire roll.
Avoiding auto white balance gives you greater control over color temperature. By setting white balance manually, you can preserve subtle warm or cool tones that contribute to a cinematic, nostalgic mood. Consistency in white balance also makes your images feel more intentional, which is a defining characteristic of film photography.
Using slightly warmer tones is a common technique when aiming for a film look. Many classic film stocks lean warm, especially in skin tones and highlights. Manually adjusting white balance toward warmer values can soften the overall image and make it feel more inviting without looking unnatural.
Manual white balance also simplifies editing. When images share the same color temperature, batch editing becomes easier and more accurate. This consistency helps you build a cohesive visual style, similar to how film photographers achieve a unified look across an entire shoot.
Shooting in RAW Format
Shooting in RAW format is essential for anyone serious about creating a film-like aesthetic. RAW files capture significantly more image data than JPEGs, preserving subtle details in highlights, shadows, and color transitions. This extra information closely mirrors the flexibility photographers associate with film negatives.
Film-style editing often involves lifting shadows, softening highlights, and adjusting color curves. RAW files handle these adjustments far better than compressed formats. When working with RAW, tones remain smooth and natural, reducing the risk of banding or color artifacts that can break the illusion of a film look.
Color grading is another area where RAW truly matters. Film aesthetics rely on nuanced color shifts rather than bold saturation changes. RAW files provide greater control over individual color channels, allowing you to recreate muted palettes, gentle fades, and natural skin tones with precision.
Shooting in RAW also supports non-destructive editing workflows. Just as film negatives can be re-scanned or re-printed in different ways, RAW files allow you to revisit and refine edits without degrading image quality. This flexibility is crucial for experimenting with film-inspired styles and achieving consistent, refined results.
Lenses That Help Achieve a Film Aesthetic
The lens you choose has a powerful influence on whether a digital image feels modern or timeless. Film-era photography was shaped by optical imperfections, gentle softness, and natural rendering that many modern lenses intentionally eliminate. By selecting lenses that emphasize character over clinical perfection, you can introduce depth, mood, and texture that closely resemble the visual qualities of film photography.
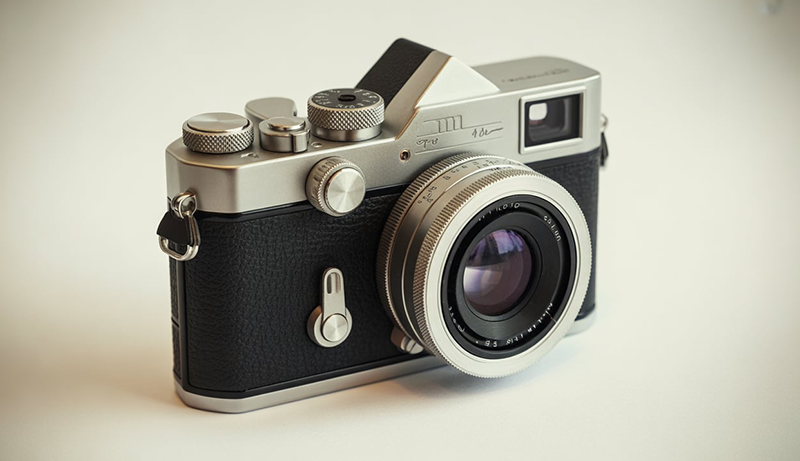
Vintage Manual Focus Lenses
Vintage manual focus lenses are among the most effective tools for achieving a film aesthetic. Many older lenses were designed with simpler optical formulas and coatings, which often produce softer contrast, subtle flare, and organic color rendering. These traits closely match the imperfections associated with classic film photography.
Unlike modern lenses that aim for edge-to-edge sharpness, vintage lenses often fall off slightly toward the corners. This natural softness can draw attention to the subject and create a more immersive, cinematic feel. Minor optical flaws such as chromatic aberration or light bloom are often seen as character rather than defects when used creatively.
Manual focus also slows down the shooting process. Film photography encourages deliberate composition, and manually focusing reinforces that mindset. This slower pace often results in more intentional framing and timing, which contributes to the emotional quality associated with film images.
Many vintage lenses are adaptable to modern mirrorless cameras, making them accessible and affordable. Their unique rendering helps digital images break away from the overly clean look of modern optics and move closer to the expressive qualities of film.
Prime Lenses with Wide Apertures
Prime lenses, especially those with wide apertures, play a significant role in creating a film-like look. Film photography frequently relied on fast prime lenses, which naturally produce shallow depth of field and smooth background separation. This helps isolate subjects and adds a sense of intimacy to an image.
Wide apertures introduce gentle softness when shot near their maximum opening. This softness reduces the hyper-detailed appearance often associated with digital photography. Film images rarely appear razor-sharp, and wide-aperture primes help replicate that subtle rendering while maintaining pleasing detail.
Background blur, or bokeh, is another important factor. Film-era lenses often produce creamy, imperfect bokeh with slight swirl or uneven highlights. These characteristics add visual interest and reinforce a nostalgic, cinematic atmosphere that modern corrected lenses tend to suppress.
Prime lenses also encourage thoughtful composition. Without zoom flexibility, photographers must move physically and engage more deeply with the scene. This approach mirrors the discipline of film shooting and often leads to stronger, more intentional images with a timeless quality.
Older Autofocus Lenses from Early Digital Eras
Not all film-like lenses are fully manual. Autofocus lenses from early digital or late film eras often strike a balance between usability and character. These lenses typically have less aggressive contrast and softer color rendering compared to modern designs, making them well-suited for a film-inspired aesthetic.
Early autofocus lenses often lack advanced coatings that control flare and ghosting. As a result, light sources can introduce subtle haze or glow, especially when shooting into the light. Film photographers frequently embrace these effects as part of the image’s mood rather than flaws.
Sharpness in these lenses is usually centered rather than uniform across the frame. This natural falloff helps guide the viewer’s eye and adds depth without relying heavily on post-processing techniques. The image feels more organic and less digitally optimized.
Using older autofocus lenses also maintains convenience while adding character. You gain reliable focusing with rendering that feels less sterile, allowing digital images to retain modern usability while echoing the visual language of film photography.
Lighting Techniques for a Film Look
Lighting is one of the most defining elements of a film-inspired image. Film responds to light in a softer, more forgiving way than digital sensors, especially in highlights. To replicate this feel, the goal is not brightness but quality of light. Gentle transitions between light and shadow help images feel natural, emotional, and less digitally harsh.
Natural light is often the best starting point. Overcast skies, window light, and shaded outdoor areas produce soft illumination with gradual contrast. This type of light mimics the way film handles tones, preserving detail without sharp edges. Early morning and late afternoon light also adds warmth and depth that suits a film aesthetic.
Diffusion is another key technique. Using curtains, reflectors, softboxes, or even sheer fabric helps spread light evenly across the subject. Film rarely shows hard, aggressive shadows unless intentionally stylized. Diffused light smooths skin tones and reduces extreme contrast, creating a calm and timeless visual feel.
Backlighting and side lighting can add subtle drama without overpowering the image. Light hitting the subject from behind or at an angle creates gentle highlights and depth. Film often embraces light spill, glow, and slight haze, which adds atmosphere and emotional weight rather than technical perfection.
Avoid overly strong artificial lighting setups. Direct flash or hard LED panels can make images look flat and clinical. If artificial light is necessary, bounce it off walls or ceilings to soften the effect. The aim is to let light feel present but unobtrusive, supporting the story instead of dominating the frame.
Editing Techniques to Make Digital Photos Look Like Film
Editing is where digital images truly take on a film-like character. Film aesthetics are built on subtlety rather than strong effects, focusing on gentle color shifts, soft contrast, and natural texture. By approaching editing with restraint and intention, you can transform clean digital files into images that feel organic, emotional, and timeless without appearing overprocessed.
Color Grading Basics
Color grading is the foundation of a film-inspired edit. Film rarely displays strong, punchy colors straight across the image. Instead, colors appear slightly muted, with softer transitions between tones. Reducing overall saturation while preserving natural skin tones helps digital photos move away from a modern, high-contrast look and toward a more analog feel.
Faded blacks are another essential element. Film does not produce deep, crushed blacks like many digital images do by default. Slightly lifting the black point introduces softness in the shadows, allowing detail to remain visible and creating a more atmospheric mood. This technique adds depth without making the image feel flat.
Film-inspired color curves play a major role in shaping tone. Gentle S-curves with softened highlights and lifted shadows mimic the tonal response of film stocks. Unlike aggressive contrast adjustments, curves allow precise control over how light and color interact across the image.
Color balance should also feel intentional rather than neutral. Many film looks favor warm highlights and slightly cooler shadows, creating natural separation within the frame. These subtle color shifts add emotional weight and visual harmony, reinforcing the film aesthetic without relying on heavy presets.
Adding Film Grain Properly
Film grain is one of the most recognizable characteristics of analog photography, but it must be applied carefully. Digital noise and film grain are not the same. Film grain has structure, variation, and purpose, while digital noise often looks random and distracting. The goal is to add texture without overwhelming the image.
Grain size should match the resolution and mood of the photo. Fine grain works well for portraits and bright scenes, while slightly larger grain can suit low-light or cinematic images. Oversized grain can quickly feel artificial, breaking the illusion of a film look.
Intensity is equally important. Film grain should be visible but subtle, enhancing texture rather than dominating the image. It should blend into shadows and midtones naturally, not appear as a uniform overlay. Many film stocks show more grain in darker areas, which adds realism and depth.
Grain also helps soften transitions and reduce digital sharpness. When applied correctly, it masks overly clean edges and contributes to a more organic rendering. This subtle texture brings digital photos closer to the tactile quality associated with film photography.
Adjusting Contrast and Highlights
Contrast control is critical when editing for a film look. Digital cameras often capture images with strong contrast and harsh highlights, while film handles bright areas with a smoother roll-off. Preserving highlights is essential to maintaining a natural and pleasing tonal range.
Reducing highlight intensity prevents bright areas from looking clipped or overly sharp. Film highlights tend to glow softly rather than appearing stark white. Lowering highlight sliders and gently shaping curves helps recreate this behavior, especially in skies and reflective surfaces.
Creating gentle contrast involves balancing tones rather than exaggerating them. Instead of deepening blacks and boosting whites, focus on midtone separation. This approach keeps images dimensional while maintaining softness across the tonal range.
Shadows should retain detail and depth. Film rarely produces completely black areas unless intentionally exposed that way. Slightly lifting shadows adds atmosphere and prevents images from looking too harsh or digitally compressed.
By managing contrast carefully, digital photos gain a smoother tonal flow that feels natural and timeless. This controlled approach allows light to feel present without overpowering the scene, closely reflecting the visual language of film photography.
Common Mistakes to Avoid
One of the most frequent mistakes when trying to achieve a film look is overdoing grain and faded blacks. While film grain adds texture and character, too much of it can overpower the image and make it look artificial. Excessive fading can also remove depth, leaving photos flat and lifeless instead of naturally soft.
Another common issue is applying heavy color shifts. Film colors are subtle and balanced, not extreme. Pushing tones too far toward teal, orange, or strong pastels can quickly break realism. When colors feel unnatural or distract from the subject, the image loses the timeless quality associated with film photography.
Relying only on presets is also a major limitation. Presets can be helpful as a starting point, but every image has different lighting, exposure, and color needs. Applying a preset without adjustment often results in inconsistent tones and unrealistic contrast that does not suit the scene.
Ignoring the importance of shooting conditions can lead to disappointment during editing. Film-inspired edits depend heavily on proper exposure, soft light, and balanced tones. Poorly lit or overexposed images leave little room for subtle, film-like adjustments later.
Another mistake is chasing perfection. Film photography embraces small imperfections, but forcing flaws through extreme edits rarely feels authentic. The goal is restraint and balance, allowing the image to retain its natural character.
Avoid rushing the process. Film looks are built through thoughtful shooting and careful editing, not quick filters. Slowing down and making intentional adjustments leads to more convincing and visually pleasing results.
People Also Asked
What Camera Settings Should I Use To Make My Digital Photos Look Like Film?
To make your digital photos resemble film, start by using a neutral or flat picture profile in your camera. Reduce in-camera sharpening and contrast to preserve detail and create softer tones. Adjust white balance manually to maintain consistent warmth and avoid the cold, overly neutral feel of auto white balance. Shooting in RAW format is also essential, as it gives you maximum flexibility for editing and color grading later.
Which Lenses Are Best For Achieving A Film Aesthetic?
Prime lenses with wide apertures are ideal for a film look, as they create shallow depth of field and creamy, natural background blur. Vintage manual focus lenses also work well because they introduce slight softness, subtle flares, and color variations, which mimic the character of classic film. Older autofocus lenses from early digital eras can also produce softer contrast and gentle tonal rendering, giving digital images a nostalgic feel.
How Can I Use Lighting To Create A Film-Like Look?
Lighting plays a critical role in replicating a film aesthetic. Natural, soft light such as window light, golden hour sunlight, or overcast skies works best. Diffuse harsh light using reflectors, softboxes, or sheer fabrics to reduce shadows and create smooth transitions. Backlighting and side lighting can add depth and mood, while avoiding harsh artificial lighting helps maintain the organic and timeless feel of film.
What Editing Techniques Make Digital Photos Look Like Film?
Color grading is essential for a film-inspired edit. Muted colors, faded blacks, and gentle film-inspired color curves help achieve natural tones. Adding subtle grain enhances texture without overpowering the image, while careful contrast adjustment preserves highlights and creates smooth tonal transitions. Balancing shadows, midtones, and highlights ensures the image retains depth and avoids the overly sharp, clinical look of digital photos.
How Much Grain Should I Add To My Digital Images?
Grain should be applied subtly to enhance texture rather than dominate the image. Fine grain works well for portraits or bright scenes, while slightly larger grain suits low-light or cinematic styles. Avoid uniform noise; film grain varies across shadows and highlights, which gives images depth and a realistic analog feel. The key is moderation—too much grain will make the photo look artificial.
Are Presets Enough To Make My Photos Look Like Film?
Presets can be a helpful starting point, but relying solely on them rarely produces authentic results. Every image is unique, with different lighting, exposure, and color conditions. To achieve a true film aesthetic, you need to adjust contrast, white balance, and color grading manually, while adding subtle grain and texture. Thoughtful, intentional editing produces more consistent and convincing film-style photos than presets alone.
Final Thoughts
Achieving a film-like aesthetic with a digital camera is a combination of thoughtful shooting and careful editing. By paying attention to camera settings, lens choice, and lighting, you create a foundation that mimics the softness, tonal depth, and emotional quality of traditional film photography. These elements work together to give your images a timeless, organic feel that stands out from standard digital photos.
Post-processing is where the transformation becomes complete. Through subtle color grading, gentle contrast adjustments, and the addition of film grain, you can refine your digital images to closely resemble film. Each step should be deliberate, focusing on enhancing mood and texture rather than applying heavy-handed effects.
Learning How to Make Digital Camera Look Like Film allows you to combine modern convenience with the charm of analog photography. With patience and practice, your digital images can carry the warmth, character, and nostalgia that make film so enduring.