How to Improve Camera Quality on iPhone (Complete Guide)
The iPhone camera has become a daily companion for capturing memories, work moments, and creative ideas. From quick snapshots to carefully framed photos, people rely on it to deliver clear and vibrant results. Still, many users feel their photos don’t always reflect what they see with their eyes, even with advanced camera hardware built in.
Lighting conditions, settings, and simple habits can make a noticeable difference in the final image. Small adjustments often have a bigger impact than expected, especially when using features that are already available on the device. Understanding these details helps unlock the full potential of the camera without needing extra equipment.
Learning how to improve camera quality on iPhone is not only about technical tweaks but also about developing a better shooting approach. Focus, stability, and composition all work together to shape a great photo. Paying attention to these elements can instantly elevate everyday shots.
With the right techniques and awareness, anyone can take sharper, brighter, and more professional-looking photos using an iPhone. The camera is powerful; using it wisely brings out its best results.
Understand Your iPhone Camera Capabilities
Understanding your iPhone’s camera capabilities is a crucial step toward capturing better photos and videos. Every iPhone model is designed with specific hardware strengths and enhanced by powerful software features. By learning how your camera system works—from physical lenses to intelligent processing—you can make informed decisions while shooting and take full advantage of the tools already in your hands.
Know Your iPhone Model’s Camera Specs
Each iPhone model offers a different camera experience, and recognizing these differences helps set realistic expectations. Standard models are designed for everyday photography, while Pro and Pro Max versions focus on advanced imaging. Higher-end models usually include extra lenses, better sensors, and more manual control options that support professional-level results.
Lens types play a major role in how your photos turn out. The Wide lens is the primary camera and performs best in most lighting conditions. The Ultra Wide lens captures more of the scene, making it ideal for landscapes and group shots, though it may sacrifice some detail. Telephoto lenses allow optical zoom, helping maintain clarity when shooting distant subjects.
Sensor size directly affects light capture and image quality. Larger sensors gather more light, resulting in brighter images with improved detail, especially in low-light situations. Megapixels determine how much detail an image can hold, but more megapixels do not always mean better photos. Balance matters more than numbers alone.
Aperture controls how much light enters the lens. A wider aperture allows more light, which improves night photography and background blur. Understanding how these specifications work together enables you to choose the right lens and settings for each shooting scenario, maximizing the camera’s potential.
Camera Software vs Hardware
While hardware defines the camera’s physical limits, software plays an equally important role in shaping the final image. iOS uses computational photography to enhance photos in real time. This process combines multiple frames, adjusts exposure, sharpens details, and balances colors automatically, often producing results beyond what hardware alone could achieve.
Features like smart HDR, night mode, and portrait enhancements rely heavily on software intelligence. Instead of capturing a single image, the camera analyzes multiple exposures and merges them into one balanced photo. This approach improves highlights, shadows, and clarity without requiring manual adjustments from the user.
Software also compensates for hardware limitations. Smaller sensors and lenses are enhanced through algorithms that reduce noise, improve texture, and correct distortions. This means even older or non-Pro models can still deliver impressive results when the software is optimized effectively.
Regular software updates can noticeably improve camera quality. Apple refines image processing with each iOS release, enhancing color accuracy, low-light performance, and overall sharpness. Staying updated ensures your iPhone camera continues to improve over time, even without changing the physical hardware.
Update iOS for Better Camera Performance
Keeping your iPhone updated with the latest iOS version plays a significant role in improving camera performance. Apple frequently enhances camera processing through software updates, refining how photos and videos are captured. These updates are designed to optimize image quality without requiring any changes to the physical camera hardware.
Each iOS update often includes improvements to computational photography features such as HDR, Night mode, and image stabilization. Apple fine-tunes how the camera handles lighting, color accuracy, and detail preservation. As a result, photos can appear sharper, more balanced, and closer to real-life scenes after an update.
Camera-related bugs and performance issues are also addressed through system updates. Problems like focus delays, inconsistent exposure, or reduced low-light clarity are commonly fixed in newer iOS versions. Updating ensures that your camera runs smoothly and consistently across different shooting conditions.
Another advantage of updating iOS is access to newly introduced camera features. Apple sometimes adds enhancements like improved portrait effects, better video recording options, or smarter scene detection. These features can instantly elevate photo and video quality without any manual setup.
Security and system stability also indirectly affect camera performance. A well-optimized operating system allows the camera app to function efficiently without crashes or lag. This ensures quicker access, faster image processing, and a more reliable shooting experience overall.
By regularly updating iOS, you allow your iPhone camera to benefit from ongoing software innovation. Simple updates can unlock better performance, improved image quality, and a more refined photography experience using the same device.
Optimize iPhone Camera Settings
Optimizing your iPhone camera settings allows you to get the best possible photo and video quality without relying on third-party apps. Many powerful options are hidden within the settings menu and are often left unchanged. Adjusting these features ensures better detail, accurate colors, and consistent results across different shooting conditions and everyday scenarios.
Enable High-Quality Photo Settings
Choosing the right photo format is one of the most important steps in improving image quality. High Efficiency uses HEIF format, which preserves excellent detail while saving storage space. Most Compatible uses JPEG and is ideal when sharing images across older devices, but it may slightly reduce overall image quality.
For supported models, enabling Apple ProRAW unlocks greater control over photo details. ProRAW captures more data from the camera sensor, allowing better adjustments to exposure, color, and sharpness during editing. This format is especially useful for photographers who prefer editing photos without losing quality.
Smart HDR should always be enabled for balanced photos. It combines multiple exposures into one image, ensuring highlights are not blown out and shadows retain detail. This is especially helpful in bright daylight or high-contrast scenes where lighting varies.
Together, these settings help maximize image clarity and dynamic range. When properly enabled, they allow the camera to capture more accurate colors, improved textures, and professional-quality results even in challenging lighting environments.
Improve Video Quality Settings
Video quality settings significantly affect how smooth and detailed your recordings appear. Setting video resolution to 4K at 60 frames per second provides sharp visuals and fluid motion, making it ideal for action shots or fast-moving subjects. However, this setting uses more storage, so it should be used selectively.
HDR video recording enhances color depth and contrast in videos. It captures a wider range of highlights and shadows, making footage appear more vibrant and realistic. This feature is particularly useful when filming outdoors or in scenes with strong lighting variations.
Cinematic Mode adds a professional depth-of-field effect by automatically focusing on subjects while blurring the background. To use it correctly, ensure proper lighting and maintain steady movement. This mode works best for storytelling videos, interviews, and creative clips where subject focus is important.
Adjusting these video settings allows your iPhone to produce high-quality footage comparable to dedicated cameras. Proper configuration ensures smooth playback, rich colors, and visually engaging recordings across different environments.
Adjust Camera Preferences
Camera preferences improve consistency and composition during shooting. Enabling grid lines helps align subjects using the rule of thirds, resulting in more balanced and visually appealing photos. This simple tool makes framing easier and improves overall image structure.
Preserving camera settings ensures that preferences like exposure, night mode, and camera filters remain active between sessions. This saves time and prevents unwanted changes when reopening the camera app. It is especially useful when shooting in similar lighting conditions repeatedly.
Mirroring the front camera can be helpful for selfies and video recordings. This setting displays images the way you see yourself on screen, making framing more intuitive. However, disabling it may be better when text or symmetry is important in the final image.
Fine-tuning these preferences creates a more personalized camera experience. Small adjustments help maintain consistency, improve composition, and ensure your iPhone camera works exactly the way you need it to for everyday use.
Improve Photo Quality While Shooting
Improving photo quality doesn’t rely only on camera settings; how you shoot plays an equally important role. Lighting, stability, and focus control directly influence sharpness, clarity, and mood. By applying simple techniques while taking photos, you can significantly enhance results in real time and avoid relying heavily on editing afterward.
Use Proper Lighting
Lighting is the foundation of high-quality photography, and natural light is often the most flattering option. Soft daylight, especially during early morning or late afternoon, creates balanced exposure and natural skin tones. Shooting near windows or outdoors provides even illumination without overwhelming shadows or highlights.
Artificial light can be useful when natural light is unavailable, but it must be used carefully. Indoor lighting often creates color casts or uneven brightness. Positioning light sources at an angle rather than directly overhead helps reduce harsh shadows and creates a more pleasing depth in photos.
Harsh backlighting should be avoided unless used intentionally for creative effects. When the main light source is behind the subject, details can be lost, resulting in dark or washed-out images. Adjusting your position or tapping to expose for the subject helps maintain clarity.
For portraits and selfies, face the light source whenever possible. Natural window light or soft diffused light highlights facial features evenly. Consistent, gentle lighting enhances textures and skin tones, resulting in sharper, more professional-looking photos.
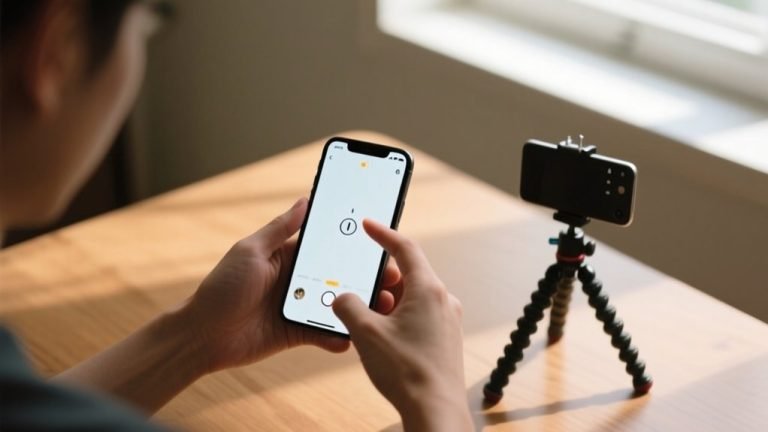
Stabilize Your iPhone
Stability is essential for sharp images, especially in low-light conditions or when using zoom. Holding your iPhone with both hands creates better balance and reduces unwanted movement. Keeping your elbows close to your body further improves steadiness.
Leaning against solid surfaces such as walls, tables, or railings adds extra support. This technique is especially useful when shooting at night or indoors where slower shutter speeds are used. Even slight movements can cause blur, so minimizing motion makes a noticeable difference.
When conditions require maximum stability, using a tripod is the best option. Tripods are ideal for night photography, long exposures, group photos, or videos. They ensure consistent framing and eliminate shake entirely, resulting in crisp images.
Stabilization techniques help the camera capture fine details accurately. By maintaining control over movement, you allow the camera to focus properly and preserve clarity, especially in challenging shooting environments.
Focus and Exposure Control
Tapping the screen to focus ensures that the camera prioritizes the correct subject. This simple action improves sharpness and prevents the camera from choosing the wrong focal point, which is especially important in close-up or portrait shots.
Locking AE/AF gives you full control over exposure and focus. By holding your finger on the screen, you prevent the camera from constantly adjusting as the scene changes. This is useful when shooting moving subjects or when lighting conditions are inconsistent.
Manually adjusting the exposure slider allows you to fine-tune brightness. Lowering exposure helps preserve highlights, while increasing it brightens darker scenes. Small adjustments can dramatically improve image balance without overexposing or losing detail.
Mastering focus and exposure control gives you creative flexibility. These tools allow you to capture images exactly as you envision them, resulting in more accurate, sharp, and visually appealing photos straight from the camera.
Master Advanced Camera Modes
Advanced camera modes on the iPhone are designed to handle challenging scenes and creative photography with minimal effort. Features like Night Mode, Portrait Mode, and Macro or Telephoto lenses allow you to go beyond standard shots. Learning how and when to use these modes helps you capture clearer details, better depth, and more professional-looking images in different environments.
Night Mode Photography Tips
Night Mode automatically activates when the camera detects low-light conditions. A small Night Mode icon appears on the screen, signaling that the camera will use longer exposure to capture more light. This mode is especially effective in dim environments, cityscapes at night, or indoor scenes with limited lighting.
Holding your phone steady is critical when using Night Mode. Because the camera captures light over a longer period, even slight movement can cause blur. Using both hands, bracing your arms against your body, or resting the phone on a stable surface greatly improves sharpness.
Night Mode allows you to adjust exposure time manually. Increasing the exposure time lets in more light, producing brighter images with enhanced details. However, longer exposure also increases the risk of motion blur, so balance is important depending on the scene.
With proper stability and exposure control, Night Mode produces clean, detailed images with reduced noise. Understanding when it activates and how to control it ensures better results in low-light photography without relying on flash.
Portrait Mode Enhancements
Portrait Mode creates a depth-of-field effect by keeping the subject sharp while softly blurring the background. Proper subject distance is essential for this effect to work correctly. Standing too close or too far away can reduce background blur or cause focus issues.
Choosing the right background enhances the depth effect significantly. Simple, uncluttered backgrounds allow the subject to stand out clearly. Avoid backgrounds with similar colors or textures to the subject, as they can confuse depth detection.
Lighting plays an important role in Portrait Mode quality. Soft, even lighting improves edge detection and skin tones. Natural light is often the best choice, especially when shooting people. Harsh lighting can cause shadows that interfere with depth mapping.
After taking the photo, you can adjust depth and lighting effects. The Photos app allows you to control background blur intensity and apply different portrait lighting styles. These adjustments help fine-tune the image and correct minor imperfections after shooting.
Macro and Telephoto Tips (Pro Models)
Macro Mode is designed for capturing extreme close-ups with sharp detail. It automatically activates when you move close to a subject like flowers, textures, or small objects. Keeping steady and using good lighting helps reveal fine details without blur.
Telephoto lenses are best used when you need to photograph distant subjects while maintaining clarity. Optical zoom preserves image quality by using the lens itself rather than software enlargement. This results in sharper images with more natural detail.
Avoid using digital zoom whenever possible. Digital zoom simply crops the image, which reduces resolution and clarity. Instead, move closer to the subject or switch to the appropriate lens for better results.
Understanding the difference between optical and digital zoom allows you to make smarter shooting decisions. Using the right mode at the right time ensures your photos remain sharp, detailed, and visually impressive.
Clean the Camera Lens
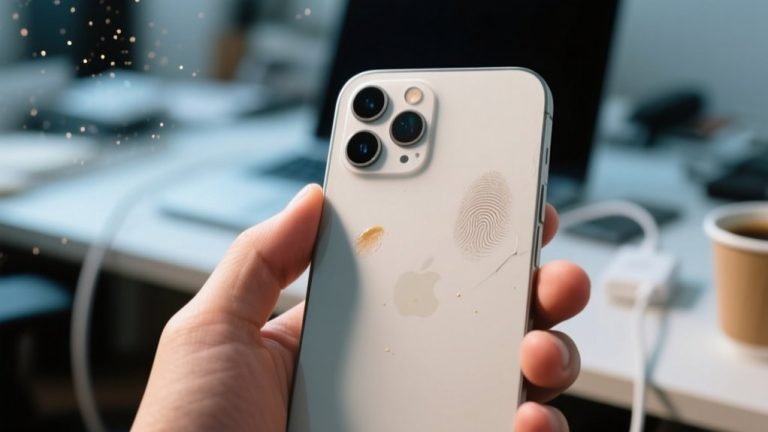
One of the simplest yet most overlooked ways to improve iPhone camera quality is cleaning the camera lens. Because phones are handled constantly, the lens easily collects fingerprints, dust, and pocket lint. Even a small smudge can cause photos to look blurry, hazy, or lacking sharp detail.
A dirty lens often leads to reduced contrast and unwanted light flares, especially in bright conditions or when shooting at night. Many people assume the camera quality has dropped, when in reality the lens is just obstructed. Regular cleaning instantly restores clarity and improves overall image sharpness.
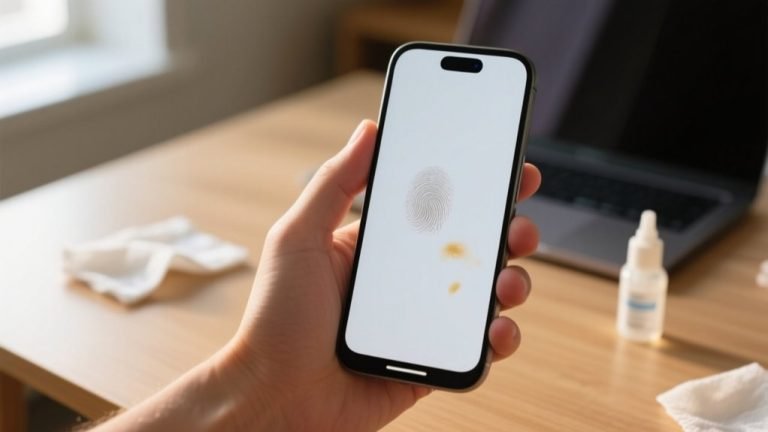
To clean the lens safely, use a soft microfiber cloth similar to the one used for glasses. Gently wipe the lens in circular motions without applying too much pressure. Avoid using tissues, paper towels, or rough fabrics, as these can scratch the lens coating.
If fingerprints are stubborn, slightly dampen the cloth with water or lens-cleaning solution. Never spray liquid directly onto the camera. Keeping the lens clean before important shots ensures consistent photo quality and prevents unnecessary image distortion during everyday use.
Use Third-Party Camera Apps
Third-party camera apps can unlock advanced controls that go beyond the default iPhone camera app. While Apple’s built-in camera is powerful, external apps offer greater flexibility for users who want more control over focus, exposure, shutter speed, and ISO. These tools are especially useful for creative photography and manual adjustments.
Many third-party apps allow manual focus and exposure control, helping you fine-tune shots in challenging lighting conditions. This level of control is beneficial for low-light photography, motion shots, or scenes with complex lighting where automatic settings may struggle.
Some apps also provide enhanced video features such as advanced frame rate control, bitrate adjustments, and better stabilization options. These features help create more cinematic and professional-looking videos, especially for content creators and vloggers.
In addition, third-party camera apps often include shooting modes like long exposure, RAW capture, and focus peaking. These options expand creative possibilities and help maximize your iPhone camera’s potential when standard settings are not enough.
Edit Photos for Better Quality
Editing is a powerful step in improving photo quality and should be viewed as a refinement process rather than a fix for poor shots. Even well-captured photos can benefit from small adjustments that enhance clarity, balance, and color accuracy. Using the right editing tools helps bring out details while keeping images natural and visually pleasing.
Use Built-In iOS Editing Tools
The built-in iOS photo editor offers a wide range of tools that are easy to use and highly effective. Adjusting exposure helps correct photos that appear too dark or too bright, while contrast adds depth by separating highlights and shadows. Small exposure and contrast tweaks often make images look more balanced and realistic.
Sharpness is another essential adjustment, but it should be applied carefully. Increasing sharpness slightly enhances details and textures, especially in landscapes and architecture. Overdoing it, however, can create unnatural edges and noise. The key is subtle enhancement rather than dramatic changes.
Photographic Styles allow you to adjust tone and warmth without affecting skin tones. Using these styles correctly helps maintain natural-looking portraits while still improving overall color balance. Unlike filters, they apply intelligent adjustments that preserve important details.
Together, these built-in tools are ideal for quick edits. They provide enough control to improve photo quality significantly without requiring advanced editing knowledge or additional apps.
Use Professional Editing Apps
Professional editing apps offer advanced tools for users who want deeper control over their images. Noise reduction is particularly useful for low-light photos, where grain can reduce clarity. Proper noise reduction smooths images while preserving important details.
Color correction tools help fine-tune white balance, saturation, and color tones. Adjusting these settings improves realism and ensures colors match the original scene. This is especially helpful for indoor photos affected by artificial lighting.
Sharpening tools in professional apps are more precise than basic editors. They allow selective sharpening, enhancing key areas without affecting the entire image. This prevents overprocessing and keeps photos looking natural.
Using professional editing apps wisely enhances photo quality while maintaining authenticity. Controlled adjustments ensure images look polished, clean, and visually appealing without appearing overly edited.
Troubleshooting Poor iPhone Camera Quality
When iPhone photos suddenly appear blurry, dull, or inconsistent, the issue is often related to settings, software, or external factors rather than hardware damage. Identifying the root cause helps restore image quality quickly without unnecessary frustration or repairs.
One common problem is accidental setting changes. Low-resolution formats, disabled HDR, or incorrect video settings can reduce overall quality. Reviewing camera and photo settings ensures features designed to enhance clarity and detail are properly enabled.
Software glitches can also affect camera performance. Temporary bugs may cause focus issues, lag, or exposure errors. Restarting the device or updating iOS often resolves these problems by refreshing system processes and applying camera-related fixes.
Storage limitations may impact camera functionality as well. When storage is nearly full, the camera may struggle to process images efficiently. Freeing up space allows the camera to capture and save photos without delays or compression issues.
Physical obstructions should not be overlooked. A dirty lens, thick phone case, or damaged lens cover can block light and reduce sharpness. Inspecting and cleaning the camera area often leads to instant improvement.
If problems persist, resetting camera settings or testing the camera in safe conditions helps isolate the issue. Consistent troubleshooting ensures your iPhone camera performs as expected across different shooting environments.
Frequently Asked Questions (FAQs)
How Can You Improve Camera Quality On iPhone Without Buying A New Device?
You can improve camera quality on iPhone by optimizing built-in settings and improving how you shoot. Keep your iOS updated, enable Smart HDR, use High Efficiency photo format, and clean the camera lens regularly. Shooting in good lighting, stabilizing your phone, and using focus and exposure controls also make a noticeable difference without any additional hardware.
Does Updating iOS Really Improve iPhone Camera Quality?
Yes, updating iOS can significantly improve camera quality. Apple often enhances computational photography through software updates, improving color accuracy, low-light performance, and image processing. When you update iOS, you also receive bug fixes and performance improvements that help the camera function more smoothly and consistently across different lighting conditions.
What Camera Settings Should You Change For Better Photos On iPhone?
You should enable Smart HDR, choose High Efficiency photo format, and turn on ProRAW if your model supports it. Preserving camera settings such as exposure and night mode helps maintain consistency. Using grid lines improves composition, while manual exposure adjustments allow you to control brightness more accurately for sharper and balanced photos.
Why Do iPhone Photos Look Blurry Even With A Good Camera?
Blurry photos are often caused by camera shake, poor lighting, or a dirty lens. Holding your iPhone with both hands, stabilizing it against a solid surface, and cleaning the lens can instantly improve sharpness. In low light, using Night Mode properly and keeping the phone steady helps reduce motion blur.
Do Third-Party Camera Apps Actually Improve Photo Quality?
Third-party camera apps improve photo quality by giving you more manual control. They allow you to adjust ISO, shutter speed, focus, and white balance. These features are helpful in challenging lighting situations or creative photography, letting you capture images that the default camera app may not handle as precisely.
How Much Does Editing Help Improve Camera Quality On iPhone?
Editing helps refine photos rather than replace good shooting habits. Using iOS editing tools, you can adjust exposure, contrast, and sharpness for better clarity. Professional editing apps provide noise reduction and color correction, helping your photos look cleaner and more natural when edits are applied carefully.
Conclusion
Improving iPhone camera performance is not about having the latest model, but about using the device more effectively. Small changes in settings, better shooting habits, and regular maintenance can dramatically enhance photo and video results. Understanding how lighting, stability, and focus work together allows you to capture clearer and more detailed images every day.
Software optimization also plays a major role in overall image quality. Keeping iOS updated, using advanced camera modes correctly, and taking advantage of built-in editing tools help refine photos without extra effort. Even simple steps like cleaning the lens or adjusting exposure manually can make a noticeable difference.
Learning how to improve camera quality on iPhone empowers you to get professional-looking results from a device you already use daily. With the right techniques and awareness, your iPhone camera becomes a powerful tool for capturing sharp, vibrant, and visually appealing photos in any situation.