What Is Shutter Speed on a Camera?
Shutter speed on a camera controls how long the sensor is exposed to light, measured in seconds or fractions of a second. You use it to manage exposure and motion. Fast speeds freeze action, while slow speeds create motion blur.
It works closely with aperture and ISO to balance brightness and clarity. Understanding its different ranges lets you capture anything from sharp sports shots to creative light trails. Investigate shutter speed further to master its full photographic potential.
Key Takeaways
- Shutter speed is the duration the camera’s shutter remains open to expose light onto the sensor or film.
- It controls motion capture, freezing fast action or creating motion blur effects depending on speed.
- Measured in seconds or fractions, faster speeds reduce light exposure while slower speeds increase it.
- Shutter speed works with aperture and ISO to balance overall image brightness and quality.
- Common uses vary from very fast speeds for sports to slow speeds for night or creative long exposure photography.
What Is Shutter Speed on a Camera?
Shutter speed refers to the length of time your camera’s shutter stays open, allowing light to reach the sensor. Measured in seconds or fractions of a second, shutter speed directly affects the amount of light entering your camera and therefore influences exposure.
Fast shutter speeds, such as 1/1000 sec, reduce the time the sensor is exposed, enabling you to freeze motion and capture sharp images of fast-moving subjects. Conversely, slow shutter speeds, like 1 second or longer, increase exposure duration, which can introduce motion blur for creative effects or improve brightness in low-light settings.
Mastering shutter speed is essential for controlling both exposure and motion portrayal in your photos, making it a fundamental component of your camera’s exposure triangle alongside aperture and ISO.
How Shutter Speed Controls Exposure and Light
Because it controls how long your camera’s sensor is exposed to light, shutter speed plays a critical role in determining the brightness of your images.
When you select slow shutter speeds, such as 1 second or longer, more light reaches the sensor, increasing exposure and producing brighter photos.
Conversely, fast shutter speeds, like 1/1000 seconds, limit light exposure, resulting in darker images.
Adjusting shutter speed within your camera settings allows you to manage light intake precisely, especially in varying lighting conditions.
Slow shutter speeds are useful in low-light environments, while fast shutter speeds help prevent overexposure in bright scenes.
Understanding how shutter speed controls exposure lets you capture images with the desired brightness and clarity, essential for mastering your camera’s performance.
How Shutter Speed Works With Aperture and ISO
When you adjust shutter speed, you need to balance it carefully with aperture and ISO to achieve the correct exposure.
These three components form the exposure triangle, where each affects the amount of light reaching your camera’s sensor.
A slower shutter speed lets in more light, so you might reduce aperture size (higher f-stop) or lower ISO to avoid overexposure.
Conversely, a faster shutter speed reduces light intake, requiring a wider aperture or increased ISO to maintain balanced exposure.
Since shutter speed is measured in fractions of a second, aperture in f-stops, and ISO reflects sensor sensitivity, understanding their interdependence is essential.
Changing one demands compensatory adjustments in the others for precise exposure control and desired image quality.
How Shutter Speed Is Measured and Displayed
Although it varies by camera model, you’ll usually find shutter speed displayed as fractions of a second, such as 1/250s or 1/1000s. Longer exposures are shown in whole seconds and marked by quotation marks (e.g., “1” for one second).
Shutter speed is measured in fractions to accurately control exposure duration, directly impacting motion capture and light intake. On your camera’s display or viewfinder, these settings are integral to adjusting exposure within different modes.
Shutter speed values commonly range from 1/8000s to 30 seconds. Faster speeds freeze motion; slower speeds increase exposure time.
In Manual mode, you set both shutter speed and aperture. Shutter Priority lets you choose shutter speed while the camera adjusts aperture.
Automatic mode sets shutter speed based on lighting and scene requirements.
Understanding these camera settings guarantees precise exposure control.
Common Shutter Speed Ranges and Their Typical Uses
You’ll find shutter speeds range from slow to fast, and each has its own special role in photography.
Slow speeds are great for creating motion blur effects, which come in handy for artistic shots or when you’re working in low light.
On the flip side, fast speeds are perfect for freezing fast-moving subjects, like athletes or wildlife, so you don’t miss a moment.
Then there are midrange speeds, which strike a nice balance—they capture moderate motion with just a little blur, making them ideal for everyday scenes.
Slow Speeds Effects
Since slow shutter speeds range from about 1/30 second to several seconds, they allow you to capture motion blur effectively, conveying movement in your photographs.
Using slow shutter speeds increases exposure time, which can introduce camera shake, so a tripod is essential for exposures longer than one second.
You can apply intentional camera movement during long exposures for artistic effects or use panning techniques to keep a moving subject sharp against a blurred background.
These approaches improve dynamic storytelling and highlight motion in your images.
- Capture flowing water or moving crowds with motion blur
- Use longer exposure times for night photography and light trails
- Avoid camera shake by stabilizing your camera on a tripod
- Employ panning techniques for dynamic subject focus
- Experiment with intentional camera movement for abstract effects
Fast Speeds Benefits
When you need to freeze fast-moving subjects with precision, fast shutter speeds become indispensable. Using a fast shutter speed minimizes motion blur and guarantees sharp images. This is especially critical when you capture action in sports or wildlife photography.
For handheld photography, fast shutter speeds help counteract camera shake, particularly when using longer lens focal lengths. A practical tip is to choose a shutter speed at least the inverse of your lens focal length (e.g., 1/200 sec for 200mm) to maintain freezing action clarity.
| Shutter Speed | Typical Use |
|---|---|
| 1/500 sec | Freezing moderate sports motion |
| 1/1000 sec | Sharp images of birds or vehicles |
| Faster than 1/1000 sec | High-speed action and handheld with long lenses |
Midrange Speed Uses
A midrange shutter speed, typically between 1/60 and 1/250 seconds, offers a versatile balance between capturing motion and allowing adequate light exposure.
Using midrange shutter speeds in photography lets you freeze motion effectively while still accommodating indoor lighting conditions without extra equipment. These speeds also enable controlled motion blur to add dynamic effects when needed.
- 1/125 seconds freezes moderate motion, ideal for casual sports and moving subjects
- 1/60 seconds suits indoor photography with available light, minimizing camera shake risks
- 1/200 seconds captures sharp images of fast-moving children or pets
- 1/30 to 1/60 seconds introduces slight motion blur for flowing water or rustling leaves
Balances light exposure and motion control, enhancing image sharpness and creativity.
Mastering midrange shutter speeds guarantees precise control over motion and light in your photography.
Fast vs. Slow Shutter Speeds: Key Differences
Although shutter speed controls exposure duration, it also directly affects how motion appears in your photos. Fast shutter speeds, typically 1/500 seconds or faster, freeze motion by limiting light entering the camera, preventing motion blur even with rapid subject movement.
However, this reduced exposure can darken images, requiring aperture or ISO adjustments.
In contrast, slow shutter speeds, often 1 second or longer, increase exposure by allowing more light into the camera, which can produce artistic motion blur effects like silky water or light trails.
Be aware that camera movement during slow exposures causes unwanted blur, so stabilization with a tripod is essential for exposures longer than 1/30 seconds.
Understanding these key differences helps you control both exposure and motion representation precisely.
When to Use Fast Shutter Speeds to Freeze Motion
When you’re shooting fast action, like sports or wildlife, you’ll want to use shutter speeds of 1/500 seconds or faster to freeze motion effectively.
It really helps to set your shutter speed equal to or faster than the inverse of your lens focal length. This way, you minimize motion blur and camera shake.
By doing this, you can be confident that your images will come out sharp and detailed, even when your subject is moving quickly or you’re shooting handheld.
Action Photography Settings
If you want to capture sharp images of fast-moving subjects, you’ll need to use fast shutter speeds, typically 1/500 seconds or faster. In action photography, these speeds freeze motion, ensuring clarity with moving subjects like athletes or wildlife.
For extremely rapid actions, like birds in flight or racing cars, shutter speeds of 1/1000 to 1/4000 seconds are ideal. Remember, shutter speed inversely affects light exposure, so bright conditions demand faster speeds to avoid overexposure.
In low-light photography, increase ISO to maintain fast shutter speeds without underexposing your shots.
- Use shutter speed equal to or faster than your lens focal length to reduce camera shake.
- Opt for 1/1000+ seconds for very fast motion.
- Balance ISO for low-light action photography.
- Fast shutter speeds capture motion crisply.
- Adjust shutter speed based on lighting and subject speed.
Minimizing Motion Blur
Since fast-moving subjects tend to cause motion blur, you need to use fast shutter speeds, typically 1/500 seconds or faster, to freeze their movement effectively.
To capture fast-moving subjects like athletes or wildlife sharply, consider shutter speeds of 1/1000 seconds or higher. These settings minimize motion blur by reducing the time the sensor is exposed to movement.
Keep in mind, fast shutter speeds let in less light, so you’ll need to adjust your ISO settings and aperture to maintain proper exposure.
Furthermore, to avoid camera shake, use a shutter speed at least the inverse of your lens’s focal length; for example, 1/200 seconds for a 200mm lens.
Employing image stabilization in your camera or lens further compensates for small movements during handheld shooting, enhancing image sharpness.
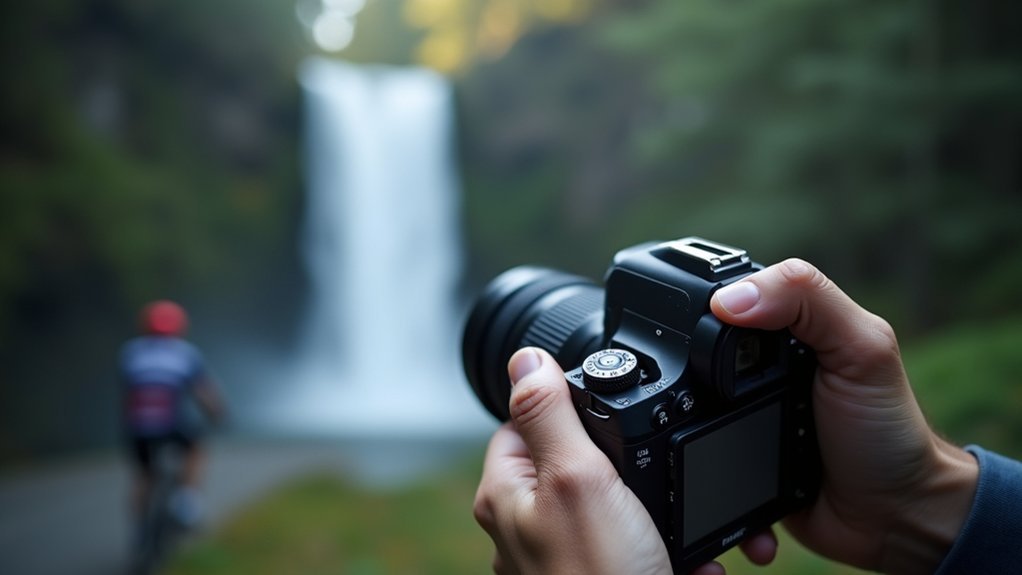
When to Use Slow Shutter Speeds for Creative Blur
Although slow shutter speeds require careful handling, they let you capture motion blur that adds a creative dimension to your photos. Using slow shutter speeds, typically one second or longer, you can produce artistic effects like smooth water or light trails.
To avoid unwanted camera shake during long exposures, always stabilize your camera with a tripod. Techniques such as panning help isolate subjects by keeping them sharp against a blurred background, improving motion blur deliberately.
Stabilize with a tripod and use panning to keep subjects sharp while creatively blurring backgrounds.
Managing exposure is vital; use higher f-stops or ND filters to control light intake and prevent overexposure.
- Employ slow shutter speeds for dynamic water or light effects
- Use a tripod to eliminate camera shake
- Apply panning for creative blur around moving subjects
- Adjust aperture and use ND filters to manage exposure
- Capture long exposures to improve motion blur effectively
How Shutter Speed Affects Motion Blur and Sharpness
Shutter speed controls how long your camera’s sensor is exposed to light, directly impacting motion blur and image sharpness. Fast shutter speeds freeze motion, producing sharp images by minimizing motion blur.
Conversely, slow shutter speeds increase exposure time, creating motion blur that conveys movement but may reduce sharpness. Balancing shutter speed with aperture and ISO is key to proper exposure.
| Shutter Speed | Effect on Motion Blur | Typical Use |
|---|---|---|
| 1/1000s | Minimal blur | Freezing fast action |
| 1/250s | Slight blur | Moderate movement |
| 1/60s | Noticeable blur | Low light, handheld shots |
| 1 second | Significant blur | Artistic effects, trails |
| 5+ seconds | Heavy blur | Light painting, waterfalls |
Choosing the right shutter speed guarantees the desired balance between sharp images and motion blur.
How to Set Shutter Speed in Different Camera Modes
When you want precise control over motion capture, you’ll find that different camera modes offer varying levels of shutter speed adjustment.
In Auto mode, your camera selects shutter speed automatically based on lighting, simplifying exposure settings.
Shutter Priority lets you set shutter speed manually, while the camera adjusts aperture for correct exposure.
Manual mode demands you control both shutter speed and aperture, maximizing creative flexibility.
- Auto mode: Camera controls shutter speed for quick shooting
- Shutter Priority: You pick shutter speed to freeze fast-moving subjects
- Manual mode: Full control of shutter speed and aperture for tailored exposure
- Consider focal length: Use shutter speed inverse to lens length to reduce camera shake
- Use fastest shutter speeds (e.g., 1/8000s) to capture sharp images of motion
Tips to Avoid Camera Shake With Slow Shutter Speeds
To avoid camera shake with slow shutter speeds, try using a tripod or placing your camera on a stable surface to keep it steady. This really helps prevent those unwanted blurs.
Also, don’t forget to enable image stabilization features in your lens or camera. These are great for counteracting minor movements that can still mess up your shot.
And here’s a handy tip: use a remote shutter release or set a self-timer. That way, you won’t risk shaking the camera when you press the shutter button.
Use A Tripod
Three key steps can help you avoid camera shake during slow shutter speeds, starting with using a tripod. A tripod provides essential stability, minimizing camera shake during long exposures, especially with shutter speeds of one second or longer.
It lets you capture sharp images when handheld shots would blur. To maximize stability, place the tripod on a firm surface, and consider adding weight to prevent movement.
Using a remote shutter release or the camera’s timer further reduces vibrations caused by pressing the shutter button. This setup enables creative techniques like light trails and silky water effects without compromising image sharpness.
- Use a sturdy tripod for long exposures
- Position tripod on a stable surface
- Add weight to the tripod for extra stability
- Use a remote shutter release or timer
- Employ slow shutter speeds confidently without blur
Enable Image Stabilization
Although using a tripod is ideal for long exposures, enabling image stabilization (IS) can greatly reduce camera shake when shooting handheld at slower shutter speeds.
Image stabilization systems, either built into lenses or digital cameras, counteract small movements, allowing you to shoot sharper images without a tripod.
When using a slower shutter speed, activate IS in your camera’s settings to improve stability. Hold your camera firmly with both hands and brace your elbows against your body to minimize blur.
Keep in mind, IS complements but doesn’t replace a tripod for very slow shutter speeds.
Utilize Remote Shutter
Building on the stability provided by image stabilization, utilizing a remote shutter release further reduces camera shake during slow shutter speeds.
By triggering the shutter release without touching the camera, you decrease vibrations that can blur long exposures.
Whether wired or wireless, remote shutter devices offer flexibility and convenience.
Pairing your remote shutter with a sturdy tripod guarantees maximum steadiness for sharp, steady images.
Many cameras also support remote shutter control via smartphone apps, enhancing ease of use.
- Reduces camera shake during long exposures
- Compatible with wired and wireless remote shutters
- Works best combined with a stable tripod
- Enables sharper images at slow shutter speeds
- Often controlled through smartphone apps for convenience
Using a remote shutter is crucial for professional-quality steady images at slow shutter speeds.
How Shutter Speed Affects Video Recording
Shutter speed controls the exposure time for each frame in your video, directly influencing brightness and motion clarity.
In video recording, shutter speed is typically set to double the frame rate, like 1/50 second for 24 fps, to produce natural motion blur.
If you use a faster shutter speed, motion appears choppy. Slower speeds create excessive blur, reducing smoothness. Maintaining a consistent shutter angle around 180 degrees balances frame rate and motion blur, giving your footage a cinematic feel.
When adjusting shutter speed, you must compensate with aperture and ISO settings to maintain proper exposure, especially under changing light.
Understanding this relationship guarantees your video maintains both clarity and the desired motion characteristics without sacrificing brightness or introducing noise.
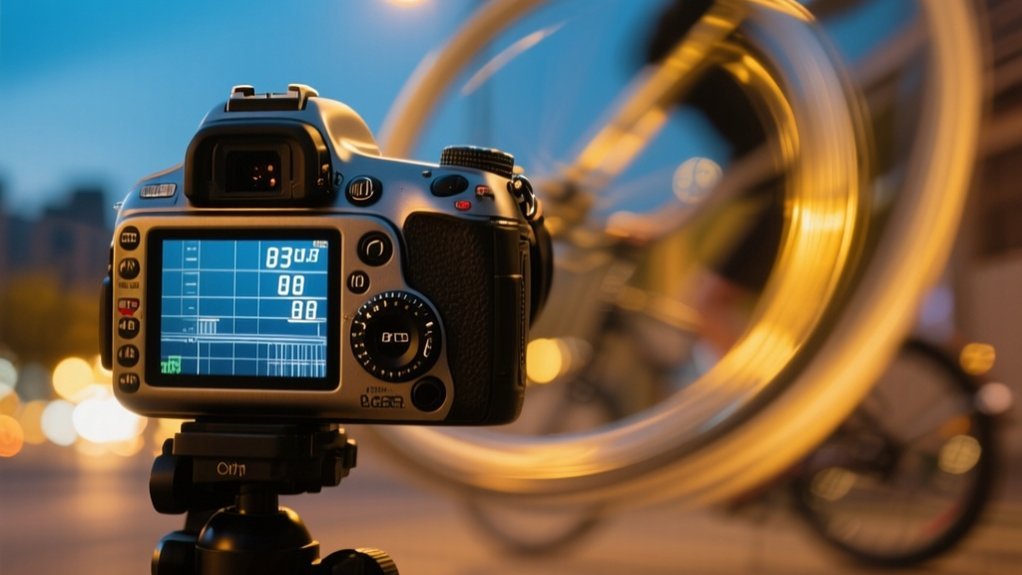
Creative Effects Like Light Trails and Motion Blur Using Shutter Speed
You can create some really striking light trails by using slow shutter speeds—usually one second or longer. This lets you capture the movement of light sources like cars or fireworks in a way that looks almost magical.
If you try panning with your subject at around 1/30 of a second, you’ll keep that subject sharp while blurring the background. It’s a cool trick that really emphasizes motion in your photos.
And don’t be afraid to experiment with long exposures and techniques like light painting. These methods let you craft unique images filled with dynamic patterns and smooth motion blur effects.
It’s all about playing around and seeing what creative effects you can come up with!
Light Trails Photography
Capturing light trails requires using slow shutter speeds, typically from one second to several seconds, to record the continuous movement of light sources as dynamic streaks.
You’ll want to set your camera on a tripod to stabilize the long exposure and prevent unwanted blur.
Using slow shutter speeds allows the camera sensor to gather light over time, effectively capturing the path of moving subjects like cars or fireworks.
To avoid overexposure, consider employing neutral density filters.
Experimenting with settings lets you control the intensity and length of light trails.
Use a tripod for sharp, stable shots
Apply long exposure to capture continuous light movement
Utilize ND filters to manage exposure
Track moving subjects for dynamic trails
Adjust shutter speed to vary light trail effects
Motion Blur Techniques
Several motion blur techniques rely on slow shutter speeds, typically 1/30 seconds or longer, to create artistic effects by recording subject movement.
Using long exposure, you can capture smooth motion blur, where a moving subject appears fluid and dynamic against a steady background.
Panning involves tracking a moving subject with your camera while applying slow shutter speeds. This results in a sharp subject contrasted by a blurred background that emphasizes speed.
To avoid overexposure during these slower shutter speeds, especially in bright conditions, you’ll want to use neutral density filters. They limit light entry without affecting color.
Mastering these techniques lets you creatively portray motion, adding depth and energy to your photos by balancing shutter speed, subject speed, and lighting conditions precisely.
Long Exposure Creativity
Building on motion blur techniques, long exposure photography extends shutter speeds beyond one second to capture dynamic visual effects like light trails and star movement.
You’ll need a tripod to maintain stability during these extended exposures, preventing camera shake.
Managing movement creatively with shutter speed allows you to produce striking images, such as silky water flow or vibrant light painting.
Using neutral density filters helps control light intake, letting you use longer shutter speeds even in bright conditions.
Here are key aspects to master:
- Capture light trails from moving vehicles or stars
- Employ a tripod for sharp, stable shots
- Use shutter speeds from seconds to minutes for creative effects
- Apply panning techniques to isolate subjects in motion
- Experiment with light painting by moving light sources during exposure
Mastering these techniques enhances your long exposure creativity.
Gear That Helps You Control Shutter Speed Effects
Three key pieces of gear can greatly improve your control over shutter speed effects: a tripod, Neutral Density (ND) filters, and remote shutter releases.
A tripod stabilizes your camera during long exposures, preventing motion blur and ensuring sharp images at slow shutter speeds.
ND filters reduce light entering the lens, enabling longer shutter speeds in bright conditions without overexposure.
Remote shutter releases minimize camera shake caused by pressing the shutter button, which is essential for long exposures and macro shots.
Moreover, image stabilization in lenses or camera bodies helps reduce blur at slower shutter speeds, allowing sharper handheld shots.
Fast lenses with wide apertures let you use faster shutter speeds in low light, enhancing your ability to capture sharp images of moving subjects with precision.
Choosing the Right Shutter Speed for Your Photography Style
Selecting the right shutter speed hinges on the effect you want to achieve: use fast speeds like 1/500s or faster to freeze motion in sports, or slow speeds of one second or more to introduce artistic blur in low light.
To avoid camera shake, use a shutter speed inverse to your lens’s focal length when shooting handheld. For dynamic panning shots, a slower shutter speed around 1/30s keeps the subject sharp while blurring the background, enhancing movement.
Adjust shutter speed carefully to balance exposure. Fast shutter speeds prevent overexposure in bright settings, while slow shutter speeds often require stabilization.
Experimentation is key to mastering how shutter speed influences your images.
- Fast shutter speeds freeze action sharply
- Slow shutter speeds create motion blur effects
- Use inverse focal length to reduce camera shake
- Panning shots use slower shutter speeds for dynamic backgrounds
- Shutter speed adjustments control exposure and artistic style
Frequently Asked Questions
Can Shutter Speed Affect Battery Life in Digital Cameras?
Yes, shutter speed can affect your digital camera’s battery life indirectly.
When you use slower shutter speeds, your sensor stays active longer, consuming more power. Long exposures, like night shots, demand extra processing and stabilization, which drains the battery faster.
Conversely, faster shutter speeds reduce sensor activation time, saving power.
Also, continuous high-speed shooting ramps up battery use.
Does Shutter Speed Impact the Lifespan of a Camera’s Shutter?
Oh sure, crank that shutter speed to lightning-fast and watch your camera’s shutter sprint to an early retirement.
Yes, faster shutter speeds mean the mechanical shutter cycles more rapidly, hastening wear and reducing its lifespan.
Mechanical shutters have rated actuation limits, often 100,000 to 300,000 cycles.
Using slower speeds or electronic shutters minimizes this wear.
How Does Shutter Speed Influence Flash Synchronization?
Shutter speed directly affects flash synchronization by controlling how long your camera’s shutter stays open during exposure.
If you exceed your camera’s maximum sync speed, usually around 1/200 to 1/250 seconds, the shutter won’t fully open when the flash fires. This causes partial exposure.
To sync flashes at faster speeds, you’ll need high-speed sync mode, which pulses the flash multiple times.
Understanding this helps you balance ambient and flash lighting for proper exposure.
Are There Differences in Shutter Speed Capabilities Between Camera Brands?
Yes, you’ll find notable differences in shutter speed capabilities across camera brands.
High-end Canon and Nikon models typically max out at 1/8000s mechanical shutter speed, while some Sony mirrorless cameras offer electronic shutters up to 1/32,000s.
Entry-level DSLRs usually top out around 1/4000s.
These variations affect your ability to capture fast motion and sync flash effectively, so consider your shooting needs when choosing a brand and model.
Can Shutter Speed Settings Be Adjusted Remotely via Smartphone Apps?
You can effortlessly adjust shutter speed remotely using smartphone apps like Canon’s Camera Connect.
Imagine controlling your camera from across the room, tweaking settings with a tap to capture sharp long exposures without any shake.
These apps often offer live view previews, letting you fine-tune shutter speed, aperture, and ISO in real time.
Just verify your camera model supports this feature by checking the manufacturer’s specs before relying on remote control.
Conclusion
Mastering shutter speed is like holding the key to time itself in your hands. By adjusting how long your camera’s sensor is exposed to light, you control the dance between motion and stillness, clarity and blur.
Pair it precisely with aperture and ISO, and you’ll craft images that capture both fleeting moments and lasting impressions. With practice, shutter speed becomes your silent partner in painting with light, sharpening your vision with every click.