What Is HDR in a Camera and How to Use It
HDR in a camera stands for High Dynamic Range. It lets you capture a wider range of brightness by combining multiple exposures, usually underexposed, normal, and overexposed shots. This technique preserves details in both shadows and highlights.
It’s ideal for high-contrast scenes like landscapes or interiors. To use HDR effectively, shoot with a tripod and maintain a consistent aperture. Then merge exposures using HDR software while avoiding over-processing.
Keep going to uncover advanced HDR shooting and editing strategies.
Key Takeaways
- HDR in cameras combines multiple exposures to capture a wider range of light, preserving details in shadows and highlights.
- Use HDR in high-contrast scenes like landscapes, interiors, or sunsets to balance bright and dark areas effectively.
- Capture 3–5 bracketed shots at different exposures using a tripod for stability and consistent framing.
- Merge exposures with HDR software or in-camera HDR features, applying tone mapping to create balanced, natural-looking images.
- Avoid HDR for fast-moving subjects and over-processing to maintain realistic colors and prevent unnatural contrast.
What HDR Means for Your Camera and Why You Should Care
Although many cameras struggle with scenes that have extreme brightness differences, HDR technology lets you capture a broader range of light levels in a single image. When you use HDR, your camera combines multiple exposures to preserve details in both shadows and highlights. This greatly expands the dynamic range of your photos.
This capability is essential because a camera’s dynamic range, like the A7iv’s 14.7 stops compared to the Canon 600D’s 11.5 stops, directly impacts how effectively it handles high contrast scenes.
Modern cameras, such as Canon’s EOS R-series, include in-camera HDR features that automate this blending process, making HDR photography more accessible.
Understanding how HDR works and your camera’s dynamic range will help you retain critical highlight details and improve image quality in challenging lighting situations.
How HDR Lets You Capture More Light and Detail
You capture more light and detail in HDR by combining multiple exposures taken at different shutter speeds.
This technique expands your camera’s dynamic range, letting you see more in both the bright and dark areas of your photo.
So, instead of just one shot that might lose detail in the shadows or highlights, HDR blends these images together.
The result? A balanced photo with greater clarity across all kinds of lighting conditions.
It’s like getting the best parts of each exposure all in one picture.
Expanding Dynamic Range
When capturing scenes with extreme contrasts in brightness, HDR photography expands your camera’s dynamic range by merging multiple exposures taken at different settings.
This technique allows your images to retain detail in both the darkest shadows and the brightest highlights, surpassing the native dynamic range limitation of your camera sensor.
By capturing at least three exposures—underexposed, normal, and overexposed, you guarantee that no detail is lost in areas where brightness varies drastically.
Cameras like the Canon A7iv offer around 14.7 stops of dynamic range, but HDR techniques push beyond this by combining data from multiple frames.
Shooting in RAW format further preserves image data, enabling precise adjustments during post-processing to create a balanced, high dynamic range image that accurately represents the full spectrum of light in your scene.
Combining Multiple Exposures
Since a single exposure can’t capture the full range of light in high-contrast scenes, HDR photography merges multiple images taken at different shutter speeds to extend detail in both shadows and highlights.
You’ll capture at least three multiple exposures: underexposed, correctly exposed, and overexposed. Each preserves detail in the brightest and darkest areas.
When you shoot in HDR mode, your camera or software aligns and merges them together, ensuring consistent aperture and ISO to avoid inconsistencies.
This merging process combines the best-exposed parts from each image, producing a composite that retains detail across the entire dynamic range.
Mastering this technique allows you to accurately reproduce scenes with extreme contrast.
It makes HDR indispensable for landscapes and architectural photography where balanced exposure is critical.
Enhancing Shadow And Highlight
Although traditional photography struggles to capture the full range of light in complex scenes, HDR improves shadow and highlight detail by merging multiple exposures.
By combining these exposures, HDR images extend the range of brightness, revealing intricate textures in shadows without overexposing highlights.
This technique captures subtle nuances missed by single exposures, especially in high-contrast situations like sunsets or interiors with bright windows.
When you use HDR, your camera processes bracketed shots to balance shadows and highlights, preserving detail across the tonal spectrum.
As a result, your photos display a broader dynamic range, ensuring both dark and bright areas retain clarity and depth.
Leveraging HDR boosts your ability to capture scenes realistically, letting you present a more detailed and evenly lit image than traditional photography allows.
When to Use HDR Mode for Better Photos
You should enable HDR mode in high-contrast lighting conditions, like sunrise landscapes or indoor scenes with bright windows. This helps you capture details across both shadows and highlights.
HDR works best for static subjects or scenes where the dynamic range exceeds what your camera’s sensor can handle. However, if your subject is moving fast, it’s usually better to avoid HDR—unless your camera supports HDR PQ for single-exposure capture.
To keep your images from looking overprocessed, try adjusting settings like Highlight Tone Priority.
And always take a moment to review your shots on an HDR-capable display. That way, you can see the true colors and contrast as they really are.
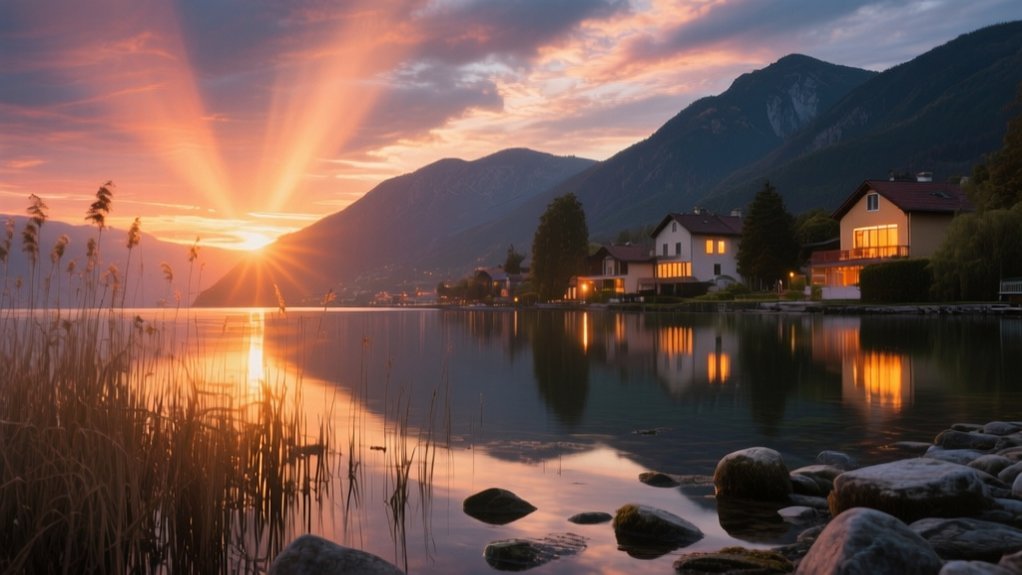
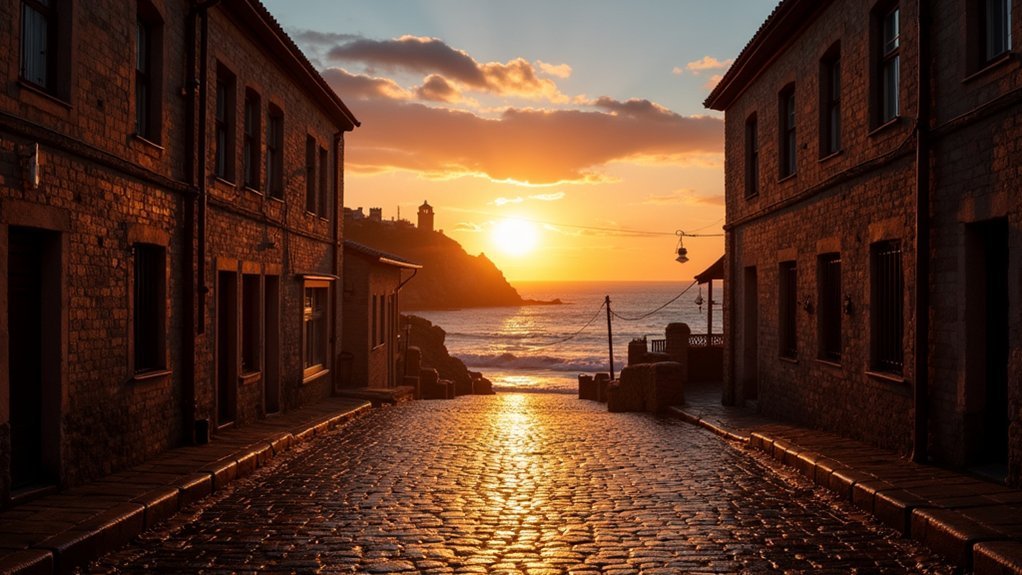
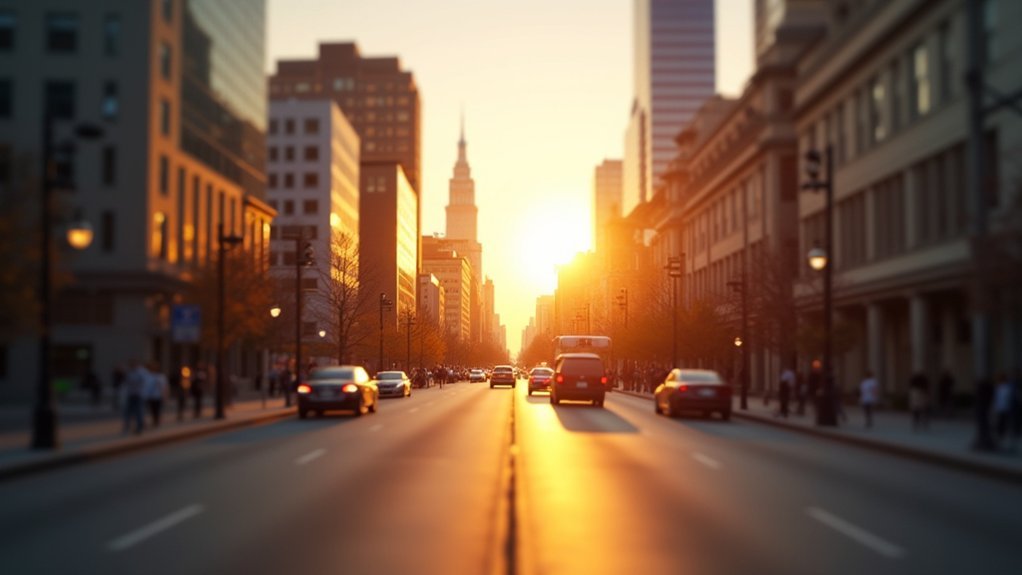
Ideal Lighting Conditions
When capturing scenes with a wide dynamic range, such as bright highlights alongside deep shadows, HDR mode helps you preserve detail that standard photography often misses.
Ideal scenarios include landscapes at sunrise or sunset, interiors with bright windows, and architecture where bright and dark areas contrast sharply.
HDR works best under high-contrast lighting conditions by combining multiple images at varied exposures, balancing highlights and shadows effectively.
Shooting during the golden hour or on cloudy days provides softer light, reducing harsh shadows and enhancing HDR’s effectiveness.
Avoid using HDR in low-light settings, as insufficient light variation can introduce noise and artifacts.
To guarantee precise alignment of multiple images, use a tripod or stable platform, minimizing movement and preserving image clarity in complex lighting situations.
Subjects Benefiting From HDR
Since scenes with significant contrast challenge standard photography, HDR mode becomes invaluable for capturing balanced images.
HDR excels at preserving detail across bright areas and dark shadows, providing an extensive range of tones that standard exposure often misses.
You’ll find HDR particularly useful when shooting:
- Landscapes, where bright skies and shadowed foregrounds coexist
- Architectural scenes, to reduce glare and maintain detail in both light and shadow
- Night photography, to capture illuminated subjects alongside dim starry skies
Avoiding Overprocessed Images
HDR mode greatly improves image quality in scenes with wide dynamic ranges, but applying it indiscriminately can produce overprocessed results. To avoid this, use HDR selectively in landscapes or architecture where bright highlights and deep shadows coexist.
Apply tone mapping moderately to boost details without sacrificing natural appearance. Always shoot in RAW format to retain maximum data, allowing precise adjustments during post-processing.
Monitor exposure settings carefully to prevent blown-out highlights and oversaturated bright areas. Moreover, choose static scenes to minimize ghosting artifacts caused by movement, which can lead to unnatural final images.
Essential Camera Settings for HDR Photography
Although capturing multiple exposures is fundamental to high dynamic range imaging, setting your camera correctly is likewise critical to achieving ideal results.
To optimize your HDR version, you must control shutter speed to avoid blur while capturing different exposures that cover the scene’s dynamic range.
Control shutter speed carefully to prevent blur while capturing exposures that span the full dynamic range.
Using camera sensors to shoot in RAW format preserves maximum data for detail recovery in shadows and highlights.
Maintain a consistent aperture in Aperture Priority mode to keep depth of field uniform across images.
Focus on these essential settings:
- Use bracketing with 3–5 shots at 1–2 EV steps to encompass broad exposure range
- Set metering to Matrix or Evaluative for balanced exposure
- Employ a tripod to prevent movement and guarantee precise alignment during HDR processing
How to Shoot Multiple Exposures for HDR
Capture multiple exposures by taking at least three images at varying exposure levels: one underexposed, one correctly exposed, and one overexposed. Use your camera’s bracketing shots function to automate capturing these exposure variations, setting exposure values (EV) 1 to 2 stops apart to encompass a broad dynamic range.
Mount your camera on a tripod to maintain consistent framing and avoid misalignment during shooting. Guarantee you shoot in RAW images format, which preserves maximum detail and tonal information across all three images, facilitating superior post-processing flexibility.
Minimize movement within your scene to prevent ghosting artifacts when merging exposures.
Creating HDR Photography From a Single RAW Image
If your single RAW image contains both recoverable bright and dark areas without blown highlights or clipped shadows, you can create HDR photography by extracting multiple exposures from that file.
Using a single image, you utilize the full dynamic range captured by the sensor, isolating the brightest and darkest details for improved tonal balance. Software like Adobe Photoshop lets you generate underexposed, normal, and overexposed versions from the RAW file.
Key steps include:
- Ensuring the single image holds sufficient detail in both brightest and darkest regions
- Extracting multiple exposures via exposure adjustments within RAW processing software
- Combining these to produce an HDR image that maximizes dynamic range without multiple shots
This method is ideal when shooting conditions prevent bracketed exposures but you still want HDR benefits.
Using HDR Software to Merge and Tone Map Images
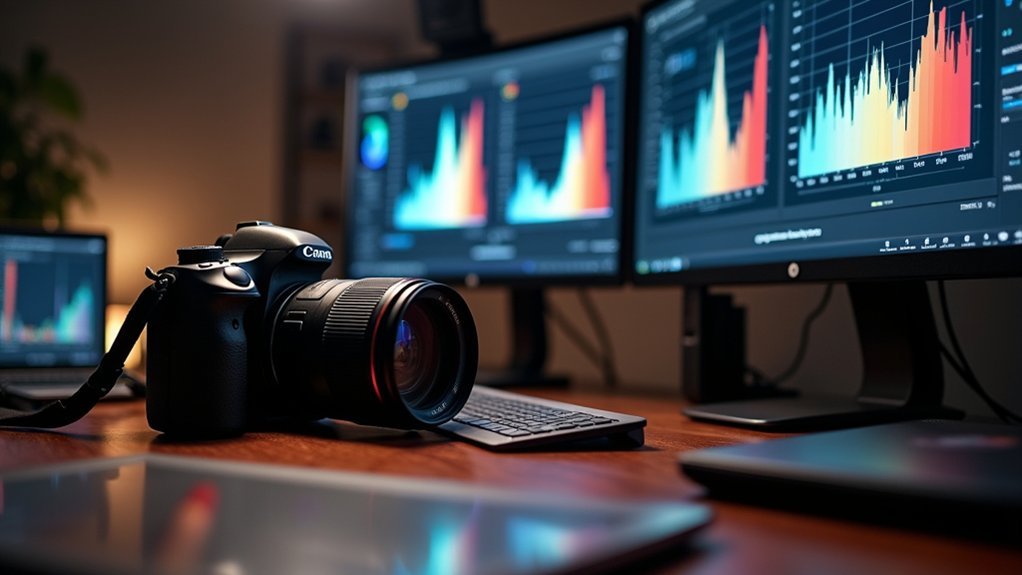
You’ll start by merging multiple exposures in HDR software like Photomatix Pro.
Make sure to keep the settings consistent across all your files so the images align accurately. After that, you can use tone mapping techniques to tweak the highlights, shadows, and contrast, which helps bring out the dynamic range in your photo.
Also, don’t forget to check out features like auto align and deghosting in the software.
These tools can really help reduce any unwanted artifacts and boost the overall quality of your image.
Merging Multiple Exposures
Although merging multiple exposures requires careful preparation, HDR software streamlines the process by automatically aligning and combining images taken at different exposure levels, such as underexposed, normal, and overexposed shots. This helps retain maximum detail in highlights and shadows.
When merging multiple exposures, you capture the full range of luminance to create a final image with superior dynamic range. Key considerations include maintaining consistent camera settings like shutter speed, aperture, and ISO across all shots to guarantee seamless merging.
Using HDR software like Photomatix Pro or Adobe Lightroom helps with precise alignment and deghosting of moving elements. Also, saving the merged image in RAW format preserves maximum editing flexibility.
This approach uses the different exposure captures, enabling the software to blend them into a cohesive final image with improved detail and balanced light distribution.
Tone Mapping Techniques
Tone mapping serves as an important process in HDR imaging. It transforms the merged exposures into a visually compelling image by compressing the wide luminance range into a format your display can handle. After merging exposures into an initial flat HDR image, you adjust tone mapping parameters like strength, saturation, and detail to recreate a natural dynamic range.
Deghosting is vital here. It fixes motion artifacts between shots to maintain image coherence.
| Parameter | Purpose |
|---|---|
| Strength | Controls contrast and HDR effect intensity |
| Saturation | Improves or mutes color richness |
| Deghosting | Removes ghosting from moving objects |
Once satisfied, save in high-quality formats like TIFF or JPEG. This helps preserve your HDR image’s quality and detail.
Software Options Overview
When working with multiple exposure images, HDR software streamlines the process by merging them into a single, detailed image that balances shadows and highlights effectively.
Using HDR software like Photomatix Pro or Adobe Lightroom, you can perform a photo merge that combines exposures while retaining RAW data for maximum flexibility.
Critical features to look for include alignment of source images to prevent blur and misregistration, reduction of ghosting artifacts caused by moving subjects, and advanced tone mapping controls to adjust exposure, contrast, and saturation.
These tools help you create a single HDR image with improved dynamic range and minimal distortions.
Leveraging these options guarantees your final output is both technically precise and visually compelling, maximizing detail in every tonal region.
How to Edit HDR Images Without Overdoing It
Editing HDR images requires a careful balance to preserve natural tones and avoid exaggerated effects. HDR gives you the ability to recover details across exposure ranges, but you need to adjust exposure, highlights and shadows subtly to maintain realism.
Use software like Adobe Lightroom or Photomatix with precise sliders to fine-tune these parameters without pushing them too far. Monitor the histogram closely. Make sure it’s balanced and not heavily skewed left or right, which signals clipping in shadows or highlights.
Apply deghosting selectively to fix movement artifacts while retaining image integrity.
Finally, review your edits on an HDR-capable monitor to verify that details in both highlights and shadows remain well-preserved. This ensures your final image looks natural and technically sound without overprocessing.
Common HDR Mistakes to Avoid for Natural Results
Balancing HDR adjustments to preserve natural tones can be challenging, especially if you fall into common pitfalls that compromise image realism. To achieve authentic results, you must avoid over-processing HDR images that create unnatural, cartoon-like effects.
Start by using bracketed shots with consistent settings like shutter speed, aperture, and ISO to prevent ghosting and alignment issues. Also, guarantee proper exposure techniques to capture the scene’s dynamic range without losing detail in highlights or shadows.
Before merging, make certain images are ready with aligned source images and ghost reduction enabled in your HDR software.
Key mistakes to avoid include:
- Using inconsistent camera settings across bracketed shots.
- Excessive tone mapping that distorts natural contrast.
- Ignoring dynamic range limits and exposure settings.
How to Shoot HDR With Different Camera Models
Mastering HDR photography requires understanding how your specific camera model handles exposure bracketing and image merging.
For Canon users, utilize Auto Exposure Bracketing (AEB) at -2, 0, and +2 EV to capture the full dynamic range necessary for shooting landscapes.
Mirrorless models like the EOS R6 Mark II simplify HDR by stacking exposures in-camera, giving you full creative control.
Nikon cameras demand enabling bracketing while maintaining a consistent aperture and shooting in RAW to retain maximum data.
Sony’s A7 series supports HDR through AEB, effectively capturing scenes with wide dynamic range.
Furthermore, many newer cameras offer HDR PQ for single-shot HDR images, useful for HDR video and stills.
Always check your camera’s HDR capabilities to optimize your results and capture the full tonal range.
Using HDR for Landscapes, Architecture, and Interiors
When capturing scenes with a wide range of brightness, such as landscapes, architecture, or interiors, HDR helps you preserve details in both highlights and shadows by combining multiple exposures. This technique expands the dynamic range beyond what a single shot can capture, ensuring balanced and detailed images.
For effective HDR in these contexts, focus on capturing three to five bracketed exposures to cover extreme highlights and shadows. Using a tripod is also important to keep alignment and prevent ghosting artifacts during multiple captures.
Applying HDR reveals intricate architectural details and balances interior lighting contrasts, especially near windows. This approach really brings out the best in your shots by managing challenging lighting situations.
Frequently Asked Questions
Can HDR Be Used Effectively With Smartphone Cameras?
Yes, you can use HDR effectively with smartphone cameras. Your phone captures multiple exposures automatically, merging them to balance highlights and shadows.
To maximize results, verify your device’s HDR mode is enabled, especially in high-contrast scenes.
You can also adjust HDR settings manually if available, and shooting in RAW format helps retain more details for editing.
Does HDR Increase Battery Consumption on Cameras?
Yes, HDR increases battery consumption on cameras because it requires capturing multiple exposures and processing them into one image.
This extra processing demands more power, especially during preview and display of the HDR result.
If your camera uses Auto Exposure Bracketing or in-camera HDR, expect quicker battery drain.
Mirrorless models tend to consume more power than DSLRs when using HDR.
To avoid interruptions, carry spare batteries during extended HDR shooting sessions.
How Does HDR Affect Photo File Size and Storage?
HDR photos can increase your file size by 2 to 4 times compared to standard images, especially when you shoot in RAW.
This happens because HDR combines multiple exposures into one image, resulting in larger files.
To manage this, consider using HEIF format, which compresses HDR data more efficiently.
Also, be prepared with ample storage like bigger memory cards and external drives since HDR files demand more space and processing power during editing.
Can HDR Be Applied to Video Recording?
Yes, you can apply HDR to video recording.
Modern cameras and smartphones capture HDR video using formats like HDR10 or Dolby Vision, which expand dynamic range and color depth.
This lets you record scenes with both bright highlights and deep shadows without losing detail.
To utilize HDR video, enable the HDR mode in your device’s camera settings and use compatible playback devices or editing software to maintain the improved quality throughout your workflow.
Are There Any Risks of Damaging the Camera Sensor With HDR?
You won’t damage your camera sensor by using HDR itself, since it just combines multiple exposures or processes RAW files.
However, prolonged exposure to intense light, like direct sunlight during HDR shooting, can risk sensor overheating or damage.
To protect your sensor, use a tripod, apply filters to manage bright light, and avoid excessive exposure times.
Understanding your camera’s dynamic range helps you prevent overexposure that might strain the sensor.
Conclusion
Think of HDR as your camera’s way of painting with light, blending shadows and highlights like a master artist layering colors on a canvas. When you use HDR thoughtfully, you reveal details hidden in darkness and brightness, capturing the full story your eyes see.
By mastering exposure and editing, you avoid unnatural results and create images that resonate with clarity and depth. Welcome HDR, it’s the key to accessing your camera’s true vision.