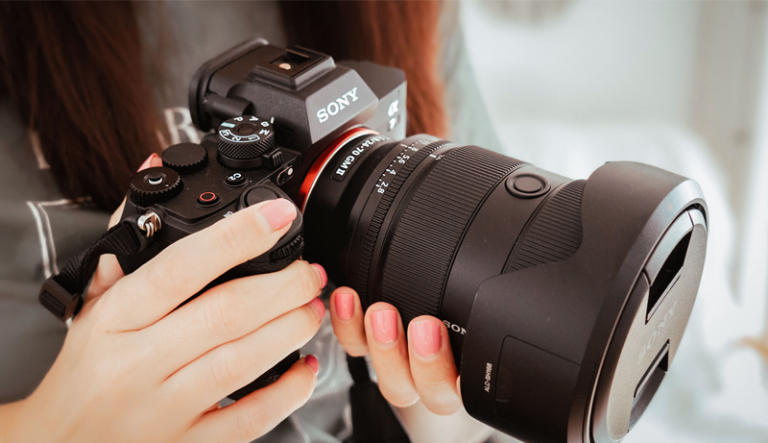
How to Put Film in a Camera: A Step-by-Step Guide for Beginners
Film photography has a way of slowing things down and making every shot feel intentional. Before the click of the shutter and the anticipation of developing your photos, there is one essential step that sets everything in motion. Understanding the basics builds confidence and removes the fear of making simple mistakes.
Many people feel intimidated when holding a roll of film for the first time. The camera may look mechanical and unfamiliar, but the process is far more straightforward than it seems. With a calm approach and a little guidance, anyone can learn to handle film properly.
This guide is designed for beginners and returning film shooters alike. It walks you through how to put film in a camera in a clear, practical way, focusing on what actually matters when you open the camera back and load your roll.
By learning this skill, you connect more deeply with the craft of photography. Each step becomes part of the experience, turning a simple action into the start of a creative journey worth enjoying.
How to Put Film in a Camera?
Before starting, make sure you are in a clean, low-light environment. Bright sunlight can damage film if it is exposed too long. Have your camera and film ready, and check that the camera is turned off. Most film cameras open from the back, either by pulling up a rewind knob or pressing a release switch.
Once the camera back is open, identify the film chamber. Place the roll of film into the chamber, making sure it sits securely. Pull the film leader gently across the camera toward the take-up spool. This step is important, as improper alignment can cause the film not to advance correctly.
Attach the film leader into the slot or hooks of the take-up spool. Slowly advance the film using the winding lever while watching to see that the film sprockets catch onto the camera’s gears. This confirms the film is moving properly and will advance with each shot.
After the film is securely engaged, close the camera back firmly. Advance the film and press the shutter a couple of times until the frame counter shows “1.” This clears the exposed portion of the film and prepares the camera for shooting.
Understanding how to put film in a camera helps prevent wasted shots and mechanical issues. Taking a moment to load film carefully ensures that every frame counts. With practice, this process becomes quick and natural, allowing you to focus fully on composing and capturing meaningful photographs.
What You Need Before Loading Film
Before loading film, it is important to have the right items ready so the process goes smoothly. The most obvious requirement is a compatible film camera. Different cameras use different film formats, so confirming whether your camera takes 35mm or another type of film helps avoid confusion and wasted supplies.
Choosing the correct film is just as important. Film comes in various speeds, known as ISO, which affect how it performs in different lighting conditions. Slower films work well in bright light, while faster films handle low light better. Selecting film that matches your shooting environment makes the loading process more purposeful.
A clean and calm environment also matters. Dust, moisture, and direct sunlight can damage film before it is even loaded. Working indoors or in shaded light reduces the risk of accidental exposure and keeps the film in good condition while handling it.
Having a basic understanding of your camera’s controls is helpful before opening it. Knowing where the rewind knob, film release latch, and advance lever are located saves time and prevents fumbling. This familiarity makes loading feel more controlled and confident.
Finally, patience is something many people overlook. Rushing through the process can cause the film to misalign or tear. Taking a steady, relaxed approach ensures the film loads correctly and sets the stage for a successful shooting experience.
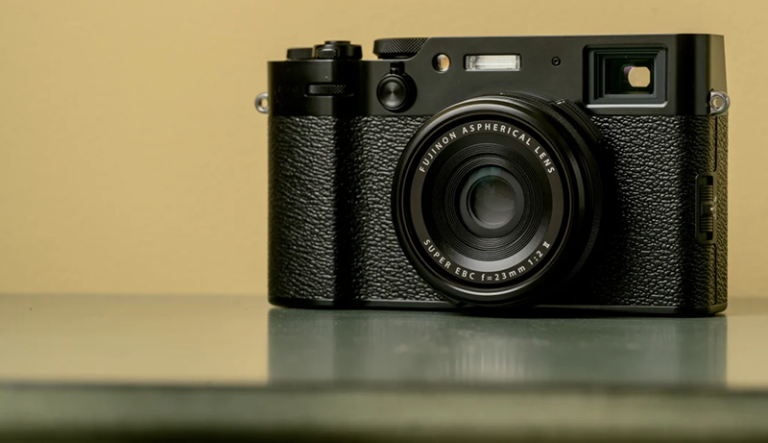
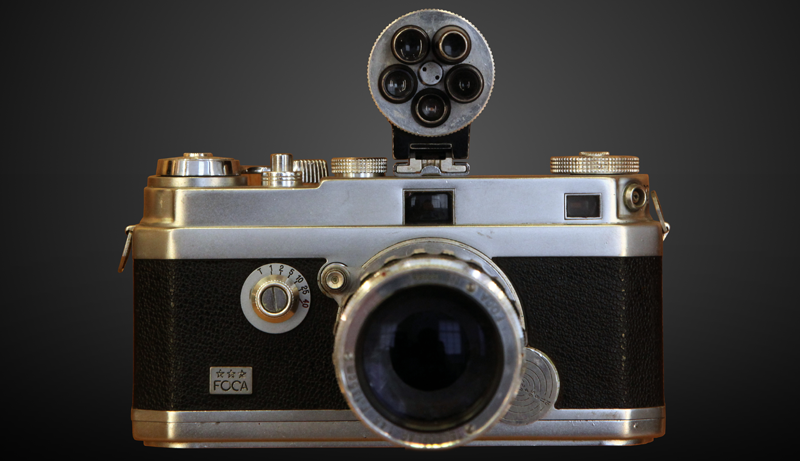
Types of Film Cameras
Film cameras come in several distinct categories, each designed to suit different shooting styles, experience levels, and creative goals. Understanding these types helps photographers choose the right tool for their needs, whether they value manual control, portability, or image quality. Each camera type offers a unique way of interacting with film and shaping the photographic process.
SLR (Single-Lens Reflex) Film Cameras
SLR film cameras are among the most popular and widely used types in film photography. They use a mirror and prism system that allows photographers to see exactly what the lens sees through the viewfinder. This direct viewing method makes composition precise and reliable, especially when working with different lenses or manual focus.
These cameras are well known for their versatility. Interchangeable lenses allow users to switch between wide-angle, standard, and telephoto options depending on the subject. Most SLRs also provide full manual control over shutter speed, aperture, and focus, making them ideal for learning the technical foundations of photography.
SLR cameras are commonly used by enthusiasts and professionals because they balance control and usability. Many models also include light meters that assist with exposure, which is helpful when shooting in changing light conditions. Their solid construction and mechanical reliability make them suitable for long-term use.
While SLRs can be slightly larger and heavier than other film cameras, their ergonomic design supports steady handling. For photographers who want creative flexibility and hands-on involvement with every shot, SLR film cameras remain a trusted and rewarding choice.
Rangefinder Film Cameras
Rangefinder film cameras operate differently from SLRs, using a separate viewfinder system instead of a mirror. Focus is achieved by aligning two overlapping images in the viewfinder, which creates a clear and accurate method for manual focusing. This system allows for a quieter and smoother shooting experience.
One of the biggest advantages of rangefinder cameras is their compact size. Without a mirror mechanism, the camera body can be slimmer and lighter, making it easier to carry for long periods. This portability makes rangefinders popular for street photography and travel.
Rangefinders are known for sharp lenses and minimal shutter vibration. Because there is no mirror movement, images tend to be crisp, especially at slower shutter speeds. Many photographers appreciate the unobtrusive nature of these cameras, which helps capture candid moments without drawing attention.
However, rangefinders have limitations. They usually do not support very close focusing or long telephoto lenses as effectively as SLRs. Despite this, they are valued for their simplicity, precision, and quiet operation, offering a distinct shooting experience rooted in classic photographic techniques.
Point-and-Shoot Film Cameras
Point-and-shoot film cameras are designed for convenience and ease of use. These cameras typically feature automatic exposure, focus, and film advance, making them accessible to beginners or casual photographers. Minimal controls allow users to focus on capturing moments rather than adjusting settings.
Most point-and-shoot cameras are compact and lightweight, fitting easily into bags or pockets. This portability makes them ideal for everyday photography, vacations, and spontaneous shooting. Many models also include built-in flash, allowing for basic low-light photography without extra equipment.
While they offer less manual control, point-and-shoot cameras are capable of producing high-quality images. Many are equipped with sharp fixed lenses and reliable metering systems. Their simplicity can encourage creativity by removing technical distractions and letting photographers concentrate on timing and composition.
These cameras are especially appealing to those who want a relaxed film experience. They are easy to load, quick to operate, and forgiving for beginners. For photographers who prefer simplicity and portability, point-and-shoot film cameras provide an approachable entry into film photography.
Medium Format Film Cameras
Medium format film cameras use larger film than standard 35mm, typically 120 film, which produces larger negatives. This increased size results in higher image detail, smoother tonal transitions, and improved overall image quality. These cameras are often favored for portrait, landscape, and studio work.
Medium format cameras come in various designs, including SLR-style bodies, waist-level viewfinders, and modular systems. Some models allow interchangeable film backs, lenses, and viewfinders, offering exceptional flexibility for professional workflows. The slower shooting pace encourages thoughtful composition and careful exposure.
Because medium format film holds fewer frames per roll, photographers tend to be more deliberate with each shot. This slower rhythm can deepen creative focus and strengthen technical discipline. The physical presence of these cameras also reinforces a hands-on photographic experience.
These cameras are generally larger and heavier, requiring more preparation and intention. Despite this, the image quality and depth they provide are unmatched in film photography. Medium format film cameras are valued for their precision, detail, and ability to produce striking, high-resolution images.
Step-by-Step: How to Put Film in a Camera
Loading film correctly is a foundational skill in film photography that ensures your camera captures images as intended. Each step plays a role in protecting the film from damage, preventing mechanical issues, and avoiding wasted frames. This detailed walkthrough breaks the process into clear stages, helping you load film confidently and consistently, even if you are handling a film camera for the first time.
Step 1: Open the Camera Back
Opening the camera back is the first and most important step, as improper handling at this stage can expose film to light or damage internal components. Most film cameras open by pulling up the rewind knob located on the top plate, while others use a latch or switch on the side or bottom. Before applying force, take a moment to locate the correct release mechanism and operate it gently.
Once the back opens, keep the camera angled slightly downward to prevent dust from settling inside. Avoid opening the camera in direct sunlight, as this increases the risk of accidental exposure if film is already inside. If you are unsure whether film is loaded, check the rewind knob for tension before opening.
A common mistake is forcing the camera back open when resistance is felt. Resistance usually indicates that film is already loaded or the rewind process has not been completed. Forcing it can tear the film or damage the camera’s door hinge. Another mistake is opening the camera too quickly, which can cause the door to snap open and stress the mechanism.
By opening the camera back carefully and deliberately, you set the tone for the rest of the loading process. This controlled approach protects both your film and your camera from avoidable damage.
Step 2: Insert the Film Canister
After opening the camera back, the next step is placing the film canister into the film chamber. The film chamber is typically located on the left side of the camera interior. Insert the canister so that it sits flush and upright, with the film leader pointing toward the take-up spool on the opposite side.
Proper orientation is essential. The flat end of the canister should rest securely at the bottom of the chamber, while the rewind shaft aligns with the top of the canister. Gently push the rewind knob back down to lock the canister into place. If the knob does not engage smoothly, slightly adjust the canister until it fits correctly.
Ensuring the film is seated properly prevents issues later, such as the film failing to advance or slipping out of alignment. A loosely seated canister may cause uneven tension, which can lead to overlapping frames or incomplete exposures.
Avoid pressing too hard or tilting the canister at an angle, as this can damage the film or the camera’s internal components. When the canister sits securely and the rewind knob turns freely, the film is correctly positioned and ready for the next step.
Step 3: Pull Out the Film Leader
Pulling out the film leader requires a gentle and controlled motion. The film leader is the narrow strip extending from the canister, designed to attach to the take-up spool. Pull out just enough film to comfortably reach the spool without stretching or bending it excessively.
A common guideline is to pull the leader across the camera body so it reaches the take-up spool naturally without tension. Pulling too much film can result in slack, which may cause misalignment or uneven frame spacing. Pulling too little may prevent the film from engaging properly when advancing.
Place the film leader flat against the film rails, ensuring the sprocket holes align with the camera’s sprocket teeth. These small perforations are critical for smooth film transport. If the holes do not line up, the film may slip or fail to advance when you wind the lever.
Avoid touching the image area of the film with your fingers, as oils and dirt can affect image quality. Handle the film by the edges whenever possible. Taking care at this stage helps ensure smooth operation throughout the roll and reduces the risk of mechanical errors.
Step 4: Secure the Film on the Spool
Securing the film leader to the take-up spool is one of the most critical steps in the loading process. The take-up spool usually has slots, hooks, or teeth designed to grip the film leader. Insert the end of the leader into the slot or align it with the spool’s hooks, depending on your camera model.
Once the leader is positioned, gently advance the film using the winding lever while keeping slight tension on the film with your fingers. This helps the film wrap evenly around the spool. Watch closely to ensure the sprocket holes engage with the sprocket teeth on both sides of the film gate.
Checking alignment at this stage prevents the most common loading problem: film that appears loaded but does not actually advance. If the film slips or detaches, rewind slightly and reinsert the leader before proceeding.
The film should lie flat across the camera’s film plane without curling or lifting. A properly secured film will move smoothly when advanced and stay aligned with the sprockets. Taking a few extra seconds here can save an entire roll from being improperly exposed.
Step 5: Advance the Film
With the film secured, advancing it confirms that everything is working correctly. Slowly turn the advance lever while watching the film move across the film gate. The film should advance evenly, and the sprockets should rotate in sync with the movement.
Advance the film one frame at a time and press the shutter between advances. This simulates normal shooting operation and ensures the film is winding properly. Pay attention to the rewind knob on the top of the camera. It should rotate slightly as you advance the film, indicating that the film is moving through the canister.
If the rewind knob does not move, the film may not be engaged correctly. In this case, reopen the camera back and repeat the previous steps. Continuing without checking can result in an entire roll of blank exposures.
Avoid forcing the advance lever if it feels stuck. Resistance often signals improper film alignment or a mechanical issue. Smooth, consistent movement is a sign that the film is advancing correctly and ready for shooting.
Step 6: Close the Camera Back
Once you are confident the film is advancing properly, carefully close the camera back. Ensure no part of the film is pinched or protruding from the edges. Press the door shut firmly until you hear or feel it lock into place.
A secure closure is essential to prevent light leaks, which can fog or streak your images. Check that the camera back sits flush against the body with no gaps. Light leaks often occur when the door is not fully closed or the seals are compromised.
Avoid reopening the camera back once the film is loaded and advanced, as this will expose the film to light and ruin the frames already wound. If you must reopen it, rewind the film fully into the canister first.
Taking a moment to confirm the camera back is locked properly protects your film investment and ensures consistent results throughout the roll. This step finalizes the physical loading process and prepares the camera for active use.
Step 7: Advance to Frame 1
After closing the camera back, advance the film until the frame counter displays “1.” This process clears the exposed portion of the film leader and positions fresh, unexposed film behind the shutter. Typically, this requires advancing and firing the shutter two or three times.
Watch the frame counter as you advance, ensuring it increments correctly. At the same time, observe the rewind knob. Continued movement confirms the film is advancing with each frame. This small detail provides reassurance that the film is properly loaded and tensioned.
If the frame counter does not move or the rewind knob remains still, stop and check the loading process. Proceeding without confirmation can result in missed shots or blank frames.
Once the camera reaches frame 1, it is fully loaded and ready to shoot. This final check ensures that every frame you capture from this point forward will be properly exposed and recorded on the film.
How to Tell If the Film Is Loaded Correctly
Knowing whether your film is loaded correctly is essential before you start shooting. One of the simplest signs is smooth resistance when advancing the film. When the film is properly engaged, the advance lever should move with consistent tension rather than feeling loose or slipping freely.
Another reliable indicator is the rewind knob movement. As you advance the film and fire the shutter, the rewind knob should rotate slightly. This movement confirms that the film is being pulled from the canister and wound onto the take-up spool. If the knob stays still, the film may not be attached correctly.
The frame counter also provides helpful feedback. After loading, the counter should move from its starting position to frame one as you advance the film. If the counter does not change, it often signals that the film is not advancing as expected.
Listening to the camera can also help. A properly loaded film produces a steady winding sound when advancing. Unusual clicking, slipping, or silence may indicate misalignment or disengagement. These subtle cues become easier to recognize with experience.
Finally, trust the feel of the camera. A correctly loaded film creates a sense of controlled movement and balance when winding. Taking a few moments to check these signs before shooting helps prevent wasted rolls and ensures your images are actually being captured.
Common Mistakes When Loading Film
Loading film may seem simple, but small mistakes can easily lead to lost images or damaged film. One of the most common errors is pulling out too much film leader. Excess slack can cause the film to misalign, leading to uneven frame spacing or the film failing to advance properly once the camera is closed.
Another frequent mistake is not engaging the sprocket holes correctly. When the perforations along the edge of the film do not align with the camera’s sprockets, the film may appear loaded but will not move when the advance lever is turned. This often results in an entire roll of blank exposures without the photographer realizing it.
Opening the camera back in bright light is another problem many beginners face. Direct sunlight can fog or completely ruin exposed frames, even if the camera is open for only a short time. Always load film indoors or in shaded conditions to minimize light exposure.
Forcing camera mechanisms is also a common issue. If the advance lever or rewind knob feels stiff, applying extra force can tear the film or damage internal parts. Resistance usually signals incorrect loading or incomplete rewinding.
Finally, failing to check basic indicators such as rewind knob movement and frame counter progression can lead to avoidable mistakes. Taking a moment to confirm the film is advancing correctly helps protect your shots and ensures a successful shooting experience.
Tips for First-Time Film Camera Users
Starting out with a film camera can feel both exciting and unfamiliar. Unlike digital photography, film requires patience, attention, and a basic understanding of how the camera operates. Learning a few essential habits early helps prevent mistakes, builds confidence, and allows new photographers to enjoy the process rather than worry about technical issues.
Learn Your Camera Before Loading Film
Before inserting your first roll of film, spend time getting familiar with your camera’s layout and controls. Identify where the shutter release, advance lever, rewind knob, and aperture and shutter speed dials are located. Understanding these elements beforehand reduces confusion once film is inside the camera.
Practice advancing the lever and firing the shutter without film loaded. This allows you to feel how the mechanisms work and recognize normal resistance. Check how the camera back opens and closes, and note any locks or safety features. Knowing these details prevents accidental exposure or mechanical stress later.
Reading the camera manual, if available, can be extremely helpful. Manuals often explain model-specific features that may not be obvious at first glance. Even older cameras usually have manuals available online. Familiarity with your camera builds confidence and minimizes the risk of loading errors or operational mistakes.
Start With One Film Type and Stick With It
Choosing a single type of film when starting out helps simplify the learning process. Film varies in ISO, color balance, and grain structure, which can be confusing for beginners. By sticking to one film type, you can focus on learning exposure and composition without constantly adjusting your approach.
Using the same film repeatedly allows you to understand how it reacts in different lighting conditions. You begin to recognize how shadows, highlights, and contrast appear once developed. This consistency helps you connect camera settings with final results more clearly.
Switching film types too often can make it difficult to identify mistakes or improvements. A consistent film choice provides a stable reference point as you learn. Once you feel comfortable with exposure and handling, experimenting with different films becomes more rewarding and educational.
Pay Attention to Light and Exposure
Light plays a critical role in film photography, and film is generally less forgiving than digital sensors. Understanding how light affects your images helps prevent underexposed or overexposed frames. Start by observing your surroundings and estimating how bright or dim the scene is before adjusting settings.
Learn how aperture, shutter speed, and ISO work together. Aperture controls how much light enters the lens, shutter speed affects motion and exposure time, and ISO determines the film’s sensitivity to light. Balancing these three elements is key to achieving proper exposure.
Using a built-in light meter or a handheld meter can help guide your settings, but developing your own judgment is equally important. With practice, you will learn to anticipate lighting conditions and make informed adjustments, improving consistency across your images.
Be Patient and Shoot With Intention
Film photography encourages a slower, more thoughtful approach. Each roll has a limited number of frames, which naturally promotes careful composition and timing. Take a moment to consider your subject, framing, and exposure before pressing the shutter.
Avoid rapid shooting or unnecessary test shots. Instead, focus on capturing meaningful images with purpose. This mindset not only saves film but also strengthens your photographic skills. Reviewing each shot mentally helps reinforce learning and improve future decisions.
Patience also extends beyond shooting. Waiting for film to be developed is part of the experience and teaches appreciation for the process. Embracing this slower pace helps first-time film camera users develop discipline, creativity, and a deeper connection to photography.
Frequently Asked Questions (FAQs)
How Do You Know If Film Is Loaded Correctly?
You can tell film is loaded correctly by checking a few simple signs before you start shooting. When you advance the film using the lever, you should feel steady resistance rather than loose spinning. The rewind knob should rotate slightly as you advance the film, which confirms the film is moving from the canister to the take-up spool. You should also see the frame counter advance to frame one after a few shutter presses. If these indicators are missing, the film may not be engaged properly and your photos may not be recorded.
Can You Load Film in Bright Light?
You should avoid loading film in bright or direct sunlight whenever possible. Excess light can fog or damage the film during loading, especially if the film leader is exposed for too long. It is best to load film indoors or in shaded conditions where light exposure is minimal. If you must load film outside, turn your body to block direct sunlight and work quickly. Taking precautions during this step helps protect your images before you even start shooting.
What Happens If Film Is Not Hooked Properly?
If the film leader is not secured properly to the take-up spool, the film will not advance when you press the shutter. This often results in an entire roll of blank photos because the camera is operating without moving the film. You may not notice the issue until the film is developed. To prevent this, always check that the sprocket holes align with the camera gears and that the rewind knob moves when advancing the film.
How Much Film Leader Should You Pull Out?
You should pull out only enough film leader to comfortably reach the take-up spool without creating slack. Typically, this means pulling the leader just across the film gate until it aligns with the spool slot or hooks. Pulling too much film can cause loose winding and frame spacing problems, while pulling too little may prevent the film from catching. Keeping the leader flat and aligned ensures smooth advancement throughout the roll.
Can You Reopen the Camera After Loading Film?
Once film is loaded and advanced, you should not reopen the camera back unless the film has been fully rewound. Opening the camera mid-roll exposes the film to light and will ruin the frames already shot. If you accidentally open the camera slightly, close it immediately to minimize damage. Always rewind the film completely into the canister before opening the camera to remove it safely.
Why Is the Rewind Knob Important When Loading Film?
The rewind knob plays a key role in confirming that your film is advancing correctly. When you turn the advance lever, the rewind knob should rotate slightly in the opposite direction. This movement shows that the film is being pulled from the canister and wound onto the spool. If the rewind knob does not move, the film is likely not loaded properly. Watching this small detail helps you avoid shooting an entire roll without capturing images.
Conclusion
Learning the basics of film photography starts with understanding the loading process. Taking the time to handle each step carefully helps prevent wasted rolls and ensures your camera works exactly as it should. Small details, such as checking alignment and film movement, make a big difference in your results.
Once you are comfortable with how to put film in a camera, the process becomes second nature. You gain confidence every time you load a new roll, allowing you to focus more on composition, light, and storytelling rather than technical worries. This skill creates a smoother and more enjoyable shooting experience.
Mastering how to put film in a camera also builds a deeper connection with photography. It encourages patience and intention, turning each photo into a thoughtful decision rather than a quick click. With practice, loading film becomes the first satisfying step in capturing meaningful images.