How to Change WiFi on Ring Camera (Step-by-Step Guide)
A stable internet connection keeps a smart security system working the way it should. When a home network changes, connected devices need a quick update to stay online and responsive. Ring cameras are no exception, and keeping them connected ensures uninterrupted monitoring, alerts, and access to live video whenever it matters most.
Many people change their Wi-Fi because of a new router, a different internet provider, or a stronger network setup. When that happens, the camera can’t automatically switch over on its own. Learning how to change wifi on ring camera becomes essential to restore full functionality without frustration or long downtime.
The process itself is simpler than most expect and doesn’t require technical expertise. With just a smartphone and the Ring app, the connection can be updated in minutes. Understanding the steps ahead of time helps avoid common mistakes that cause delays or failed connections.
This guide is designed to walk through the process clearly and confidently. By following the right approach, the camera stays secure, online, and ready to protect the home without missing important moments.
What You Need Before Changing WiFi on a Ring Camera
Before changing the WiFi on a Ring camera, a few essentials should be ready to make the process smooth and interruption-free. Preparation helps avoid repeated setup attempts and reduces the chance of connection errors that can delay getting the camera back online. Taking a few minutes to gather what’s needed can save a lot of time later.
First, access to the new WiFi network is necessary. This includes knowing the exact network name and the correct password. The camera must connect to a 2.4 GHz network in most cases, so confirming that the router supports it and that the signal reaches the camera’s location is important.
A smartphone or tablet with the Ring app installed is also required. The app should be updated to the latest version to prevent compatibility issues during setup. Being logged into the correct account linked to the camera ensures full access to device settings and connection options.
The Ring camera should have sufficient power before starting. Battery-powered models need to be adequately charged, while wired devices should be properly connected to a power source. Losing power midway through the setup can cause the process to fail and may require restarting from the beginning.
It also helps to be physically near the camera during the WiFi change. This allows easier access to the setup button and ensures a stronger temporary connection between the phone and the device. With these basics in place, changing the WiFi becomes a quick and straightforward task.
How to Change WiFi on Ring Camera (Standard Method)
Changing the WiFi on a Ring camera is a structured process designed to keep the device secure while ensuring a stable connection. The standard method uses the Ring mobile app and works for most Ring camera models. By following each step in order, the camera can be safely disconnected from the old network and connected to a new one without affecting saved settings or recordings.
Step 1 – Open the Ring App
The first step begins with opening the Ring app on a smartphone or tablet. The app acts as the control center for all Ring devices, so it must be accessible and functioning properly before moving forward. Make sure the device being used is connected to the internet, preferably the same WiFi network that will be linked to the camera.
Once the app is open, log into the Ring account associated with the camera. Using the correct login credentials is essential, as only the primary or authorized account can change device settings. If multiple Ring devices are connected to the account, all of them will appear once logged in.
It is important that the app is updated to the latest version available. An outdated app may not display the correct options or could interrupt the setup process. Updates also ensure compatibility with the latest firmware installed on the camera.
After logging in, allow the app a moment to fully load the dashboard. This ensures all devices and settings are synced correctly. Starting from a fully loaded home screen helps prevent errors in later steps.
Step 2 – Select Your Ring Camera
After accessing the Ring app, the next step is selecting the specific Ring camera that needs its WiFi network changed. From the main dashboard, all connected Ring devices will be displayed. These may include doorbells, indoor cameras, or outdoor cameras, depending on the setup.
Tap on the camera you want to update. Selecting the correct device is crucial, especially in homes with multiple Ring cameras. Each device has its own settings and network connection, so changing the wrong one could cause confusion later.
Once selected, the camera’s live view screen usually appears. This screen confirms that you are working with the intended device. From here, you can also verify the camera’s current status, such as whether it is online or offline.
Take a moment to ensure the camera has enough battery power or a stable wired connection. Low battery levels can interrupt the WiFi change process. Confirming the device is ready before proceeding helps keep the setup smooth and avoids unnecessary restarts.
With the correct camera selected and verified, the app is now ready to move into the settings required for updating the WiFi network.
Step 3 – Go to Device Settings
Once the correct Ring camera is selected, access its settings by tapping the gear icon or settings option within the app. This section contains all configuration options related to the device, including power, signal strength, and network details.
Within the settings menu, locate and tap on “Device Health.” This area provides important information about the camera’s current connection, battery status, and firmware. Device Health is also where the option to update the WiFi network is located.
Scroll until you see the option labeled “Change WiFi Network.” Selecting this tells the app that the camera will be disconnected from its current network and prepared for a new one. At this point, the app may display instructions or reminders to keep the phone close to the camera.
Following the on-screen prompts carefully is important. Skipping steps or navigating away from the app can interrupt the process. The app guides the transition to setup mode, ensuring the camera is ready to receive new network information.
Staying within the Device Health section until prompted to move forward helps maintain a stable connection between the phone and the camera during this critical stage.
Step 4 – Put Your Ring Camera Into Setup Mode
After selecting the option to change the WiFi network, the Ring camera must be placed into setup mode. This step allows the camera to temporarily broadcast a signal so it can receive new WiFi details from the app.
Locate the setup button on the Ring camera. The button’s position varies by model, but it is usually found on the side, back, or bottom of the device. Press and hold the setup button as instructed in the app.
Hold the button until the camera’s light begins to spin or flash in a specific pattern. The spinning light indicates that the camera is now in setup mode and ready to connect to a new network. This may take several seconds, so patience is important.
During this time, keep the phone close to the camera. The app will search for the device and establish a temporary connection. Avoid switching apps or locking the phone screen, as this can disrupt communication.
Once the app confirms that the camera is in setup mode, it will automatically move to the next step. This confirmation ensures the camera is fully prepared to accept new WiFi credentials.
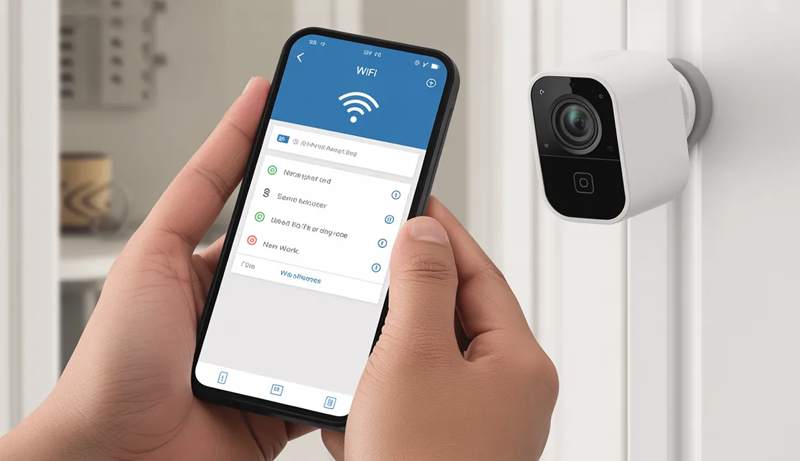
Step 5 – Connect to the New WiFi Network
With the Ring camera in setup mode, the app will display a list of available WiFi networks. Choose the new network you want the camera to connect to. Make sure the selected network is stable and within range of the camera’s location.
After selecting the network, enter the correct WiFi password. Accuracy matters here, as even small typing errors can cause the connection to fail. Take a moment to double-check the password before proceeding.
Once the password is entered, the app will begin connecting the camera to the new WiFi network. This process may take a minute or two as the camera verifies the credentials and establishes a secure connection.
During this time, the camera’s light may flash or change patterns. This is normal and indicates that the device is communicating with the network. Keep the phone nearby and avoid interrupting the process.
When the connection is successful, the app will display a confirmation message. The camera will then reconnect to the Ring servers, restoring live view, motion alerts, and recording features on the new WiFi network.
How to Change WiFi on Ring Camera Without the Old WiFi
Changing the WiFi on a Ring camera without access to the old network is a common situation, especially after switching internet providers or replacing a router. Even if the previous WiFi is no longer available, the camera can still be reconnected by using setup mode and the Ring app. The process does not require the old network to be active, but it does require physical access to the camera.
The first requirement is having the Ring app installed on a smartphone or tablet and being logged into the correct Ring account. The app is the only way to communicate with the camera during setup. Make sure the phone is connected to the new WiFi network that the camera will use, as this helps the app guide the connection smoothly.
Next, the Ring camera must be placed into setup mode manually. Since the device cannot connect to the old WiFi, it needs to be reset into a state where it can accept new network details. Locate the setup button on the camera, which is usually on the side, back, or bottom depending on the model. Press and hold the button until the light begins spinning or flashing, indicating setup mode is active.
Once the camera is in setup mode, open the Ring app and navigate to the option for setting up or reconnecting a device. The app will search for nearby Ring devices in setup mode and detect the camera. When prompted, select the camera and continue with the setup process.
The app will then display a list of available WiFi networks. Choose the new WiFi network you want the camera to use and carefully enter the correct password. Since the old network is no longer involved, there is no need to remove or disconnect it manually. The camera will automatically forget the previous connection once the new one is confirmed.
After entering the password, wait for the app to complete the connection process. This may take a few minutes while the camera verifies the network and reconnects to Ring services. During this time, keep the phone close to the camera and avoid switching apps or locking the screen.
Once the connection is successful, the app will show a confirmation message, and the camera will come back online. Live view, motion alerts, and recordings will resume on the new WiFi network. Even without access to the old WiFi, this method ensures the Ring camera is quickly reconnected and fully functional again.
How to Change WiFi on Ring Doorbell vs Ring Stick Up Cam
Changing the WiFi on both the Ring Doorbell and Ring Stick Up Cam follows the same core process through the Ring app, but there are small, important differences in how each device enters setup mode and responds during the connection. Understanding these differences helps avoid confusion, especially if you own more than one Ring device from Ring.
Ring Doorbell: WiFi Change Process
For a Ring Doorbell, the WiFi change process is centered around the device’s built-in setup button, which is usually located on the front, side, or back of the doorbell depending on the model. After opening the Ring app, selecting the doorbell, and navigating to Device Health, the option to change the WiFi network becomes available.
Once prompted, pressing and holding the setup button places the Ring Doorbell into setup mode. The light on the doorbell will begin spinning or flashing, signaling that it is ready to connect to a new network. Because many Ring Doorbells are mounted outside, it’s especially important to ensure a strong WiFi signal reaches the installation spot.
During the connection process, the Ring Doorbell may take slightly longer to confirm the new network, especially if it is wired and syncing power and network settings at the same time. Keeping the phone close to the doorbell and waiting for confirmation in the app ensures the process completes successfully.
Ring Stick Up Cam: WiFi Change Process
The Ring Stick Up Cam follows a very similar app-based process but offers more flexibility in physical setup. Since it can be used indoors or outdoors and may be battery-powered, plug-in, or solar-powered, checking the power level before starting is critical.
The setup button on a Ring Stick Up Cam is usually easier to access, often located on the top or side of the camera. When changing WiFi, holding this button places the camera into setup mode, indicated by a spinning or flashing light. Because the Stick Up Cam is portable, it can be temporarily moved closer to the router during setup to ensure a smoother connection.
Once the new WiFi network is selected and the password is entered, the Stick Up Cam typically reconnects quickly. Its mobility and strong setup signal often make the WiFi change process slightly faster compared to a mounted doorbell.
Key Differences to Remember
While both devices use the Ring app and Device Health settings, the main differences come down to button placement, power source, and installation location. Ring Doorbells may require more patience due to outdoor mounting and wiring, while Ring Stick Up Cams benefit from portability and easier access during setup.
Ring Camera Not Connecting to New WiFi? (Troubleshooting)
When a Ring camera fails to connect to a new WiFi network, the issue is often related to signal strength, network compatibility, or an interrupted setup process. This situation is common after changing routers or internet providers and does not usually indicate a problem with the camera itself. Identifying the cause early makes troubleshooting much easier.
One of the first things to check is the WiFi network type. Most Ring cameras work best on a 2.4 GHz network, and some models struggle with 5 GHz-only connections. If the router combines both bands under one name, temporarily separating them can help the camera connect more reliably.
Signal strength also plays a major role. If the camera is installed far from the router, the connection may fail during setup. Moving the camera closer to the router or using a WiFi extender can improve stability. Even a temporary relocation during setup can make a noticeable difference.
Another common issue is incorrect WiFi credentials. Entering the wrong password, extra spaces, or using special characters not supported by the router can prevent connection. Carefully re-entering the password and confirming accuracy often resolves this problem.
Power interruptions can also stop the setup from completing. Battery-powered cameras should be fully charged, and wired devices should have a steady power supply. If the process stalls, restarting both the camera and the router before trying again can clear temporary glitches.
Finally, ensure the Ring app is fully updated and that the phone being used stays close to the camera throughout setup. Closing other apps and disabling VPNs can also help the camera connect successfully to the new WiFi network.
Frequently Asked Questions (FAQs)
Can You Change WiFi on a Ring Camera Without Resetting It?
Yes, you can change the WiFi on a Ring camera without performing a full factory reset. You simply need access to the Ring app and the camera itself. From the app, you go to the camera’s Device Health section and select the option to change the WiFi network. The camera will temporarily enter setup mode and allow you to connect it to a new network while keeping all existing settings, motion zones, and recorded history intact.
What Do You Need Before Changing WiFi on a Ring Camera?
Before you begin, you should have your smartphone or tablet with the Ring app installed and updated. You also need the new WiFi network name and password, and your phone should already be connected to that network. Make sure the camera has enough power, either through a charged battery or a stable wired connection, to avoid interruptions during setup.
How Do You Put a Ring Camera Into Setup Mode?
To put a Ring camera into setup mode, you need to press and hold the physical setup button on the device. The button location varies by model, but it is usually on the side, back, or bottom. When the light starts spinning or flashing, the camera is in setup mode and ready to accept new WiFi details through the app.
Can You Change WiFi on a Ring Camera Without the Old Network?
Yes, the old WiFi network is not required to change the connection. As long as you can physically access the camera, you can place it into setup mode manually. Once in setup mode, the Ring app will detect the camera and guide you through connecting it to the new WiFi network, automatically replacing the old one.
Why Is a Ring Camera Not Connecting to the New WiFi?
A Ring camera may fail to connect due to weak signal strength, incorrect password entry, or incompatible network settings. Many Ring cameras work best on a 2.4 GHz network. You should also check that your router is close enough, the password is entered correctly, and the camera has sufficient power during setup.
Does Changing WiFi Affect Ring Camera Recordings or Settings?
No, changing the WiFi network does not delete recordings or reset camera settings. Your motion alerts, video history, and device preferences remain linked to your Ring account, not the WiFi network. Once the camera successfully connects to the new WiFi, it resumes normal operation without losing stored data.
Tips to Avoid WiFi Issues in the Future
A reliable WiFi connection is essential for keeping smart security devices running without interruptions. Many connectivity problems can be prevented with simple planning and proper network management. By optimizing router placement, maintaining device health, and monitoring network settings, you can reduce the chances of future WiFi disruptions and ensure your Ring camera stays connected and responsive at all times.
Choose the Right WiFi Band and Network Settings
Selecting the correct WiFi band plays a major role in long-term connectivity stability. Most Ring cameras perform best on a 2.4 GHz network because it offers wider coverage and better wall penetration compared to 5 GHz. Even though 5 GHz provides faster speeds, its shorter range can cause frequent dropouts, especially for outdoor or wall-mounted cameras.
You should configure your router to either prioritize 2.4 GHz for smart devices or separate the network bands with different names. This makes it easier to connect cameras to the most stable option. Automatic band steering can sometimes force devices to switch networks unexpectedly, leading to temporary disconnections.
Security settings also matter. Using WPA2 or WPA3 encryption ensures compatibility and protects your network. Avoid frequently changing your WiFi name or password unless necessary, as every change requires reconnecting all smart devices.
Keeping your router firmware updated improves performance and fixes bugs that may affect device connectivity. Stable network settings combined with the right WiFi band create a strong foundation that helps prevent future connection issues.
Optimize Router and Camera Placement
Physical placement has a direct impact on WiFi reliability. Routers should be positioned in a central, elevated location, free from heavy obstructions like thick walls, metal surfaces, or large appliances. Poor placement can weaken the signal and create dead zones where cameras struggle to stay connected.
For Ring cameras installed outdoors or far from the router, distance becomes a key factor. Even a strong router can lose signal strength over longer ranges. In such cases, adjusting the camera’s position slightly or reducing obstacles between the router and the camera can improve connectivity.
You should also avoid placing cameras near devices that cause wireless interference, such as microwaves, cordless phones, or baby monitors. These can disrupt WiFi signals and cause intermittent connection drops.
If coverage remains inconsistent, adding a WiFi extender or mesh system can significantly improve signal strength in hard-to-reach areas. Proper placement of both the router and camera ensures a consistent connection and reduces the likelihood of future WiFi problems.
Maintain Power and Device Health Regularly
Power stability is often overlooked but plays a crucial role in WiFi reliability. Battery-powered Ring cameras should be checked regularly to ensure they remain sufficiently charged. Low battery levels can weaken the camera’s ability to maintain a strong WiFi connection, leading to delayed alerts or offline status.
For wired cameras, make sure power cables are securely connected and protected from weather exposure. Loose or damaged cables can cause power fluctuations that interrupt network connectivity.
Within the Ring app, the Device Health section provides valuable information about signal strength, battery level, and firmware status. Reviewing this section periodically allows you to identify issues before they become serious problems.
Keeping the camera firmware updated is equally important. Firmware updates often include performance improvements and fixes for connectivity issues. Consistent maintenance of power and device health helps ensure the camera remains stable on your WiFi network over time.
Plan Ahead When Changing Internet or Equipment
Many WiFi issues occur during router upgrades or internet service changes. Planning ahead can prevent unnecessary downtime for your Ring camera. Before switching routers or providers, you should note your existing WiFi name and password. Using the same credentials on the new router allows many devices to reconnect automatically.
If you need to change network details, reconnect your Ring camera as soon as the new network is active. Delaying the process can cause the camera to remain offline longer than necessary.
You should also test WiFi signal strength in camera locations after installing new equipment. New routers may have different coverage patterns, even if they are more powerful. Adjusting placement early prevents long-term connectivity issues.
By preparing for network changes and making small adjustments in advance, you reduce disruptions and keep your Ring camera reliably connected without repeated setup problems.
Conclusion
Keeping a Ring camera connected to the right network ensures uninterrupted security and reliable performance. When internet settings change, updating the camera’s connection becomes an important step to maintain live view access, motion alerts, and video recordings without delays or errors.
Understanding how to change wifi on ring camera allows you to handle router upgrades, provider changes, or network improvements with confidence. The process is simple when the correct steps are followed, and it does not require technical skills or advanced tools. With the Ring app and physical access to the camera, reconnection can be completed quickly.
By staying prepared and following proper setup practices, you reduce the risk of future connectivity issues. A stable WiFi connection keeps your camera functioning as intended, helping ensure consistent monitoring and dependable home security at all times.