How to Set Up Ring Camera in 8 Easy Steps
To set up your Ring camera, first download the Ring app and create an account. Fully charge the camera battery before starting. Choose a spot with a strong Wi-Fi signal and near power if needed.
Use the app to connect the camera to your Wi-Fi by scanning its QR code, then securely mount the camera and adjust its angle. Test live view and customize motion alerts.
If issues arise, troubleshooting tips can help guarantee smooth setup. Keep going to investigate detailed steps and best practices.
Key Takeaways
- Download the Ring app, create or log into your account, and have your Wi-Fi password ready.
- Fully charge the camera battery before starting the setup to avoid interruptions.
- Use the Ring app to scan the camera’s QR code, power on the device, and connect it to your Wi-Fi network.
- Mount the camera securely about 8-10 feet high with a strong Wi-Fi signal for optimal coverage.
- Use the app’s live view feature to adjust angles and customize motion detection and notification settings.
Get the Ring App and Set Up Your Account
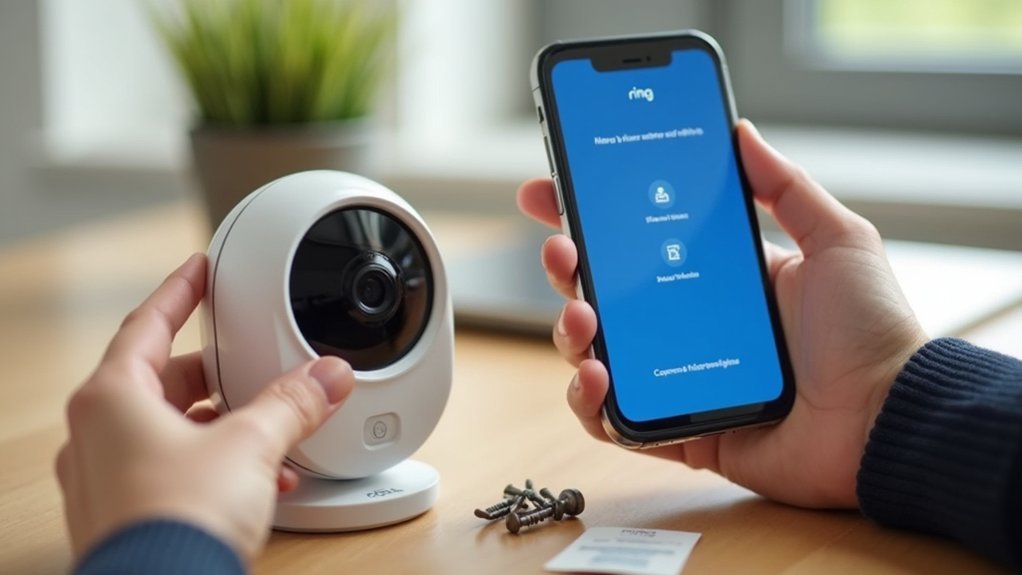
To get started with your Ring camera, first download the Ring app from the App Store or Google Play Store.
Once installed, open the Ring app and either create a new account or log in with your existing credentials using your email and password.
Make sure you have your Wi-Fi password nearby, as the app will ask for it to connect your camera to the internet.
Take a moment to explore the Ring app’s main dashboard, where you’ll manage all your devices in one place.
When prompted, allow location permissions to enable features like location-based settings.
Following these steps will prepare you for the next stages of setup, ensuring your Ring camera is ready to connect smoothly and function properly.
Charge Your Camera Battery Fully Before Setup
Before you start setting up your Ring camera, make sure the battery is fully charged so you don’t run into any interruptions.
While it’s charging, you’ll notice a red light, and when it’s done, the light will turn green.
Charging the battery all the way ensures your camera runs smoothly right from the get-go.
Battery Charging Importance
Although setting up your Ring camera might seem straightforward, charging the battery fully beforehand is essential to confirm smooth installation and reliable performance.
Understanding the battery charging importance helps you avoid interruptions during setup and assures your camera connects to Wi-Fi without issues.
Before starting, remove the battery and plug it into a power source with the provided cable. Charging typically takes four to six hours.
Keep an eye on the indicator lights: a red light means charging, while green confirms a full charge.
A fully charged battery powers your device through the entire setup process, preventing unexpected shutdowns.
Prioritizing battery charging importance sets a solid foundation for your Ring camera’s functionality and long-term reliability.
Charging Indicators Explained
When you start charging your Ring camera battery, the indicator lights give you clear feedback on its status. Understanding these charging indicators helps you know when your battery is ready for setup.
- Red light: This means your battery is currently charging. Expect it to take about four to six hours to fully charge.
- Green light: This signals that your battery is fully charged and ready to be installed.
- No light: If no light appears, verify the battery is correctly connected to the charger and the charger is powered.
Make certain to remove the battery from the camera for charging. Fully charging your battery before setup guarantees peak camera performance and reduces connection issues.
Pay attention to charging indicators to avoid interruptions during operation.
Pick the Best Spot for Your Ring Camera (Check Wi-Fi and Power)
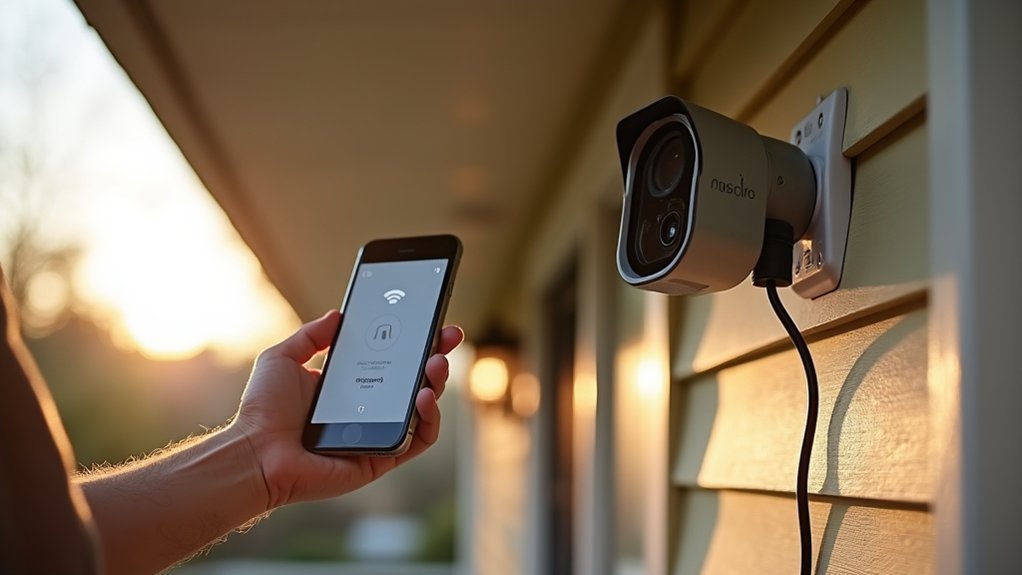
Before you install your Ring camera, it’s a good idea to check that the spot has a strong Wi-Fi signal. This helps make sure your video streams smoothly without interruptions. You’ll want your footage to be clear and uninterrupted, right?
Also, think about where the power will come from. It’s best to pick a location near an outlet if you’re plugging it in. But if that’s not possible, no worries—Ring cameras can run on batteries or even solar power, so you have some flexibility there.
And one more thing: try to position your camera about 8 to 10 feet above the ground. This height usually gives you a clear view of the area you want to keep an eye on. That way, you won’t miss any important details!
Assess Wi-Fi Signal
Where’s the best place to set up your Ring camera for a reliable connection?
It’s essential to guarantee your camera gets a strong Wi-Fi signal to avoid interruptions. Here’s how you can assess your wifi network before installation:
Place your camera within 30 feet of your router to maximize signal strength.
Use the Ring app’s “Device Health” feature to check the current Wi-Fi signal and adjust the camera’s location if needed.
If your camera’s spot is far or blocked by walls, consider adding a Wi-Fi extender to boost the network range.
Consider Power Source
Once you’ve found a spot with a strong Wi-Fi signal, consider how you’ll power your Ring camera. If you have a battery-powered model, choose a location that gets plenty of sunlight, especially if you plan to use a solar panel to keep it charged.
For hardwired cameras, pick a spot near an existing power source to make installation easier and avoid complicated wiring.
During setup, temporarily place the camera in the chosen area and use the Ring app to test the Wi-Fi connection and verify it’s stable.
Selecting the right power source and location helps your Ring camera operate smoothly without frequent battery changes or connectivity problems. This step is essential for reliable, long-term performance.
Optimize Camera View
Although choosing the right location involves several factors, optimizing your Ring camera’s view is key to capturing clear, useful footage.
To pick the best spot for your Ring security camera, follow these tips:
- Select a location with a clear line of sight to the areas you want to monitor. Avoid obstructions and glare from direct sunlight or extreme angles.
- Use the Ring app to check for a strong Wi-Fi signal at your chosen spot. This ensures reliable connectivity for real-time alerts and footage.
- Mount the camera at a height that prevents blind spots and allows effective motion detection.
Also, consider access to power, whether it’s a nearby outlet or solar charging.
Connect Your Ring Camera to Your Wi-Fi Network
Connecting your Ring camera to your Wi-Fi network is a straightforward process that starts with downloading the Ring app and logging into your account.
Once logged in, open the app, tap “Set Up a Device,” select “Security Cams,” and the app will walk you through scanning the camera’s QR code.
Make certain your camera is powered on, then press the setup button when prompted.
Next, connect your mobile device to the Ring Wi-Fi network via your device’s settings.
Return to the app to enter your home Wi-Fi password to link your camera.
After a successful connection, complete the setup by customizing your camera settings in the app for the best performance.
This step guarantees your camera stays connected and ready to protect your home.
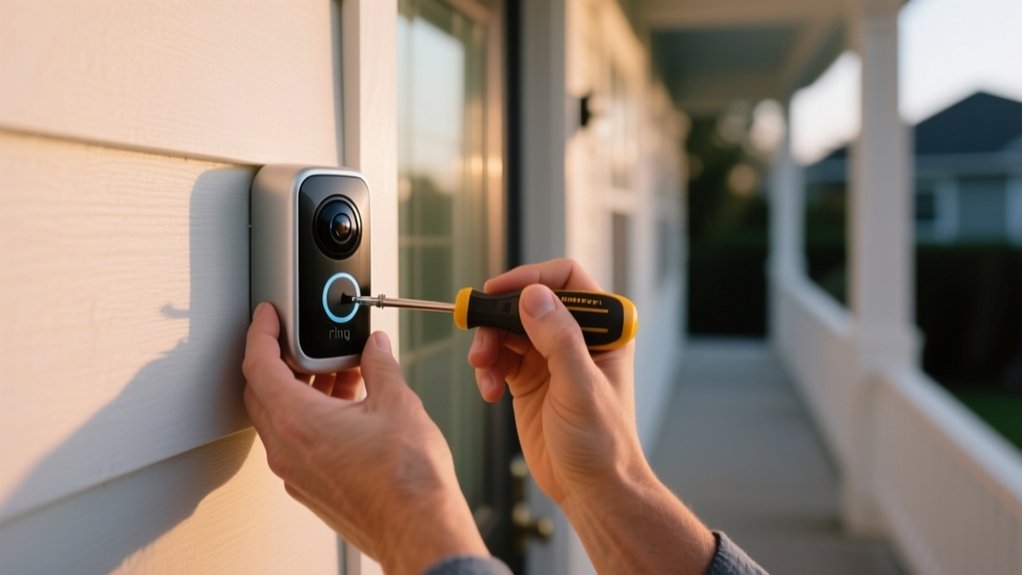
Mount the Camera Securely Using the Included Hardware
Start by holding the mounting bracket against the wall where you want to place your Ring camera.
Use a level to make certain it’s perfectly straight, then mark the screw holes with a pencil.
Follow these steps to mount your camera securely:
- For brick or stucco walls, drill holes using the provided masonry bit and insert anchors.
- Align the mounting bracket with the marked holes and fasten it firmly using the included screws.
- Attach the camera by snapping it onto the bracket until you hear a click, confirming it’s locked.
Finally, double-check the camera is secure and level before moving on to the next setup step.
This guarantees your Ring camera stays mounted safely and functions properly.
Adjust Camera Angles for Optimal Coverage
Three key factors guarantee your Ring camera captures the best possible footage: angle, height, and coverage area.
To adjust camera angles for ideal coverage, mount your camera between 7 to 10 feet high to prevent tampering and maximize the view.
Use the swivel feature, if available, to fine-tune the angle after installation. Focus on covering entry points, driveways, and high-traffic zones while avoiding obstacles that could block motion detection within its 30-foot range.
Open the app on your phone and use the live view feature to see real-time footage, making precise angle adjustments until you achieve the widest field of view.
This method guarantees your Ring camera monitors the desired areas effectively and sends timely alerts.
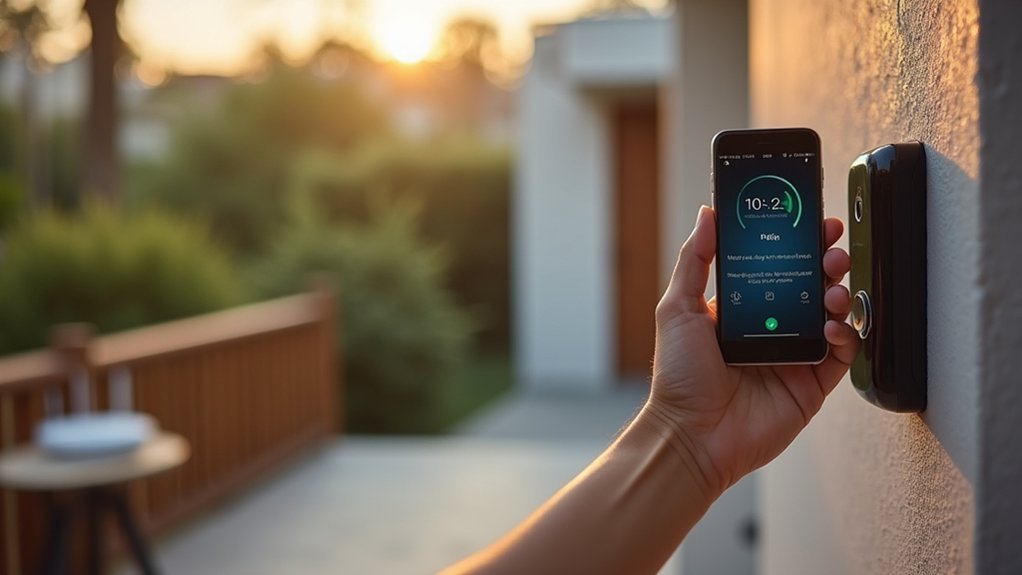
Test Live View and Set Motion & Notification Preferences
To test your Ring camera’s Live View, open the app and tap the camera icon to access a real-time video feed.
Make sure your camera is connected to Wi-Fi for smooth streaming. Once you’ve confirmed the live feed works, set your motion and notification preferences to tailor your security.
- Go to camera settings in the app and customize motion zones to focus on critical areas.
- Adjust notification settings to get alerts only for important motion events.
- Regularly review and update these settings to match changes in your environment or security needs.
Troubleshoot Common Ring Camera Setup Issues
If you encounter issues during your Ring camera setup, checking the battery level or wiring is an essential first step. Insufficient power often causes connection failures.
To troubleshoot common Ring camera setup issues, make sure the QR code is scanned correctly, verify your Wi-Fi credentials, and reset the device if needed. Here’s a quick guide:
| Issue | Possible Cause | Solution |
|---|---|---|
| Camera won’t power on | Battery drained or wiring | Charge battery or check wiring |
| QR code won’t scan | Wrong code location | Use Ring app help icon |
| Wi-Fi connection fails | Wrong password or distance | Re-enter password, move closer |
| Persistent setup failure | Software glitch | Reset device, consult support |
Following these tips will help you quickly resolve setup problems and get your security cameras working smoothly.
Frequently Asked Questions
Can I Use Multiple Ring Cameras on One App Account?
Yes, you can use multiple Ring cameras on one app account. You’ll manage all your devices easily through a single interface, customizing settings and notifications for each camera.
The Ring app supports unlimited cameras, so you can monitor different areas seamlessly.
Plus, with a subscription, you get access to recorded footage from all your cameras, enhancing your home security by providing extensive coverage and convenient control right from your phone.
How Do I Share Camera Access With Family Members?
To share camera access with family members, open the Ring app and go to your camera’s device settings.
Tap “Shared Users,” then “Add User.”
Enter their email and select the access level you want to grant, like “Can View” or “Can Control.”
Send the invite, and once they accept it via email, they’ll be able to view live footage and receive notifications based on the permissions you set.
What Is the Subscription Cost for Ring Protect Plans?
Think of Ring Protect plans like a security umbrella.
The Basic plan costs $3 monthly per device, giving you 60 days of video storage. It’s perfect if you want simple coverage.
The Plus plan is $10 a month for unlimited devices at one spot, adding perks like extended warranty and professional monitoring.
You can save with annual payments, $30 per device for Basic or $100 for Plus.
It’s smart protection made easy.
Can Ring Cameras Work Without Wi-Fi?
No, Ring cameras can’t fully work without Wi-Fi. You won’t get live video, alerts, or remote access without an internet connection.
Some models might record locally offline, but you can’t view that footage remotely.
For full functionality like motion alerts and two-way audio, you need a stable Wi-Fi connection.
Without it, your Ring camera’s smart features and security benefits will be severely limited.
How Secure Is the Data Stored by Ring Cameras?
Your Ring camera data is very secure.
Ring uses end-to-end encryption, meaning only you and authorized users can access your video footage. They protect stored data with multiple security layers and physical safeguards.
Plus, you can enable two-factor authentication for extra protection.
Ring also complies with strict privacy laws like GDPR and CCPA. You control your data by managing sharing settings or deleting recordings whenever you want.
Conclusion
Setting up your Ring camera is quick and straightforward, ensuring your home stays secure with minimal hassle. Did you know that homes with security cameras are 300% less likely to be targeted by burglars?
By following these eight easy steps, you’ll have your camera up and running in no time, giving you peace of mind and real-time protection. Stay vigilant, adjust settings to your needs, and enjoy improved security right at your fingertips.