How to Make My Camera Quality Better
Everyone wants their photos and videos to look sharp, clear, and professional, but not everyone has access to expensive gear. Camera quality often feels like something that depends entirely on hardware, yet many people overlook how much control they already have. Small changes can make a surprisingly big difference.
Modern cameras, including smartphone cameras, are powerful tools when used correctly. Lighting, settings, and handling all play a major role in how an image turns out. Understanding these basics helps you take better shots without immediately thinking about upgrades or replacements.
Many people search for answers by asking, How to Make My Camera Quality Better, expecting a complicated solution. In reality, improving camera quality is often about simple habits, smarter adjustments, and using your camera’s features to their full potential. These steps are practical and easy to apply.
This guide focuses on realistic ways to improve your camera results, whether you’re capturing daily moments, creating content, or learning photography as a hobby. With the right approach, you can consistently achieve cleaner, brighter, and more impressive images using the camera you already own.
How to Make My Camera Quality Better?
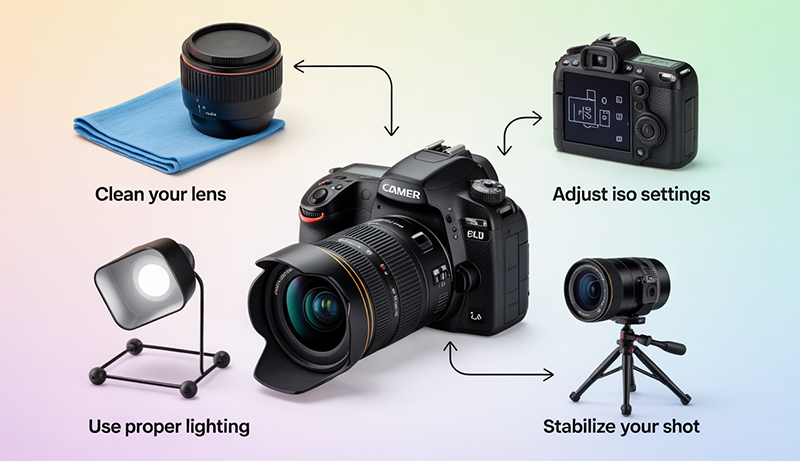
Improving your camera results starts with understanding light, because lighting has the biggest impact on image quality. Natural light is always a strong choice, especially when shooting during early morning or late afternoon. Positioning your subject so light falls evenly across it helps reduce noise and harsh shadows. Indoors, using lamps or soft light sources instead of relying on a flash can instantly make photos look cleaner and more professional.
Camera settings also play a major role in overall quality. Taking time to adjust resolution, focus mode, and exposure can dramatically improve results. Many people leave their camera on auto, but learning basic manual controls allows better accuracy in different environments. Keeping ISO as low as possible reduces grain, while proper white balance ensures colors look natural instead of dull or overly warm.
Lens cleanliness is often overlooked but extremely important. Dust, fingerprints, or smudges can make images appear blurry or faded. Simply wiping the lens with a microfiber cloth before shooting can improve sharpness instantly. This small habit alone answers a big part of the question, How to Make My Camera Quality Better, without spending any money.
Stability is another key factor in capturing sharper images. Shaky hands lead to motion blur, especially in low light. Using a tripod, resting your arms on a stable surface, or enabling image stabilization helps maintain clarity. Even slowing down and holding the camera firmly can improve results.
Editing is the final step that elevates camera quality. Basic adjustments like brightness, contrast, and sharpness can enhance details without overdoing it. Simple editing tools help refine photos while keeping them natural. By combining good lighting, proper settings, steady shooting, and light editing, you can consistently achieve better camera quality with the gear you already have.
Understand What Affects Camera Quality
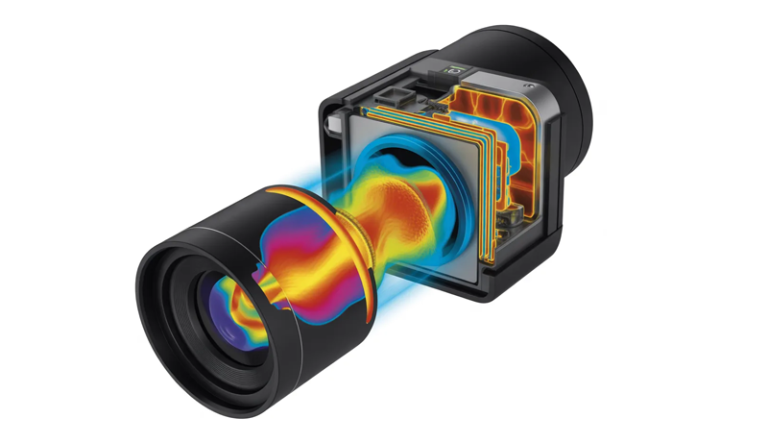
Understanding what affects camera quality begins with recognizing the role of the camera sensor. The sensor captures light and converts it into an image, which means its size and efficiency directly influence clarity, detail, and low-light performance. Larger sensors generally handle light better, producing sharper images with less noise, especially in challenging lighting conditions.
Lighting conditions themselves have a major impact on camera quality. Bright, balanced light allows the camera to capture more detail and accurate colors, while poor lighting can cause grainy or blurry results. Harsh light may create strong shadows, whereas soft, even light helps maintain smooth tones and better contrast across the image.
Lens quality is another critical factor that affects how an image looks. A high-quality lens allows more light to enter the camera and keeps details sharp from edge to edge. Even with a good camera body, a dirty or low-quality lens can reduce sharpness and color accuracy. Keeping the lens clean and choosing the right focal length for your subject makes a noticeable difference.
Camera settings also influence image quality more than many people realize. ISO, shutter speed, and aperture work together to control exposure and sharpness. Incorrect settings can introduce motion blur or digital noise, while balanced adjustments help capture clean and detailed images in different environments.
Stability and handling play an often underestimated role in camera performance. Camera shake can easily reduce sharpness, especially in low light. Using stable support or proper grip techniques ensures clearer photos. Finally, post-processing can refine an image further, but strong fundamentals are what truly define camera quality.
Clean and Prepare Your Camera
Cleaning and preparing your camera is one of the simplest yet most effective steps toward better image quality. Over time, dust, fingerprints, and smudges naturally build up on your camera and lens, quietly reducing sharpness and contrast. Starting with a clean camera ensures your photos are clear and free from avoidable blur or haze.
The lens should always be your first priority. Even a small fingerprint can distort light and soften details. Using a microfiber cloth to gently wipe the lens surface removes oils and dust without scratching. For deeper cleaning, a lens-safe cleaning solution can help restore clarity and improve overall image sharpness.
The camera body also deserves attention. Dust around buttons, dials, and the viewfinder can interfere with smooth operation. Gently brushing these areas with a soft brush or using a blower helps keep everything functioning properly. Keeping the camera body clean also protects internal components from long-term damage.
If you use a removable-lens camera, sensor care becomes important as well. Dust on the sensor can appear as dark spots in photos, especially in bright scenes. Using a sensor cleaning mode or professional cleaning service keeps images spotless and consistent.
Preparation goes beyond cleaning. Checking battery levels, clearing storage space, and updating camera settings before shooting saves time and avoids missed moments. Adjusting resolution, focus mode, and stabilization in advance helps you stay ready. A clean, prepared camera allows you to focus fully on composition and creativity, leading to consistently better results.
Improve Lighting for Better Camera Quality
Lighting plays a defining role in how your photos and videos look, often more than the camera itself. Good lighting reveals details, preserves natural colors, and reduces unwanted noise or blur. Poor lighting, on the other hand, can make even high-end cameras struggle. Learning how to work with light helps you create clearer, sharper, and more visually appealing images in any environment.
Use Natural Light to Enhance Clarity and Color
Natural light is one of the most effective tools for improving camera quality because it provides balanced illumination and realistic colors. Shooting near windows, outdoors, or in open spaces allows your camera to capture details without forcing high ISO levels. This results in cleaner images with less digital noise and better overall sharpness.
The direction of natural light matters just as much as its presence. Side lighting adds depth and texture, while front lighting creates even exposure and reduces shadows on faces or objects. Avoid placing strong light directly behind your subject, as backlighting can cause silhouettes or washed-out highlights unless intentionally used for creative effect.
Timing also plays a key role when using natural light. Early morning and late afternoon offer softer light that flatters subjects and minimizes harsh shadows. Midday light can be strong and unforgiving, often creating high contrast and deep shadows that are difficult to manage without reflectors or shade.
Cloudy days are often overlooked but provide excellent lighting conditions. The clouds act as a natural diffuser, spreading light evenly and reducing glare. By learning to observe and adapt to natural light, you can significantly improve image quality without adding any extra equipment.
Improve Indoor Lighting Without Harsh Shadows
Indoor lighting can be challenging, but with the right approach, it can greatly improve camera quality. Overhead lights often create unflattering shadows and uneven exposure. Using multiple light sources at different angles helps balance the scene and reduces harsh contrasts that affect image clarity.
Soft lighting is especially important indoors. Lamps with fabric shades, LED panels with diffusers, or bounced light off walls create smoother illumination. Soft light wraps around the subject, reducing sharp shadows and making textures appear more natural. This improves both photo and video quality instantly.
Color temperature is another important factor in indoor lighting. Mixing different light sources, such as warm bulbs and cool LEDs, can confuse your camera’s white balance and cause unnatural colors. Using lights with similar color temperatures helps maintain consistency and makes editing easier later.
Positioning lights correctly is just as important as choosing them. Placing a key light slightly above eye level creates flattering illumination, while a fill light helps soften shadows. Even simple adjustments like moving a lamp closer or farther away can dramatically improve exposure and overall camera performance indoors.
Control Harsh Light and Reduce Overexposure
Harsh lighting can easily ruin image quality by causing blown highlights and loss of detail. Direct sunlight, strong artificial lights, or camera flashes often create overly bright areas that your camera cannot recover. Learning to control and soften harsh light helps maintain balance and clarity in your images.
Diffusion is one of the best ways to manage strong light. Curtains, sheer fabrics, softboxes, or even white paper can spread light more evenly across your subject. Diffused light reduces contrast and helps the camera capture details in both bright and dark areas.
Shadows also need careful attention when dealing with harsh light. Deep shadows can hide important details and create unbalanced compositions. Using reflectors or light-colored surfaces to bounce light back into shadowed areas helps even out exposure and improves overall image quality.
Adjusting camera position can further reduce lighting issues. Slightly changing angles or stepping into shade can dramatically improve results. Instead of fighting harsh light, working around it allows your camera to perform at its best while preserving details, colors, and sharpness throughout the image.
Adjust Camera Settings (Phone & Camera)
Adjusting camera settings is one of the most effective ways to improve image quality without changing equipment. Both smartphones and dedicated cameras offer powerful controls that influence sharpness, exposure, and color accuracy. Understanding how these settings work allows you to adapt to different lighting conditions and subjects, helping you capture clearer, more professional-looking photos and videos consistently.
Optimize Resolution, Focus, and Exposure Settings
Resolution settings directly affect how much detail your camera captures. Setting your phone or camera to the highest available resolution ensures sharper images, especially when zooming or cropping later. Many devices lower resolution by default to save storage, so manually adjusting this option helps preserve fine details and textures.
Focus settings are equally important for image clarity. Auto-focus works well in many situations, but it can struggle with moving subjects or low light. Using tap-to-focus on phones or single-point focus on cameras gives you control over what stays sharp in the frame. Locking focus prevents the camera from constantly refocusing and creating soft images.
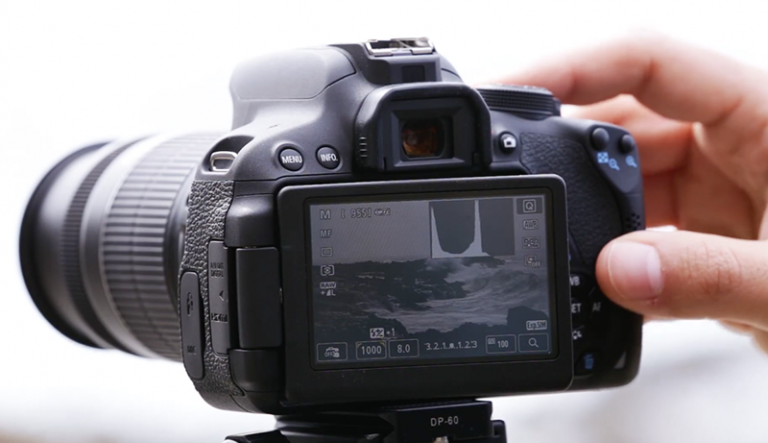
Exposure settings determine how bright or dark an image appears. Phones often allow you to adjust exposure by sliding a brightness control after tapping to focus. Dedicated cameras offer exposure compensation, which helps prevent overexposed highlights or overly dark shadows. Small exposure adjustments improve balance and preserve details.
Learning to fine-tune these settings builds confidence and consistency. Instead of relying fully on automatic modes, making simple manual adjustments allows your camera to respond better to real-world scenes and lighting conditions.
Control ISO, Shutter Speed, and Aperture Effectively
ISO controls your camera’s sensitivity to light and plays a major role in image quality. Higher ISO values brighten images in low light but introduce digital noise and grain. Keeping ISO as low as possible results in cleaner, sharper photos. When light is limited, increasing ISO gradually instead of jumping to high values helps maintain quality.
Shutter speed affects both brightness and motion clarity. Fast shutter speeds freeze movement, making them ideal for action shots or handheld photography. Slower shutter speeds allow more light but can cause motion blur if the camera or subject moves. Balancing shutter speed with available light ensures sharp images without unnecessary blur.
Aperture controls how much light enters the lens and affects depth of field. Wider apertures let in more light and create background blur, which helps isolate subjects. Narrower apertures keep more of the scene in focus but require more light. Smartphone cameras simulate aperture effects through software, while dedicated cameras offer physical aperture control.
Understanding how these three settings work together helps you adapt quickly. Adjusting them based on lighting and subject movement gives you better control over sharpness, exposure, and overall image quality.
Use White Balance, HDR, and Stabilization Features
White balance settings influence color accuracy and mood. Automatic white balance often works well, but mixed lighting can cause unnatural color tones. Manually selecting white balance presets, such as daylight or indoor lighting, helps maintain realistic colors. Consistent white balance also makes editing easier and more effective.
HDR, or High Dynamic Range, helps balance bright and dark areas in a scene. When enabled, the camera combines multiple exposures to preserve details in highlights and shadows. HDR is especially useful for landscapes, windows, and outdoor scenes with strong contrast. Using it selectively prevents overly flat or unnatural results.
Stabilization features play a critical role in image sharpness. Optical or electronic image stabilization reduces blur caused by hand movement, especially in low light. Enabling stabilization on both phones and cameras helps maintain clarity during handheld shooting and video recording.
Taking advantage of these built-in features enhances camera performance without extra effort. When combined with proper exposure and focus settings, white balance, HDR, and stabilization help produce cleaner, more balanced, and visually pleasing images across different shooting conditions.
Update Software and Camera Apps
Keeping your software and camera apps updated is an important step in maintaining and improving camera performance. Updates often include improvements that enhance image processing, fix bugs, and optimize how the camera handles different lighting conditions. Ignoring updates can mean missing out on quality enhancements that are already available for your device.
Camera manufacturers and smartphone developers regularly refine their image algorithms through software updates. These improvements can lead to better color accuracy, sharper details, and reduced noise, even though the hardware remains the same. Over time, these refinements can noticeably improve photo and video quality without any extra cost.
Camera apps also receive frequent updates that introduce new features or improve existing ones. Updated apps may offer better manual controls, enhanced HDR performance, or improved low-light modes. Third-party camera apps, in particular, often unlock advanced settings that are not available in default camera software.
Software updates also address stability and performance issues. A smoother, faster camera app reduces lag and prevents missed shots. Improved performance ensures the camera responds quickly when focusing, switching modes, or capturing images, which directly affects the final result.
Security and compatibility are additional benefits of staying updated. New software versions ensure camera apps work properly with your device’s operating system and accessories. Regular updates keep your camera experience reliable and consistent, allowing you to focus on capturing better images rather than troubleshooting technical issues.
Use Editing to Enhance Camera Quality
Editing is a powerful step that allows you to refine and elevate your photos beyond what the camera captures initially. Even well-shot images benefit from thoughtful adjustments that improve clarity, color balance, and detail. Editing does not mean changing reality, but enhancing what is already there so images appear cleaner, sharper, and more visually appealing across different platforms.
Adjust Brightness, Contrast, and Exposure for Balance
Brightness, contrast, and exposure are the foundation of photo editing and have a direct impact on perceived camera quality. Adjusting brightness helps correct images that appear too dark or washed out, allowing important details to become visible. Proper exposure ensures that highlights are not blown out and shadows are not overly deep, creating a balanced and natural look.
Contrast adjustments add depth by separating light and dark areas within an image. Increasing contrast slightly can make photos look sharper and more dynamic, while reducing contrast can soften harsh lighting. The key is moderation, as excessive contrast can remove detail and make images look unnatural.
Exposure adjustments refine how light is distributed across the photo. Small exposure changes can recover lost details and improve overall clarity. Editing tools often allow selective exposure adjustments, which help brighten darker areas without affecting highlights.
By carefully balancing these settings, images gain visual clarity and depth. This process enhances the camera’s output while preserving natural tones and realistic lighting, resulting in photos that appear professionally captured.
Improve Color Accuracy and White Balance
Color correction plays a major role in enhancing camera quality. Incorrect colors can make images feel dull, overly warm, or unnaturally cool. Adjusting white balance helps restore accurate color tones by correcting color casts caused by different lighting conditions, such as indoor bulbs or shaded outdoor areas.
Temperature and tint controls allow you to fine-tune warmth and color balance. Slight adjustments help skin tones look natural and landscapes appear vibrant without being oversaturated. Correct white balance ensures consistency across multiple images, which is especially important for content creation or visual storytelling.
Saturation and vibrance adjustments enhance color intensity. Saturation increases all colors equally, while vibrance targets muted tones without affecting skin tones too strongly. Using vibrance instead of saturation helps maintain realism while improving visual appeal.
Color grading can also enhance mood and atmosphere. Subtle adjustments to highlights and shadows add personality without overpowering the image. When done carefully, color correction makes photos feel more polished and lifelike, significantly improving the perceived quality of the camera used.
Sharpen Details and Reduce Noise Carefully
Sharpening enhances fine details and improves image clarity, making photos appear crisper and more defined. Applying sharpening moderately helps bring out textures and edges without creating harsh outlines. Over-sharpening can introduce artifacts and make images look artificial, so subtle adjustments are always more effective.
Noise reduction is especially important for images taken in low light or at high ISO settings. Digital noise appears as grainy textures that reduce image quality. Noise reduction tools smooth these imperfections while preserving important details. Balancing noise reduction and sharpness prevents images from looking overly soft.
Selective sharpening allows you to enhance key areas such as eyes, textures, or focal points while leaving backgrounds untouched. This approach maintains depth and realism while drawing attention to important elements within the frame.
Editing software often includes advanced tools for clarity and texture adjustments. These controls enhance mid-tone contrast and detail without affecting overall exposure. When used carefully, sharpening and noise reduction transform average images into clean, high-quality visuals that reflect strong camera performance.
Improve Camera Quality for Specific Uses
Camera quality requirements change depending on how and where images or videos are used. A setup that works well for photography may not be ideal for video calls, social media, or content creation. Understanding how to adjust camera settings and techniques for specific purposes helps you achieve better results without changing equipment, ensuring clarity, consistency, and professional-looking output.
Improve Camera Quality for Video Calls and Online Meetings
Video calls require clear visuals, stable framing, and balanced lighting to maintain a professional appearance. Positioning the camera at eye level creates a natural perspective and avoids unflattering angles. A stable surface or tripod prevents shaking, which can be distracting during calls and reduce perceived quality.
Lighting is especially important for video calls. Facing a window or soft light source helps illuminate your face evenly and reduces shadows. Avoid strong backlighting from windows or bright backgrounds, as it can cause the camera to darken your face. Soft indoor lighting placed slightly above eye level improves clarity and skin tone.
Camera settings also affect call quality. Setting the camera to its highest supported resolution ensures sharper video, while disabling digital zoom prevents quality loss. Many video conferencing apps allow manual adjustments for brightness and contrast, which help balance exposure in different environments.
Background control further enhances video quality. A clean, uncluttered background keeps focus on you and reduces visual noise. For added polish, slight background blur helps separate you from your surroundings while maintaining a professional appearance.
Enhance Camera Quality for Social Media Content
Social media platforms prioritize visually appealing content, making camera quality essential for engagement. Shooting in well-lit environments ensures vibrant colors and sharp details. Natural light is ideal, but soft artificial lighting works well for consistent results, especially for indoor content.
Framing and composition play a major role in perceived quality. Keeping the subject centered and aligned with platform-specific formats improves presentation. Vertical framing works best for short-form videos, while square or horizontal layouts suit posts and thumbnails. Proper framing reduces the need for heavy cropping, preserving image clarity.
Camera settings should match content style. Using higher frame rates creates smoother motion for videos, while slightly lower contrast helps retain detail after platform compression. Many platforms compress uploads, so exporting content at high quality ensures better final results.
Editing also enhances social media visuals. Adjusting brightness, color balance, and sharpness makes content stand out in feeds without looking overprocessed. Consistent visual style across posts builds recognition and reinforces quality, making your camera output appear more professional and engaging.
Improve Camera Quality for Photography and Creative Projects
Photography and creative projects require attention to detail, composition, and technical precision. Using manual or semi-manual camera modes allows better control over exposure and focus. Adjusting ISO, shutter speed, and aperture based on the scene ensures cleaner and more intentional results.
Lighting choices shape the creative outcome. Soft lighting highlights textures and tones, while dramatic lighting adds depth and mood. Experimenting with angles and shadows enhances visual interest and helps convey emotion or storytelling within images.
Stability and precision are critical for photography. Using a tripod allows slower shutter speeds without blur, improving sharpness in low light. Manual focus ensures accuracy, especially for macro or portrait shots where details matter.
Post-processing completes creative projects by refining colors, contrast, and sharpness. Editing enhances artistic vision while maintaining realism. Tailoring camera techniques to creative goals allows photographers to maximize quality and produce images that reflect both technical skill and personal style.
When to Upgrade Your Camera or Phone
Knowing when to upgrade your camera or phone depends on how well your current device meets your needs. If you consistently struggle to capture clear images despite proper lighting, clean lenses, and optimized settings, your hardware may be reaching its limits. Older devices often lack the sensor capability needed for sharp details and good low-light performance.
One clear sign it may be time to upgrade is poor low-light quality. Excessive noise, blurry photos, and slow focus in dim conditions usually indicate outdated sensor technology. Newer cameras and phones handle low light more efficiently, producing cleaner images with better color accuracy.
Another factor to consider is performance and speed. Slow camera apps, delayed shutter response, or frequent crashes can cause missed moments and frustration. Upgraded devices offer faster processing, improved autofocus, and more reliable performance, making everyday shooting smoother and more enjoyable.
Your creative or professional needs may also change over time. If you require higher resolution, better video stabilization, or advanced features like improved zoom or manual controls, an upgrade can expand what you’re able to create. Modern devices provide tools that support higher-quality content across multiple platforms.
Compatibility and software support are additional reasons to upgrade. When your device no longer receives updates, camera improvements stop entirely. Upgrading ensures access to the latest software enhancements and features. Ultimately, upgrading makes sense when limitations consistently prevent you from achieving the quality you need.
Common Mistakes That Reduce Camera Quality
Many people unknowingly reduce their camera quality by relying too heavily on automatic settings. While auto mode is convenient, it does not always choose the best exposure, focus, or white balance for every scene. This can result in blurry images, poor color accuracy, or uneven lighting, especially in challenging environments.
Poor lighting is another common mistake that significantly affects image quality. Shooting in dim or uneven light forces the camera to increase ISO, which introduces grain and noise. Using harsh flash lighting can also create washed-out highlights and strong shadows, making photos look unnatural and flat.
A dirty lens is a simple yet often ignored issue. Fingerprints, dust, and smudges reduce sharpness and contrast, causing images to appear soft or hazy. Regularly cleaning the lens with a microfiber cloth is an easy way to instantly improve clarity without adjusting any settings.
Camera shake is another major factor that reduces quality. Holding the camera with unsteady hands, especially in low light, can cause motion blur. Not using stabilization features or a stable surface makes images less sharp and professional-looking.
Over-editing is also a frequent mistake. Excessive sharpening, contrast, or saturation can make photos look artificial and degrade quality. Subtle adjustments preserve natural detail. Finally, ignoring software updates can limit performance, as updates often improve camera processing and fix quality-related issues.
People Also Asked
Can You Improve Camera Quality Without Buying New Equipment?
Yes, you can significantly improve camera quality without upgrading your device. You just need to focus on fundamentals like lighting, camera settings, and lens cleanliness. Using natural or soft lighting reduces noise and improves clarity. Adjusting resolution, focus, and exposure instead of relying on auto mode helps your camera perform better. Simple habits like steady shooting and light editing also make a noticeable difference.
Why Does Lighting Matter So Much for Camera Quality?
Lighting directly affects sharpness, color accuracy, and detail. When light is poor, your camera increases ISO, which causes grain and blur. Proper lighting allows your camera to capture more information with less processing. Facing light sources, avoiding harsh backlighting, and using soft indoor lighting help you achieve clearer and more balanced images in almost any situation.
Do Camera Settings Really Make a Difference?
Camera settings play a major role in image quality. Adjusting ISO, shutter speed, focus, and exposure allows you to adapt to different environments. Lower ISO reduces noise, proper shutter speed prevents motion blur, and correct focus keeps subjects sharp. Learning basic settings gives you more control and produces consistent, high-quality results.
How Does Cleaning the Lens Improve Image Quality?
A dirty lens can make images look blurry, faded, or hazy. Dust and fingerprints block light from entering the camera properly, reducing sharpness and contrast. Cleaning the lens with a microfiber cloth before shooting instantly improves clarity. This simple step is often overlooked but has one of the fastest impacts on camera quality.
Does Editing Really Help Improve Camera Quality?
Editing enhances the image your camera captures by correcting exposure, color, and sharpness. Adjusting brightness, contrast, and white balance makes photos look cleaner and more natural. Light sharpening and noise reduction improve detail without damaging quality. Editing should enhance, not overpower, the original image to maintain realism.
When Should You Consider Upgrading Your Camera or Phone?
You should consider upgrading when your device consistently struggles with low light, slow performance, or lacks features you need. If you already use proper lighting, clean lenses, optimized settings, and editing but still get poor results, hardware limitations may be the issue. Newer devices offer better sensors, faster processing, and improved stabilization for higher-quality output.
Conclusion
Improving camera quality is not about owning the most expensive device, but about understanding how to use what you already have. Small changes in lighting, settings, stability, and preparation can dramatically improve the way your photos and videos look. These practical steps help you achieve clearer, sharper, and more natural results in everyday situations.
Consistency plays a major role in long-term improvement. Cleaning your lens, updating software, adjusting camera settings, and using light editing regularly build better habits. Over time, these actions train you to notice details that directly affect image quality and visual appeal.
When you understand How to Make My Camera Quality Better, you gain control over your results instead of relying on luck or automatic modes. With the right techniques and awareness, your camera becomes a reliable tool for capturing high-quality images that truly reflect what you see.