7 Easy Steps to Transfer Camera Photos to Your Computer
Get your camera fully charged and computer updated, then connect using the original USB cable or insert your SD card into a card reader. Power on the camera and switch to Review mode if needed.
Open File Explorer or Finder, locate the DCIM folder, and select the photos you want. Copy them to your desired folder, then safely eject the device to prevent data loss.
Follow these steps carefully, and you’ll avoid common transfer hiccups while gaining tips for smoother photo management.
Key Takeaways
- Fully charge your camera battery and power it on before connecting to avoid interruptions during photo transfer.
- Use the original or compatible USB cable to connect the camera, or remove the memory card and use a card reader.
- Access the DCIM folder via File Explorer (Windows) or Finder (Mac) to locate and select photos for transfer.
- Copy selected photos and paste them into a designated folder on your computer for organized storage.
- Safely eject the camera or memory card after transfer to prevent data corruption and confirm all files are fully copied.
Get Your Camera and Computer Ready
Before transferring photos, make certain your camera’s battery is fully charged to prevent any interruptions. A fully powered camera guarantees a stable connection and prevents data loss during transfer.
Next, prepare your computer by confirming operating system updates, especially if you’re using a Mac. The latest macOS versions improve compatibility with various camera models.
If your camera connects via USB, use the original or a compatible USB cable to link the camera and computer securely.
Alternatively, if you prefer using a memory card, remove it carefully from the camera and insert it directly into the computer’s SD card slot or an external card reader.
Finally, power on the camera and switch it to Review mode if required. This enables your computer to recognize the device promptly and facilitates smooth photo transfer.
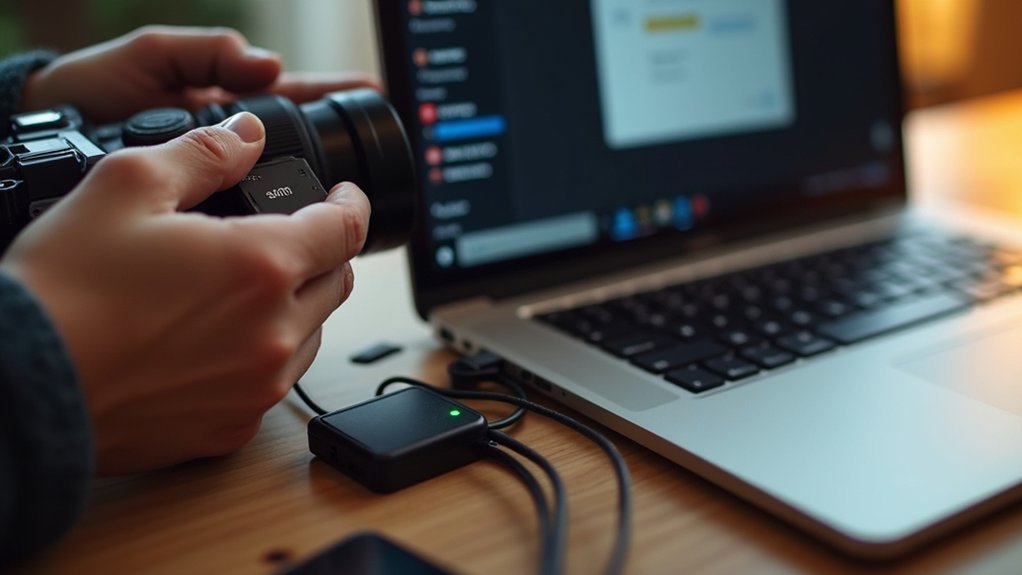
Connect Your Camera With a USB Cable
Connect your camera to your computer using the original USB cable or a compatible one that supports file transfer. Once connected, power on your camera and, if required, set it to Review mode to enable detection.
On Windows, your computer should automatically recognize the device. Open File Explorer and navigate to the DCIM folder to view and select pictures to transfer.
On a Mac, the Photos app usually launches automatically, allowing you to import photos efficiently. Use the app’s interface to import photos selectively or all new files.
Always make sure you safely eject your camera before disconnecting the USB cable to prevent data corruption. This process guarantees a reliable connection to your computer and a smooth transfer of your valuable pictures.
Connect Your SD Card With a Card Reader
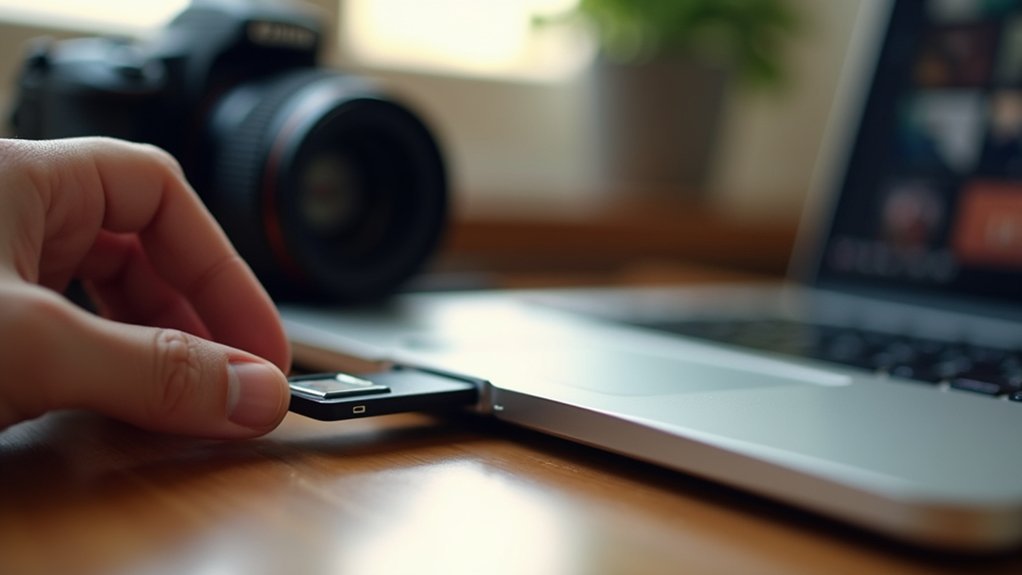
Using a card reader can really speed up photo transfers because it gives you a direct connection to your SD card.
Before you pop the card in, just make sure it’s accessible and works with your reader’s interface—whether that’s built-in or USB.
Setting up the reader properly is key; it helps your computer recognize the card quickly and reliably, so you get seamless access to your files.
Benefits of Card Readers
One key advantage of card readers is their ability to greatly speed up photo transfers from your SD card to your computer. Unlike direct camera connections, a card reader offers faster data transfer rates, so you can quickly transfer photos and videos without waiting.
When you plug the card reader into your computer, the system should recognize it as an external drive, enabling immediate access to your files. This seamless recognition eliminates common compatibility issues found with some cameras.
Moreover, card readers let you directly manage files on the card, allowing you to view, organize, or delete photos before transferring them. These devices also support multiple card formats, making them versatile tools.
Lightweight and affordable, card readers provide an efficient, reliable solution for handling your media.
Card Reader Setup Tips
Start by removing the SD card from your camera and ensuring the lock switch on the card is set to the open position.
Next, insert the SD card firmly into your computer’s built-in card reader or an external USB card reader, confirming a secure connection.
Open File Manager on Windows to locate the SD card, which appears as a removable drive.
Navigate to the DCIM folder to access your photos.
Select the files you want to transfer and copy them to your desired location on the computer.
Once the transfer completes, safely eject the SD card through File Manager to prevent data corruption.
Only after ejecting, remove the SD card from the card reader and reinsert it into your camera for continued use.
Locate Photos on Your Camera or SD Card via Computer
After you connect your camera or pop in the SD card, go ahead and open File Explorer if you’re on Windows, or Finder if you’re using a Mac.
You’ll want to find your device listed there. Once you’ve got it open, look for the DCIM folder — that’s where all your photos hang out.
Inside, you’ll see subfolders, usually organized by date or session, which makes it easier to find what you’re looking for.
Just keep an eye out for the file formats like JPEG or RAW; those are your images.
Then, you can pick and choose the files you want to transfer.
Accessing DCIM Folder
Although the DCIM folder serves as the standardized location for storing digital camera images, you must first connect your camera or insert its SD card into your computer to access it.
Confirm the camera is powered on and in Review mode so the computer recognizes the device.
Once connected, open your system’s file management tool to locate the SD card or camera storage. Inside the DCIM folder, photos are neatly organized into subfolders based on dates or events, simplifying navigation.
To import, select your desired photos within these subfolders and copy or drag them to a local folder on your computer.
Accessing the DCIM folder directly provides a clear view of all images stored on your device, streamlining the photo transfer process.
Using File Explorer
A crucial step in transferring photos involves using File Explorer to locate your camera or SD card on your computer.
Start by connecting your device using a USB cable or inserting the SD card into the SD card reader.
On Windows, open File Explorer and find your device listed under “Devices and drives.”
Navigate to the DCIM folder, where photos from your camera are stored.
Select the images you want to transfer and either drag and drop them to a folder on your computer or use the Import Selected feature if available.
After transferring, always safely eject your camera or SD card to avoid data corruption.
This precise method guarantees a smooth, error-free photo transfer process.
Identifying Photo Formats
When you connect your camera or insert your SD card into your computer, the photos are usually stored in specific file formats. Your system needs to recognize these formats to display and transfer the photos correctly. Photos from a camera or SD card often use formats like JPEG or RAW.
Some cameras store images in proprietary formats on internal memory. Knowing these formats helps you locate and manage image files efficiently.
| Format | Description | Common Usage |
|---|---|---|
| JPEG | Compressed, widely used | Most photos |
| RAW | Uncompressed, high quality | Professional use |
| TIFF | Lossless compression | Archival purposes |
| PNG | Lossless, supports transparency | Limited in cameras |
| Proprietary | Manufacturer-specific | Internal memory |
Check your camera settings to verify where photos are saved. This helps avoid confusion between SD card and internal memory storage.
Select and Copy Photos for Transfer to Your Computer
Connect your camera or insert your SD card to your computer, then open File Explorer on Windows or Finder on Mac to locate the device under “Devices” or “Locations.”
Navigate directly to the DCIM folder, where your photos are stored, and select the images you want to transfer by pressing CTRL + A to highlight all or clicking individual files.
Once selected, right-click the photos and choose “Copy.”
Next, navigate to the destination folder on your computer where you want the photos saved. Right-click inside this folder and select “Paste” to transfer the copied photos.
This process guarantees your photos are duplicated safely onto your computer’s storage, allowing you to manage or edit them without affecting the originals on your camera or SD card.
Safely Eject Your Camera or SD Card After Photo Transfer
After copying your photos to the computer, you need to safely eject your camera or SD card to prevent data loss or corruption.
First, verify all file transfers finish completely. If your camera prompts “Trust This Computer,” confirm it to allow safe communication.
On Windows, open File Explorer, right-click your device under “This PC,” and select “Eject.”
For Mac, locate your device in Finder and click the upward arrow icon next to it to eject.
If using an SD card, physically lock it if the switch is available before ejecting.
Only disconnect the camera or remove the SD card from the computer’s USB port once the system confirms it’s safe to do so.
This careful process avoids interrupting data writing, preserving file integrity and preventing future access issues.
Troubleshoot Common Photo Transfer Issues
Although transferring photos typically proceeds smoothly, you might encounter issues such as your camera not being recognized by the computer or interrupted file transfers.
First, try connecting the camera to your computer using a different USB port or cable to rule out hardware faults.
Start by switching USB ports or cables to eliminate hardware issues during camera connection.
Verify your camera is powered on and set to the correct mode, like Review mode, to facilitate file access. If you’re using an SD card, confirm it’s properly inserted and accessible. Low battery power can also cause connection failures, so charge your camera fully.
On some devices, especially smartphones, you’ll need to tap “Trust” or “Allow” when prompted to permit data transfer, similar to importing videos from your iPhone.
Restart both devices if problems persist to refresh connections and resolve software glitches.
Frequently Asked Questions
Can I Transfer Photos Wirelessly From My Camera to My Computer?
Yes, you can transfer photos wirelessly from your camera to your computer if your camera supports Wi-Fi or Bluetooth.
Connect both devices to the same network, activate the camera’s wireless transfer mode, and use the manufacturer’s companion app or software.
Make sure your camera’s firmware is updated for the best compatibility.
Transfer speed depends on file size and signal strength, so keep your devices close and check settings for the best performance.
What Software Is Best for Organizing Transferred Photos?
For organizing transferred photos, Adobe Lightroom stands out with its robust tagging, rating, and advanced search features.
It lets you efficiently manage large collections.
If you prefer cloud integration, Google Photos offers automatic organization and easy sharing.
On Windows, Microsoft Photos provides basic editing and organization without extra installs.
For professionals, Capture One delivers powerful cataloging plus superior color grading.
ACDSee Photo Studio combines customizable categories with metadata management for precise file retrieval.
Choose based on your workflow needs.
How Can I Transfer Photos to a Mac From a Windows Camera?
You’ll feel like a tech wizard when you transfer photos from a Windows camera to your Mac! Just connect the camera via USB, turn it on, and set it to file transfer mode.
If that fails, use an SD card reader.
Open the Photos app; it’ll detect your device automatically. Select photos to import, then safely eject the camera or SD card in Finder before unplugging.
This precise method guarantees a smooth, error-free transfer every time.
Are There File Formats I Should Avoid When Transferring Photos?
You should avoid proprietary formats like certain RAW files unless your software supports them, as they can cause compatibility issues.
Also, steer clear of less common formats like TIFF or HEIC unless you’re sure your system can open them.
Stick to JPEG for universal compatibility and PNG if you need higher quality or transparency, though PNG files are larger.
Choosing widely supported formats helps maintain image integrity and guarantees smooth transfers without special software.
Can I Transfer Photos Directly to an External Hard Drive?
Yes, you can transfer photos directly to an external hard drive by connecting it to your computer first.
When you connect your camera via USB or use a memory card reader, choose the external hard drive as the destination folder in your file navigator.
Make sure the drive has enough free space.
After transferring, always safely eject the external hard drive to avoid data corruption or loss during the process.
Conclusion
Transferring photos to your computer is straightforward when you follow these steps carefully. For example, a photographer once struggled with corrupted files after improper ejection but avoided data loss by safely ejecting the SD card each time.
Remember to connect devices correctly, locate files precisely, and always eject safely to prevent damage. Mastering these technical details guarantees your photos transfer smoothly and remain intact for editing or sharing.