Why Is My Backup Camera Not Working and How Can I Fix It Fast?
If your backup camera isn’t working, start by checking for dirt or obstructions on the lens and clean it thoroughly. Next, inspect wiring connections for looseness or damage and secure them as needed.
Restart your vehicle to reset the system and update any software if possible. If the screen flickers or stays black, the display or camera might need professional attention.
Keep going to investigate more fixes and know when it’s time to call a pro.
Key Takeaways
- Check for loose or disconnected wiring and secure all connections to restore camera functionality quickly.
- Clean the camera lens to remove dirt, fog, or obstructions that cause blurry or no images.
- Restart your vehicle to reset the backup camera system and clear minor software glitches.
- Update your vehicle’s software if possible to fix bugs affecting the camera’s performance.
- Inspect the display screen for faults and consider professional help if problems persist or wiring is damaged.
Common Backup Camera Problems and Causes
When your backup camera fails, it’s often due to common issues like dirty or foggy lenses that reduce image clarity and visibility. This is a common reason to clean the camera lens promptly to restore clear images.
Besides lens contamination, wiring harnesses can suffer from looseness or fraying, causing intermittent connectivity and resulting in backup camera issues.
Temporary glitches in the camera’s software or sensor faults also disrupt functionality but can often be resolved with a system reset or firmware update.
Moisture buildup inside the housing, usually from seal failures, further degrades image quality and may cause electrical problems.
Environmental stressors like UV exposure and temperature shifts deteriorate camera components over time, impacting performance.
Identifying these causes lets you target fixes efficiently and get your backup camera working fast.
Checking and Cleaning Your Backup Camera Lens
Although backup cameras are designed to withstand outdoor conditions, you should regularly inspect the lens for dirt, grime, or water spots. These can obstruct the view and distort the image. A common issue affecting visibility is buildup on the lens.
To clean the lens effectively, use a microfiber cloth with mild glass cleaner. Avoid harsh chemicals or abrasive materials that could damage the lens.
| Issue | Cause | Solution |
|---|---|---|
| Blurred image | Dirt or water spots | Clean lens with microfiber cloth |
| Obstructed view | Debris or snow | Remove physical obstructions |
| Scratches | Harsh cleaning materials | Use gentle cleaning tools |
| Stubborn dirt | Dried grime | Apply mild cleaner, wipe gently |
| Poor visibility | Infrequent cleaning | Establish weekly cleaning routine |
Keeping the lens clean guarantees peak performance and maintains clear visibility.
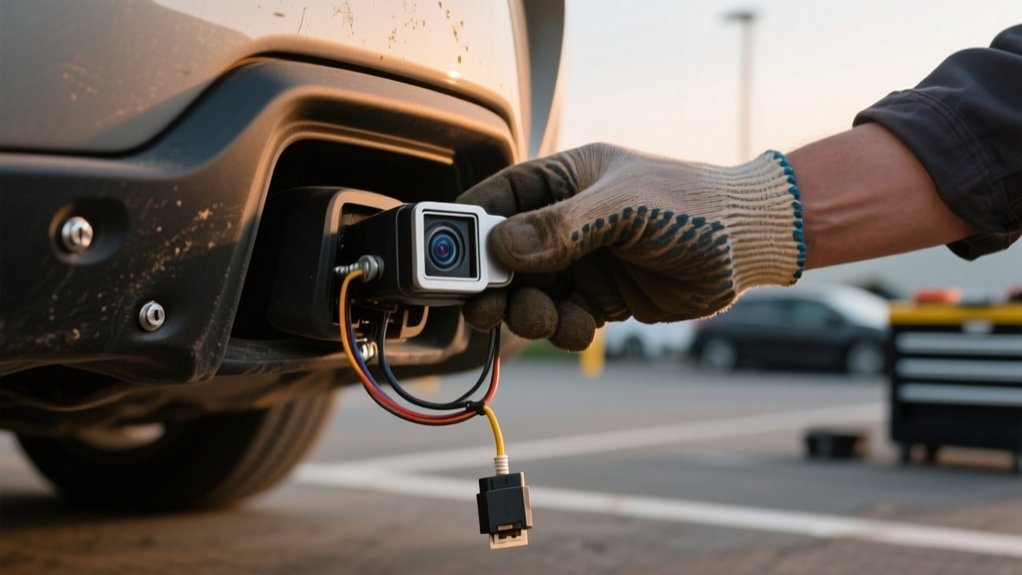
Fixing Wiring and Connection Problems
One key step in fixing backup camera issues is inspecting the wiring and connections for faults.
Start by examining the wiring harness for loose, worn, or corroded connectors, especially near moving parts like tailgate hinges. These areas can cause connection problems.
Use a multimeter to check that the power source delivers stable voltage to the camera connector.
Clean electrical contacts with contact cleaner to remove corrosion or debris that might disrupt signals. After cleaning, securely reconnect all plugs and apply dielectric grease to protect contacts from future corrosion and moisture intrusion.
Addressing these wiring and connection issues guarantees consistent power flow and signal integrity.
This resolves many common backup camera malfunctions efficiently and prevents intermittent failures caused by environmental factors.
How to Reset Your Backup Camera System
If your backup camera isn’t responding, performing a system reset can often restore functionality.
Start by turning off your vehicle and removing the key to guarantee all electrical components lose power.
Begin by powering down your vehicle and removing the key to ensure all electronics shut off.
Next, disconnect the negative battery terminal and leave it disconnected for ten minutes. This step drains residual power from the backup camera system.
Afterward, reconnect the negative battery terminal securely and start the vehicle to restore power. Shift into reverse to check if the backup camera activates correctly.
If the camera remains unresponsive, further troubleshooting will be necessary, such as inspecting wiring connections or consulting a professional technician.
Resetting the backup camera system this way is a quick, effective troubleshooting step that resolves many power-related malfunctions.
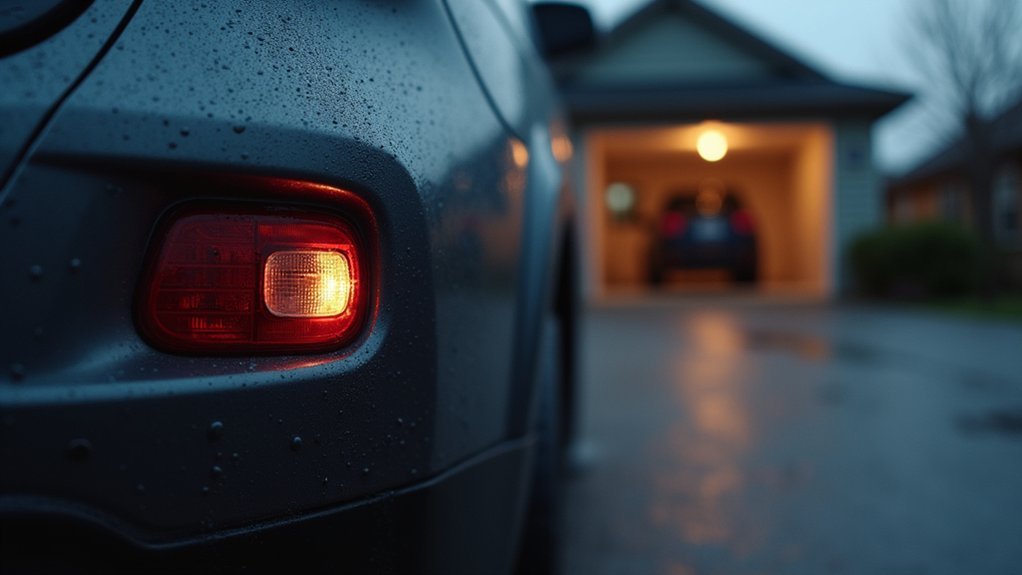
Fixing Black or Flickering Backup Camera Screens
Start by figuring out why your backup camera screen is black or flickering. Usually, the problem comes down to power delivery or signal issues.
So, take a close look at all the wiring and connections. Make sure there’s no damage, looseness, or corrosion that could be messing with the display.
Next, grab a multimeter to check the voltage—this helps confirm if power is flowing correctly.
Also, if your setup uses wireless components, double-check that they’re properly aligned and not facing any interference.
Getting these basics right often clears up the problem.
Diagnosing Black Screen Causes
Why does your backup camera screen go black or flicker unexpectedly? Camera problems like a black screen often stem from disrupted video signal or power issues.
First, inspect all wiring connections for looseness or damage, as faulty cables frequently cause signal loss.
Check the power button functionality and verify the camera receives power by testing voltage at the connector with a multimeter.
Don’t overlook blown fuses related to the backup camera system. They can cut power and cause the screen to go black.
Also, examine the camera housing for moisture or condensation, which can disrupt the video feed.
If these steps don’t resolve the issue, the problem may lie within the control module or internal wiring, requiring professional diagnostics to fix complex faults.
Resolving Flickering Display Issues
Although flickering backup camera screens can be frustrating, you can often fix them by addressing wiring issues and interference. Flickering screen problems frequently stem from loose wiring connections that cause intermittent power or signal loss.
To resolve this, try these steps:
Secure all connectors along the camera and display cables to eliminate loose wiring connections. Inspect wires for damage or exposed sections and repair any issues. Install a noise filter to reduce interference from other electronic devices.
Use a multimeter to check the power supply voltage at the camera connector for stability. Perform regular maintenance by inspecting wiring and ensuring proper installation to prevent future flickering.
Checking Wiring And Connections
Three critical areas to check when fixing a black or flickering backup camera screen are the wiring harness, connectors, and power supply. Start by inspecting the wiring harness for loose connections, corrosion, or frayed wires. Pay special attention near hinge points where flexing can cause internal breaks.
Next, verify all connectors are clean and securely fastened. This helps prevent flickering images or black screens. Finally, use a multimeter to confirm the power supply at the camera connector. Reposition wiring away from high-power electronics to reduce electromagnetic interference.
| Issue | Solution |
|---|---|
| Loose connections | Secure and clean connectors |
| Frayed wiring | Repair or replace damaged wiring harness |
| Power supply issues | Test voltage and verify proper power supply |
When to Call a Pro for Backup Camera Repairs
When should you call a professional for backup camera repairs? If basic troubleshooting fails, it’s time to seek expert help. A professional diagnosis can identify issues with the camera module or internal components that aren’t visible to you.
Consider calling a certified technician if you notice:
- Persistent black screen or poor image quality
- Frayed wiring or visible internal damage
- Software glitches unresolvable by resets
- Complex systems in electric or high-tech vehicles
- Calibration or power supply issues affecting sensor performance
Certified pros have the tools to safely assess and repair intricate problems, ensuring your backup camera functions effectively and maintains vehicle safety.
Don’t risk further damage. Get professional support when these signs appear.
Frequently Asked Questions
Can Weather Conditions Affect Backup Camera Performance?
Yes, weather conditions can affect your backup camera’s performance.
Moisture from rain or snow can fog the lens or cause electrical shorts. Freezing temperatures may impair infrared sensors, reducing night vision, while heat can degrade seals, allowing moisture inside. Dirt and grime also blur the lens.
To fix this fast, regularly clean the lens, check seals, and consider installing protective covers to shield your camera from harsh weather.
Do Backup Cameras Drain the Car Battery if Faulty?
Yes, a faulty backup camera can drain your car battery if it draws power continuously due to wiring issues or a short circuit.
To fix this fast, inspect the wiring and connections for damage or improper installation.
Disconnect the camera or check the fuse if you suspect battery drain.
Regular maintenance helps prevent excessive power consumption and guarantees your camera only operates when it should, preserving battery health and vehicle functionality.
Are Aftermarket Backup Cameras Compatible With All Vehicles?
Aftermarket backup cameras aren’t compatible with all vehicles. You’ll need to verify compatibility based on your car’s make, model, year, and wiring system.
Some require specific wiring harnesses or adapters for proper installation. Universal-fit models exist but often lack seamless integration.
To avoid issues, check technical specs carefully and consult vehicle-specific forums or expert reviews. Doing this guarantees you select a camera that works flawlessly with your vehicle’s electrical and display systems.
How Often Should Backup Camera Software Be Updated?
You should update your backup camera software every 6 to 12 months to maintain peak performance.
Studies show that 75% of camera malfunctions stem from outdated firmware.
Regular updates fix bugs, improve connectivity, and guarantee compatibility with your vehicle’s system.
Check your owner’s manual or infotainment notifications for update prompts.
Staying current minimizes technical issues, so don’t skip these updates.
They keep your camera reliable and functioning when you need it most.
Can a Backup Camera Malfunction Cause Other Electrical Issues?
Yes, a backup camera malfunction can cause other electrical issues.
If your camera’s wiring is corroded or improperly grounded, it can create voltage fluctuations affecting nearby components.
Blown fuses or intermittent power loss in the camera circuit might disrupt other accessories.
To fix this fast, inspect and clean connections, check fuses, and guarantee proper grounding.
Regular maintenance prevents cascading electrical problems and keeps your vehicle’s systems reliable.
Conclusion
Did you know that over 30% of backup camera issues stem from simple wiring or connection problems? By regularly checking and cleaning your camera lens, inspecting wiring, and performing system resets, you can quickly fix most common issues yourself.
If you encounter persistent black or flickering screens, don’t hesitate to call a professional. Staying proactive helps guarantee your backup camera works reliably, keeping you safe and saving costly repairs down the line.