How to Mount Blink Camera (Step-by-Step Guide for Indoor & Outdoor Use)
Mounting a home security camera is one of the most important steps in protecting your space. A well-placed Blink camera helps capture clear footage, reduces blind spots, and improves overall monitoring. Taking time to understand the setup process leads to better performance and long-term reliability.
Many homeowners want a simple, practical approach that feels manageable from start to finish. Learning how to mount blink camera properly allows you to position it at the right height, angle, and location for daily use. This creates a balance between visibility, coverage, and ease of access.
Blink cameras are designed with flexibility in mind, making them suitable for both indoor and outdoor areas. Walls, ceilings, and flat surfaces can all work well when chosen thoughtfully. Proper mounting also helps protect the device from weather exposure and accidental movement.
With a clear plan and the right tools, the installation process becomes smooth and stress-free. Understanding placement basics before mounting helps ensure your camera delivers consistent, reliable results and keeps your home or office monitored with confidence.
How to Mount Blink Camera?
Choosing the right location is the first step to successful installation. Blink cameras work best when mounted where they have a clear view of entry points such as doors, driveways, or hallways. Avoid placing the camera directly into sunlight or reflective surfaces, as this can affect video clarity and motion detection accuracy.
Before mounting, prepare the surface and gather the necessary tools. Most Blink cameras include a mounting bracket, screws, and anchors for drywall or wood. Make sure the surface is clean and stable so the camera remains secure over time. A steady mount prevents unnecessary movement and false motion alerts.
Understanding how to mount blink camera correctly also means paying attention to height and angle. Mounting the camera about 7 to 10 feet above the ground provides a balanced view while still capturing facial details. Adjust the angle slightly downward to cover the desired area without missing important activity.
Once the bracket is secured, attach the camera and fine-tune its position using the Blink app’s live view feature. This step helps ensure the camera captures the intended area before finalizing the setup. Small adjustments can significantly improve coverage and image quality.
For outdoor installations, consider weather protection and accessibility. Blink cameras are designed to withstand outdoor conditions, but placing them under eaves or sheltered areas adds extra protection. Proper mounting not only improves performance but also ensures long-term reliability and consistent home security.
Things to Know Before Mounting a Blink Camera
Before installation, it is important to understand your monitoring goals. Knowing what areas you want to cover—such as entrances, walkways, or interior spaces—helps determine the best mounting location. Thoughtful planning ensures your camera captures meaningful activity instead of unnecessary motion.
Another key factor to consider is camera placement and height. Mounting too low can increase false alerts from pets or passing objects, while mounting too high may reduce detail. For most setups, positioning the camera between 7 and 10 feet high provides a clear and balanced view of the area.
Surface type also plays a major role in mounting success. Walls made of wood, drywall, brick, or concrete may require different tools or anchors. Ensuring the surface is solid and stable prevents the camera from shifting over time, which helps maintain consistent video coverage.
Before mounting, check your Wi-Fi signal strength at the chosen location. A weak connection can lead to delayed notifications or missing footage. Since Blink cameras rely on wireless connectivity, stable signal access is essential for smooth performance.
Weather exposure is another important consideration, especially for outdoor installations. While Blink cameras are designed for outdoor use, placing them under eaves or sheltered areas can extend their lifespan. Protection from heavy rain, direct sunlight, and extreme temperatures helps maintain long-term reliability.
Lastly, consider accessibility for maintenance. Batteries will need replacement, and occasional adjustments may be necessary. Mounting the camera where it is easy to reach saves time and ensures your security system remains effective and dependable.
Best Placement for Blink Cameras
Choosing the best placement for your security cameras directly impacts how effective they are at monitoring your space. Proper positioning improves motion detection accuracy, video clarity, and overall coverage. Understanding height, angles, and environmental factors helps you get the most reliable performance from your Blink system while reducing false alerts and blind spots in both indoor and outdoor areas.
Where to Mount Blink Cameras Indoors
Indoor camera placement should focus on visibility, coverage, and minimal interference. Mounting Blink cameras at a recommended height of 7 to 9 feet allows the lens to capture a wider field of view while keeping the device out of easy reach. This height also helps reduce unnecessary motion alerts triggered by pets or objects moving close to the floor.
Entry points are among the most important indoor locations. Placing cameras near front and back doors helps monitor who enters and exits your home. Hallways are another ideal area, as they naturally funnel movement and allow the camera to capture activity across multiple rooms without needing several devices.
Living rooms and nurseries benefit from careful positioning. In living rooms, mount the camera in a corner to cover seating areas and access points without invading privacy-sensitive zones. In nurseries, placement should prioritize a clear view of the crib while avoiding direct angles that may cause glare from night lights or lamps.
Lighting conditions also play a major role in indoor performance. Avoid mounting cameras directly opposite windows, mirrors, or glossy surfaces, as backlighting and reflections can distort images and interfere with motion detection. Adjusting the angle slightly downward helps maintain balanced lighting throughout the day.
Before finalizing the mount, use the live view feature in the app to test visibility. Making small adjustments at this stage ensures the camera captures meaningful activity and delivers consistent indoor monitoring.
Where to Mount Blink Cameras Outdoors
Outdoor placement focuses on protecting your property while ensuring the camera remains functional in changing conditions. Common outdoor locations include the front door, backyard, garage, and side yard, as these areas experience the most activity. Positioning cameras to monitor these spaces improves overall home security coverage.
Mounting height is just as important outdoors as it is indoors. Installing cameras between 7 and 10 feet high helps deter tampering while still capturing clear facial and movement details. A slight downward tilt is ideal, as it allows the camera to focus on activity zones such as walkways, driveways, and doorways without missing motion near the ground.
The angle of the camera directly affects motion detection accuracy. A gentle downward tilt helps prevent false alerts caused by passing cars or distant movement. It also improves nighttime visibility by keeping infrared detection focused on relevant areas rather than open sky or streetlights.
Environmental exposure should always be considered. Avoid placing cameras in areas with constant direct sunlight, as glare and heat can impact video quality. Similarly, avoid spots that receive heavy rain or snow exposure. Mounting under eaves or roof overhangs adds an extra layer of protection.
Finally, test connectivity before securing the mount. Outdoor walls can weaken Wi-Fi signals, so checking signal strength ensures consistent performance. Proper placement balances protection, visibility, and durability without compromising camera reliability.
Tools and Materials Needed to Mount a Blink Camera
Mounting a Blink camera becomes much easier when the right tools and materials are prepared in advance. Having everything ready helps avoid interruptions during installation and ensures the camera is mounted securely for long-term use. Most of the essential items are simple household tools, making the process accessible for beginners and experienced users alike.
The primary materials usually come included with the camera. These often consist of a mounting bracket, screws, and wall anchors designed for standard drywall or wood surfaces. These components are specifically sized to fit the camera, helping it stay stable and properly aligned once installed.
Basic hand tools are also necessary for a smooth setup. A drill or screwdriver is commonly used to secure the mounting bracket to the wall or ceiling. A drill is especially helpful when working with tougher surfaces such as brick or concrete, where pilot holes may be required.
A measuring tape and pencil play an important role in accurate placement. Measuring helps maintain the recommended mounting height and ensures the camera is level. Marking drill points beforehand reduces errors and prevents unnecessary holes in the wall.
For outdoor installations, additional materials may be useful. Weather-resistant anchors or sealant can add extra protection against moisture. Using these materials alongside standard mounting hardware helps maintain durability and performance in changing conditions.
Finally, a smartphone with the Blink app installed is essential during setup. Live view allows you to test angles and coverage before finalizing placement, ensuring your camera delivers clear, reliable monitoring once mounted.
How to Mount Blink Camera on Different Surfaces
Mounting a camera on different surfaces requires understanding the material, tools, and environment involved. Each surface type—whether a wall, no-drill option, or outdoor area—comes with its own considerations for stability and performance. Proper installation ensures your Blink camera remains secure, aligned, and effective for continuous monitoring.
How to Mount Blink Camera on Wall (Drywall, Brick, Wood)
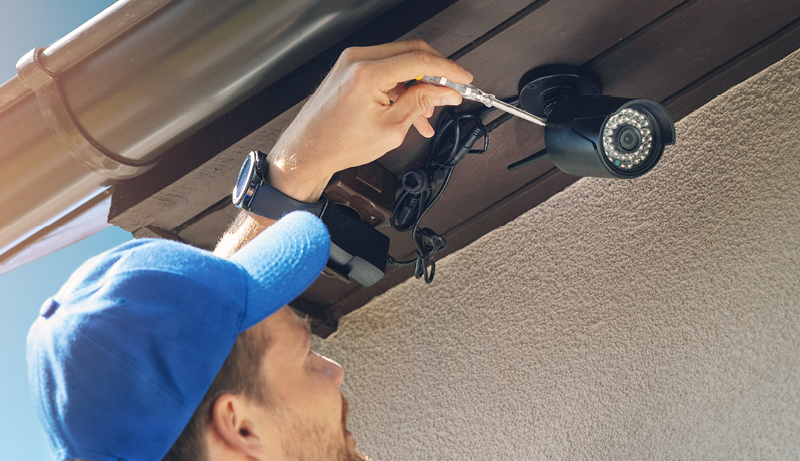
Wall mounting is the most common and secure method for installing a Blink camera. Start by selecting the desired location and marking the mounting points using the camera’s bracket as a guide. Ensure the height is between 7 and 9 feet for optimal coverage and reduced tampering. Use a level to confirm straight alignment before drilling.
For drywall installations, anchors are essential. Drill pilot holes first, insert wall anchors, then secure the mounting bracket with screws. Anchors prevent the camera from loosening over time and provide added support, especially in high-traffic areas. Without anchors, screws may pull out due to vibration or frequent motion.
Wood surfaces are the easiest to work with. Screws can be drilled directly into wooden studs or panels without anchors. Make sure the wood is solid and not thin paneling, as weak material may not support the camera’s weight long term.
Brick and concrete walls require extra preparation. Use a masonry drill bit to create pilot holes, then insert heavy-duty anchors before attaching the bracket. Drilling slowly helps prevent cracking. Once mounted, attach the camera and adjust the angle slightly downward.
Always test the camera’s view using the app before tightening all screws fully. Small angle changes at this stage help improve motion detection and image clarity.
How to Mount Blink Camera Without Drilling
No-drill mounting options are ideal for renters or users who want a temporary setup. Adhesive mounts are one of the most popular choices. These mounts use strong double-sided adhesive strips that attach to smooth, clean surfaces such as painted walls, glass, or metal.
Before applying adhesive mounts, clean the surface thoroughly to remove dust or grease. Press the mount firmly for several seconds and allow it to set for the recommended time before attaching the camera. This ensures maximum holding strength and reduces the risk of falling.
Magnetic mounts offer another flexible solution. These mounts use a metal base secured with adhesive or screws, allowing the camera to snap on and off easily. Magnetic mounts are especially useful for quick angle adjustments or frequent repositioning.
While no-drill options are convenient, they come with limitations. Adhesive mounts may weaken over time due to heat, humidity, or textured surfaces. They are best suited for indoor use or light-duty monitoring areas.
The main advantage of no-drill mounting is ease of installation and removal. However, for long-term or outdoor use, traditional drilling methods generally provide better stability and security.
How to Mount Blink Camera Outdoors
Outdoor mounting requires extra attention to weather exposure and security. Begin by choosing a location that covers key areas such as doors, driveways, or yards while staying within strong Wi-Fi range. Mounting the camera 7 to 10 feet high helps deter tampering and provides a wider field of view.
Weatherproofing is critical for outdoor setups. Although Blink cameras are built for outdoor use, mounting them under eaves or roof overhangs adds protection from rain, snow, and direct sunlight. This placement helps preserve video quality and extends the camera’s lifespan.
Angle adjustment plays a major role outdoors. A slight downward tilt helps focus on movement zones and reduces false alerts caused by passing vehicles or distant motion. Avoid pointing the camera directly at the sky or reflective surfaces.
To prevent theft or tampering, choose less accessible mounting points and ensure screws are tightly secured. Some users also position cameras within visible range to act as a deterrent. A secure mount reduces the risk of movement or removal.
Before finalizing installation, test motion alerts and live view during different times of day. Outdoor lighting changes can affect performance, so confirming coverage early helps ensure consistent, reliable monitoring.
Step-by-Step Guide: How to Mount Blink Camera
Mounting your camera correctly ensures clear footage, reliable motion detection, and long-term performance. Following a structured process helps avoid common mistakes such as poor angles, weak mounting, or missed coverage areas. This step-by-step guide explains how to mount Blink camera efficiently, whether you are setting it up indoors or outdoors, while maintaining stability and optimal viewing.
Step 1: Choose the Right Location and Height
The first step in learning how to mount Blink camera properly is selecting the right location. Focus on areas with frequent activity, such as entry points, hallways, driveways, or backyards. The camera should have a clear, unobstructed view of the space you want to monitor without being blocked by furniture, plants, or walls.
Height plays a crucial role in performance. Mounting the camera between 7 and 9 feet indoors helps capture wide coverage while reducing false alerts from pets or small movements. Outdoors, mounting slightly higher—up to 10 feet—can deter tampering and improve visibility. The goal is to balance coverage with detail.
Lighting conditions must also be considered. Avoid pointing the camera directly at windows, bright lights, or reflective surfaces, as glare can reduce video quality. For outdoor placement, avoid direct sunlight whenever possible to prevent overexposure during daylight hours.
Before drilling or attaching anything, use the camera’s live view through the app to preview the angle. This allows you to confirm coverage and make adjustments before committing to a permanent mount.
Step 2: Install the Mounting Bracket Securely
Once the location is chosen, the next step is securing the mounting bracket. Start by holding the bracket against the surface and marking the screw holes with a pencil. Using a level ensures the bracket is straight, which helps maintain proper camera alignment.
For drywall surfaces, drill pilot holes and insert wall anchors before driving in the screws. Anchors provide extra support and prevent the bracket from loosening over time. On wooden surfaces, screws can usually be installed directly without anchors, as long as the wood is solid. Brick or concrete surfaces require a masonry drill bit and heavy-duty anchors.
After drilling, attach the bracket firmly but avoid overtightening, which could damage the surface or strip the screws. A secure bracket is essential for keeping the camera stable and preventing vibrations that could affect motion detection.
Once the bracket is mounted, gently tug it to confirm stability. Any movement at this stage should be corrected before attaching the camera. A solid foundation ensures the camera remains in place even with environmental changes or repeated motion nearby.
Step 3: Attach the Camera and Adjust the Angle
With the bracket securely installed, attach the Blink camera according to the manufacturer’s design. Most models snap or screw into place easily, allowing quick attachment without complex tools. Ensure the camera is firmly connected to avoid accidental detachment.
Angle adjustment is one of the most important steps when learning how to mount Blink camera effectively. Tilt the camera slightly downward to focus on activity zones such as walkways, doors, or rooms. This angle improves motion detection accuracy and reduces false alerts from distant or irrelevant movement.
Use the live view feature in the app to fine-tune the camera’s position. Walk through the monitored area to test motion detection and visibility. Make small adjustments until the camera captures the desired field of view without blind spots.
Avoid extreme angles that point too far downward or upward. Over-tilting can limit coverage and reduce image clarity. Once satisfied, tighten any adjustment screws to lock the camera into place.
Step 4: Test Connectivity and Finalize Installation
After mounting and adjusting the camera, testing connectivity is essential. Ensure the camera maintains a strong Wi-Fi signal at its mounted location. Weak connectivity can lead to delayed alerts, buffering, or missed recordings.
Test motion detection by walking through the camera’s field of view at different speeds and angles. Check notifications to confirm alerts are triggered correctly. This step helps identify areas that may need slight repositioning for better coverage.
For outdoor installations, test the camera at different times of day. Changing light conditions can affect visibility, so verifying performance during daylight and nighttime ensures consistent monitoring. Adjust sensitivity settings if necessary to reduce false alerts.
Once testing is complete, finalize the installation by securing all screws and confirming the camera is stable. A properly mounted Blink device delivers reliable monitoring, clear footage, and long-term peace of mind without constant adjustments.
How to Adjust Blink Camera Angle for Best Motion Detection
Adjusting the camera angle correctly is essential for capturing accurate motion events and clear video footage. A well-positioned camera reduces false alerts while ensuring important activity is recorded. Small angle adjustments can make a noticeable difference in how effectively the camera detects movement.
The ideal angle for motion detection is a slight downward tilt. This positioning allows the camera to focus on active areas such as walkways, doorways, or rooms where people move naturally. Pointing the camera too high can cause missed motion, while aiming it too low may trigger alerts from irrelevant movement.
Using the live view feature in the Blink app helps fine-tune the angle. Watching the camera feed in real time allows you to see exactly what the lens captures. Walking through the monitored area during setup helps confirm whether motion is detected consistently across the intended coverage zone.
Avoid aiming the camera directly at bright light sources or reflective surfaces. Sunlight, windows, and glossy walls can interfere with motion detection and video clarity. Adjusting the camera slightly away from these elements helps maintain balanced lighting throughout the day.
Motion sensitivity settings should be adjusted after finalizing the angle. Higher sensitivity works well in low-traffic areas, while lower sensitivity helps reduce alerts in busy spaces. Combining proper angle adjustment with correct sensitivity settings ensures reliable performance.
Once the ideal angle is set, secure the camera firmly to prevent movement over time. A stable camera maintains consistent detection and ensures your Blink system continues to monitor effectively without frequent readjustment.
Common Mistakes to Avoid When Mounting Blink Cameras
Mounting a security camera may seem simple, but small mistakes can significantly affect performance. Avoiding common errors during installation helps ensure clear footage, accurate motion detection, and long-term reliability. Being aware of these issues before mounting can save time and prevent unnecessary adjustments later.
One frequent mistake is placing the camera at the wrong height. Mounting too low can lead to excessive motion alerts from pets or passing objects, while mounting too high may reduce facial detail. Following the recommended height range helps balance coverage and image clarity.
Another issue is pointing the camera directly toward bright light sources. Sunlight, windows, and reflective surfaces can cause glare and reduce video quality. This positioning can also interfere with motion detection, resulting in missed events or false alerts throughout the day.
Poor surface preparation is another common oversight. Mounting on weak or uneven surfaces without proper anchors can cause the camera to shift over time. Movement, even slight, can disrupt the field of view and reduce detection accuracy.
Many users also overlook Wi-Fi signal strength at the mounting location. A weak connection can cause delayed notifications or missed recordings. Testing connectivity before final installation helps avoid performance issues.
Lastly, skipping angle adjustments can limit coverage. Failing to fine-tune the camera’s position after mounting may leave blind spots. Taking time to test and adjust ensures your Blink setup delivers consistent and reliable monitoring.
Troubleshooting Blink Camera Mounting Issues
Mounting issues can affect both the stability and performance of a security camera. When a Blink camera is not positioned or secured correctly, problems such as poor video quality or missed motion alerts may occur. Identifying and addressing these issues early helps restore reliable monitoring and prevents ongoing frustration.
One common problem is a loose or unstable mount. If the camera shifts or vibrates, check that all screws are tightened properly and that wall anchors are secure. For drywall installations, replacing weak anchors with stronger ones can significantly improve stability and prevent future movement.
Another frequent issue involves incorrect camera angles. If motion alerts are inconsistent or footage misses key areas, use the live view feature to readjust the angle. A slight downward tilt often improves detection and ensures activity zones remain in focus.
Connectivity problems may also appear after mounting. Walls and outdoor surfaces can weaken Wi-Fi signals, leading to delayed alerts or connection drops. Testing signal strength at the mounting location and repositioning the camera slightly can help maintain a stable connection.
Lighting-related issues are also common. Glare from sunlight, windows, or reflective surfaces can interfere with motion detection. Adjusting the camera away from direct light sources often resolves image clarity problems.
Lastly, environmental exposure can affect outdoor setups. Excessive rain, heat, or wind may impact performance if the camera is not adequately sheltered. Mounting under eaves or overhangs adds protection and helps your Blink system operate consistently.
Frequently Asked Questions (FAQs)
What Is The Best Height To Mount A Blink Camera?
You should mount your Blink camera at a height of about 7 to 9 feet for indoor use and up to 10 feet for outdoor areas. This height allows you to capture clear facial details while reducing false motion alerts caused by pets or objects near the ground. Mounting at the correct height also helps protect the camera from tampering and accidental damage.
Where Should You Mount A Blink Camera For Best Coverage?
You should place your camera where it can clearly monitor high-traffic areas. Indoors, this includes entry points, hallways, living rooms, and nurseries. Outdoors, ideal locations include the front door, backyard, garage, and side yard. Make sure the camera has an unobstructed view and is not blocked by furniture, plants, or walls.
Can You Mount A Blink Camera Without Drilling?
Yes, you can mount a Blink camera without drilling by using adhesive or magnetic mounts. These options work best on smooth, clean surfaces and are ideal for renters or temporary setups. However, you should note that no-drill mounts may not be as secure as screw-mounted brackets, especially outdoors or in humid conditions.
How Do You Mount A Blink Camera On Different Wall Types?
For drywall, you should always use wall anchors to keep the camera secure. On wood surfaces, screws can usually be installed directly without anchors. Brick or concrete walls require a masonry drill bit and heavy-duty anchors. Choosing the correct hardware ensures the camera stays stable and aligned over time.
How Do You Adjust A Blink Camera Angle For Motion Detection?
You should tilt the camera slightly downward to focus on activity zones such as walkways or doorways. Use the live view feature in the app to test the angle and walk through the monitored area to confirm motion detection works properly. Avoid pointing the camera toward bright lights, windows, or reflective surfaces.
Why Does Your Blink Camera Fall Or Shift After Mounting?
Your camera may fall or shift if it is mounted on a weak surface or without proper anchors. Adhesive mounts can also lose strength over time due to heat or moisture. To fix this, you should tighten screws, replace anchors if needed, or choose a more stable mounting location for your Blink system.
Conclusion
Proper camera installation plays a major role in how well your home security system performs. Taking time to plan the location, height, and angle helps ensure clear footage, accurate motion detection, and fewer false alerts. A stable mount also protects the camera from shifting or damage over time.
Understanding how to mount blink camera correctly allows you to make the most of its features. Whether installing on a wall, using a no-drill option, or mounting outdoors, choosing the right tools and surfaces improves reliability. Small adjustments during setup can greatly enhance coverage and long-term performance.
By following the correct mounting steps and avoiding common mistakes, you create a dependable monitoring setup. A well-mounted camera provides consistent security, peace of mind, and confidence that your space is being watched effectively day and night.