Best Lighting for Portrait Photography (Beginner to Pro Guide)
Great portraits feel natural, expressive, and timeless, and lighting plays a huge role in making that happen. The way light falls across a face can highlight emotion, shape features, and set the overall mood of an image. Strong lighting choices help turn a simple photo into a portrait that feels alive and intentional.
Understanding light is not about complex gear or studio-only setups. It starts with recognizing how light direction, softness, and intensity work together. From window light at home to controlled studio sources, thoughtful lighting decisions bring consistency and confidence to portrait work.
This is where the idea of Best Lighting for Portrait Photography becomes essential. The right lighting approach helps photographers create flattering skin tones, natural shadows, and clear separation between subject and background. It also allows personality to come through without distraction.
Whether shooting people for personal projects or professional clients, mastering lighting builds trust in your creative process. With the right foundation, lighting becomes a tool for storytelling rather than a technical obstacle.
Best Lighting for Portrait Photography?
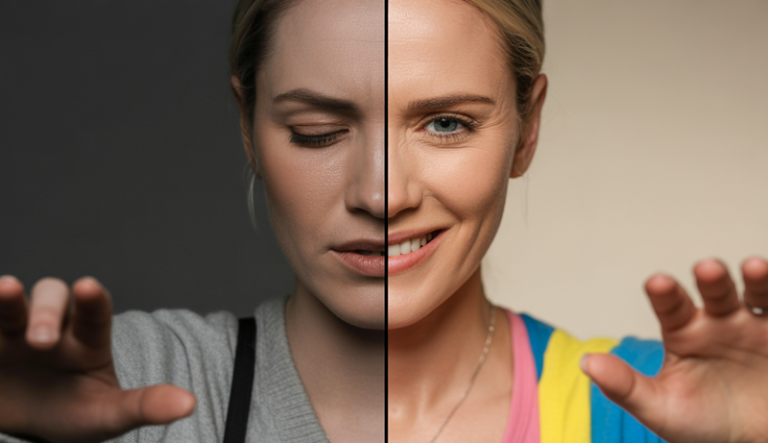
Lighting is the foundation of every successful portrait, shaping how a subject is perceived and how emotion is conveyed. Choosing the Best Lighting for Portrait Photography means understanding how light interacts with facial features, skin texture, and expression. Soft, well-placed light enhances natural beauty, while harsh or poorly positioned light can distract from the subject’s presence.
Natural light remains one of the most accessible and flattering options for portraits. Window light, especially during early morning or late afternoon, produces soft shadows and gentle highlights that suit a wide range of subjects. Positioning the subject at an angle to the light source adds depth and dimension without overwhelming the face.
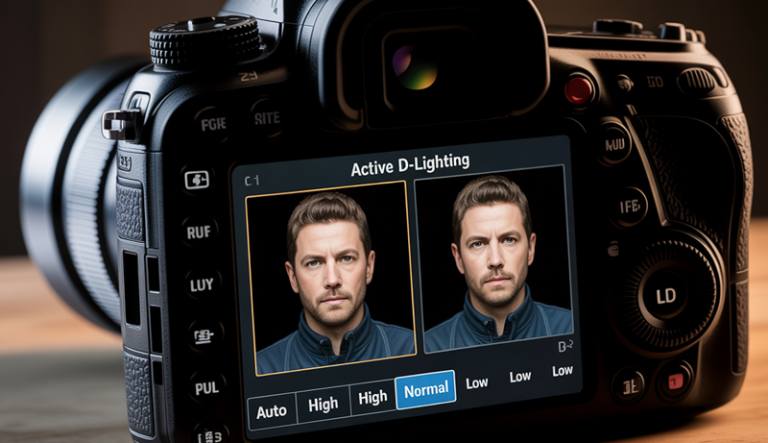
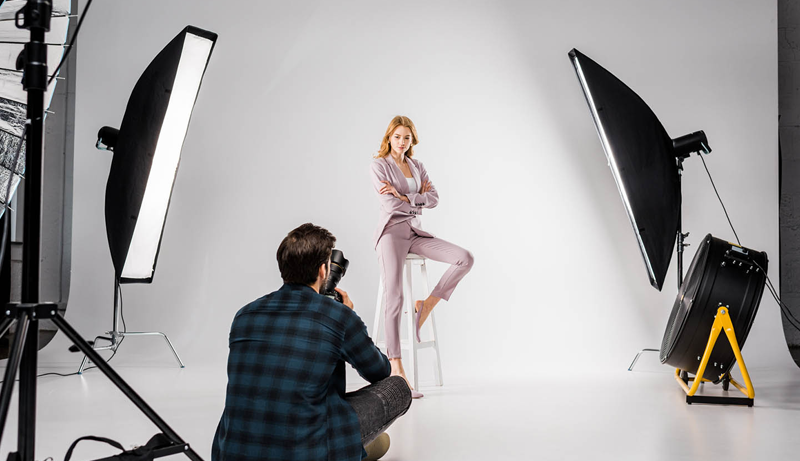
Studio lighting offers greater control and consistency. Tools such as softboxes, umbrellas, and reflectors allow photographers to sculpt light precisely. A classic setup like Rembrandt or loop lighting creates balanced shadows that add character while maintaining a natural look. Control over light intensity also ensures accurate skin tones and reduced imperfections.
Light direction plays a critical role in portrait photography. Front lighting minimizes shadows and is ideal for clean, professional looks, while side lighting adds drama and texture. Backlighting, when handled carefully, separates the subject from the background and adds a subtle glow that feels cinematic.
Background lighting should never be overlooked. A well-lit subject against a dull or distracting background can weaken the overall image. Subtle background illumination or controlled falloff helps maintain focus while adding visual interest.
Mastering the Best Lighting for Portrait Photography takes practice, observation, and experimentation. As lighting skills improve, portraits become more consistent, expressive, and visually compelling, allowing the subject’s personality to truly stand out.
What Makes Good Lighting for Portrait Photography?
Good lighting in portrait photography starts with softness. Soft light reduces harsh shadows and smooths skin tones, creating a natural and flattering appearance. This type of light wraps gently around the face, helping facial features look balanced rather than overly defined. Whether achieved through natural light or modifiers, softness is a key quality of effective portrait lighting.
Direction is another critical factor. Light that comes from a slight angle rather than straight on adds depth and dimension to a portrait. Side lighting helps define facial structure, while still keeping the image realistic and pleasing. The goal is to shape the face subtly without creating distracting or heavy shadows.
Consistency also plays an important role in good portrait lighting. Even exposure across the face prevents blown highlights or deep shadow patches that pull attention away from the subject. Balanced lighting allows viewers to focus on expression, emotion, and personality rather than technical flaws.
Color temperature contributes significantly to how a portrait feels. Neutral or slightly warm light produces healthy, natural skin tones, while mixed or overly cool lighting can make skin appear dull or unnatural. Controlling or matching light sources ensures color accuracy and visual harmony.
Good lighting also separates the subject from the background. This can be done through contrast, highlights, or gentle backlighting. Clear separation adds depth and prevents the subject from blending into the surroundings.
Ultimately, good lighting supports the story of the portrait. It enhances features, sets mood, and keeps attention on the subject, making the image feel intentional, polished, and emotionally engaging.
Best Natural Lighting for Portrait Photography
Natural light remains one of the most effective tools for creating authentic and visually pleasing portraits. It offers softness, realism, and flexibility that artificial lighting often tries to replicate. Understanding how to observe, control, and position natural light allows photographers to shape mood, enhance facial features, and maintain natural skin tones. When used intentionally, natural light adapts to both indoor and outdoor environments with impressive results.
Window Light for Indoor Portraits
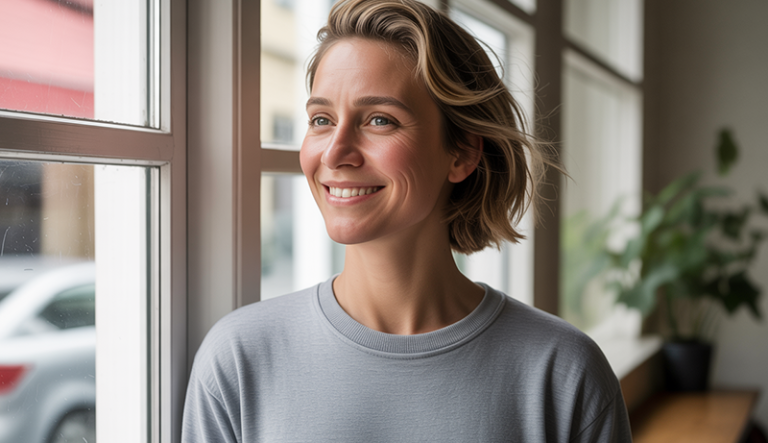
Window light is one of the most reliable sources of natural lighting for indoor portrait photography. It provides a controlled, directional light that can be shaped easily depending on subject placement. Among all window types, north-facing windows are especially valued because they deliver consistent, indirect light throughout the day. This light is softer and less contrast-heavy, making it ideal for flattering skin tones and minimizing harsh shadows.
The time of day significantly affects window light quality. Morning light tends to be cooler and gentler, while afternoon light is warmer and slightly stronger. Midday light can still work when diffused properly, especially with sheer curtains. Observing how light shifts across the room helps in choosing the best positioning for the subject without constant adjustments.
Curtains act as natural diffusers, softening strong light and spreading it evenly across the face. Sheer fabrics are particularly effective because they reduce intensity without blocking light entirely. This creates smooth transitions between highlights and shadows, resulting in a more polished look.
Reflectors play a vital role in enhancing window light portraits. Placing a reflector opposite the window fills in shadows and adds balance to the image. White reflectors create subtle fill, while silver reflectors add brightness and contrast. Using simple tools like curtains and reflectors gives full control over window light without complicated setups.
Golden Hour Lighting
Golden hour lighting is widely known for its warm, soft, and directional qualities that elevate portrait photography. Occurring shortly after sunrise and before sunset, this light produces long shadows and a gentle glow that enhances facial features naturally. Morning golden hour often feels cleaner and calmer, while evening golden hour delivers richer warmth and deeper tones.
Positioning the subject correctly during golden hour is essential. Placing the subject slightly angled toward the sun allows light to skim across the face, creating depth without overwhelming highlights. Shooting directly into the sun can soften contrast, while adjusting position slightly off-axis maintains clarity and detail.
Backlighting is a popular golden hour technique that places the sun behind the subject. This creates a glowing rim light around hair and shoulders, adding separation from the background. When combined with slight fill from a reflector or surrounding surfaces, backlighting produces a dreamy yet controlled portrait look.
Side lighting during golden hour introduces more texture and dimensionality. It defines facial structure while preserving the warm tones associated with this time of day. Side lighting works particularly well for expressive portraits, as it emphasizes contours without appearing harsh. Golden hour lighting rewards patience and careful positioning, offering dynamic results with minimal equipment.
Open Shade Lighting
Open shade lighting is an excellent solution for outdoor portraits when direct sunlight is too strong. It occurs when a subject is positioned in shade while facing a bright open area, allowing reflected light to illuminate the face evenly. This technique eliminates harsh shadows caused by overhead sun and produces balanced exposure.
Avoiding direct sunlight is crucial for maintaining natural skin tones. Harsh sunlight creates deep eye sockets, blown highlights, and uneven contrast. Open shade prevents these issues while still using ambient outdoor light. Locations such as building overhangs, tree lines, or shaded walls provide ideal conditions.
The direction of open shade light matters just as much as its softness. Positioning the subject toward an open sky or sunlit surface increases light intensity without introducing glare. This directional quality helps maintain depth while keeping lighting soft and flattering.
Open shade works especially well in urban environments, parks, and outdoor lifestyle shoots. It allows photographers to work at any time of day without waiting for perfect sunlight conditions. With thoughtful placement and awareness of surrounding surfaces, open shade lighting delivers consistent, professional-looking portraits while preserving a natural and relaxed feel.
Best Artificial Lighting for Portrait Photography
Artificial lighting gives photographers complete control over intensity, direction, and consistency, making it an essential option for portrait photography. Unlike natural light, artificial sources remain reliable regardless of time or weather conditions. Mastering artificial lighting allows for repeatable results, creative flexibility, and precise shaping of facial features, especially in studio or low-light environments.
Continuous Lighting
Continuous lighting is popular for portrait photographers who prefer to see lighting effects in real time. LED panels are among the most common continuous light sources due to their energy efficiency, adjustable brightness, and color temperature control. These lights are ideal for beginners and professionals alike, as they provide consistent illumination without sudden bursts of light.
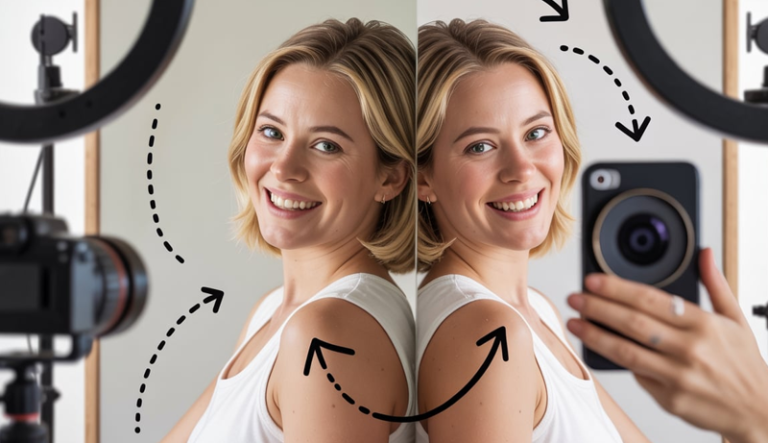
Ring lights are another widely used continuous lighting option, particularly in beauty and headshot photography. Their circular design creates even, shadow-free illumination and distinctive catchlights in the eyes. Ring lights are easy to set up and work well for close-up portraits, though they can appear flat if overused without additional light shaping.
One major advantage of continuous lighting is simplicity. Since the light remains on, photographers can adjust subject position, camera settings, and light placement while immediately seeing the results. This makes it easier to fine-tune exposure and shadow placement, especially when working with new subjects.
However, continuous lighting has limitations. It typically produces less power than flash or strobes, requiring higher ISO settings in some situations. Heat generation can also be a concern with certain models. Despite these drawbacks, continuous lighting remains a reliable choice for controlled portrait environments and consistent results.
Flash & Strobe Lighting
Flash and strobe lighting offer significantly more power and control compared to continuous light sources. Speedlights are compact, portable flashes commonly used on or off-camera. They are ideal for on-location portrait photography, providing flexibility and the ability to overpower ambient light when needed.
Studio strobes deliver higher output and faster recycle times, making them suitable for professional studio setups. These lights allow photographers to shape light precisely using modifiers such as softboxes, beauty dishes, and grids. The consistency of strobes ensures uniform results across multiple shots and sessions.
Understanding TTL versus manual mode is essential when working with flash lighting. TTL automatically adjusts flash output based on camera metering, making it useful for fast-paced or changing environments. It simplifies exposure decisions but may produce inconsistent results in complex lighting situations.
Manual mode offers full control over flash power, allowing photographers to fine-tune lighting precisely. While it requires more setup time, manual flash delivers consistent exposure once dialed in. Mastering both TTL and manual modes expands creative control and ensures reliable performance across different portrait scenarios.
Best Portrait Lighting Setups
Portrait lighting setups provide structure and consistency, helping photographers achieve specific moods and visual styles. Each setup shapes facial features differently, making it important to choose the right one for the subject and purpose. From classic studio looks to dramatic effects, these lighting patterns are foundational techniques that work across genres and experience levels.
Rembrandt Lighting
Rembrandt lighting is recognized by the small triangle of light that appears on the shadowed side of the face, just below the eye. This setup is created by placing the light source at roughly a 45-degree angle from the subject and slightly above eye level. The result is a balanced mix of light and shadow that adds depth and dimension.
One of the defining characteristics of Rembrandt lighting is its ability to sculpt facial structure. It emphasizes cheekbones and jawlines while maintaining enough shadow to create a sense of drama. The contrast is noticeable but not overwhelming, making it a versatile option for many portrait styles.
This lighting setup works particularly well for subjects with strong facial features. It is often used in classic portraiture, editorial photography, and fine art portraits. The controlled shadows add seriousness and emotion without making the image feel harsh.
Rembrandt lighting is best used when the goal is to create a timeless, painterly look. It suits both men and women and works well in studio environments where light direction and intensity can be carefully controlled.
Loop Lighting
Loop lighting is one of the most commonly used portrait lighting setups due to its flattering and natural appearance. It is achieved by positioning the light slightly above and to the side of the subject, creating a small shadow from the nose that loops down toward the cheek without touching it.
This lighting pattern offers gentle depth while keeping the face evenly lit. The shadows are soft and subtle, making loop lighting ideal for everyday portraits, corporate headshots, and lifestyle photography. It provides dimension without drawing attention away from the subject’s expression.
Loop lighting suits a wide range of face shapes, particularly round and oval faces. The slight shadowing helps slim the face while maintaining a friendly and approachable look. It also works well for subjects who are less comfortable in front of the camera due to its forgiving nature.
Because of its versatility, loop lighting is often a starting point for photographers learning portrait lighting. It adapts well to both natural and artificial light sources and delivers consistent, professional results across many scenarios.
Butterfly (Paramount) Lighting
Butterfly lighting, also known as Paramount lighting, is created by placing the light source directly in front of and slightly above the subject’s face. This positioning produces a small, symmetrical shadow under the nose resembling a butterfly, which gives the setup its name.
This lighting style is widely used in beauty and fashion portraits because it highlights cheekbones and creates smooth, even skin tones. The frontal light minimizes texture and shadows, resulting in a clean and polished appearance that works well for makeup-focused imagery.
Butterfly lighting is especially flattering for subjects with defined bone structure. It enhances facial symmetry and draws attention to the eyes and lips. When combined with a reflector beneath the face, it further reduces shadows and adds brightness.
Due to its glamorous look, this setup is often associated with classic Hollywood portraits. It requires careful positioning to avoid flat lighting, but when done correctly, it produces elegant and refined results ideal for high-end portrait work.
Split Lighting
Split lighting divides the face into equal halves of light and shadow by placing the light source directly to the side of the subject. One side of the face is fully illuminated, while the other remains in shadow, creating a strong contrast.
This setup is known for its dramatic and moody effect. It emphasizes texture and structure, making it ideal for artistic portraits, character studies, and conceptual photography. The stark contrast adds intensity and emotional depth to the image.
Split lighting works well for subjects where drama and mystery are desired. It is often used in black-and-white portraits, as the contrast translates powerfully without relying on color. Facial expressions become more pronounced under this lighting style.
Because of its bold nature, split lighting is less forgiving than other setups. Precise positioning and controlled exposure are essential. When used intentionally, it delivers striking portraits that stand out through mood and visual impact.
Best Light Modifiers for Portrait Photography
Light modifiers play a crucial role in shaping and controlling light in portrait photography. They influence softness, contrast, direction, and overall mood, helping photographers achieve consistent and professional results. Choosing the right modifier allows light to complement facial features rather than overpower them, making portraits appear natural and intentional.
Softboxes are among the most popular light modifiers for portraits. They spread light evenly and soften shadows, producing flattering skin tones and smooth transitions between highlights and shadows. Softboxes work well for headshots, studio portraits, and lifestyle photography where a clean and balanced look is desired.
Umbrellas offer a simple and versatile lighting solution. Shoot-through umbrellas create soft, diffused light, while reflective umbrellas provide slightly more contrast. They are easy to set up and ideal for beginners, though they offer less control compared to softboxes.
Beauty dishes are designed to produce a focused yet soft light that enhances facial structure. They create crisp details while maintaining smooth skin texture, making them a favorite for fashion and beauty portraits. When paired with diffusion socks, beauty dishes become even more flattering.
Grids help control light spill and add directionality. By narrowing the light beam, grids keep light focused on the subject and prevent it from affecting the background. This is especially useful for dramatic portraits or low-key lighting setups.
Reflectors are essential tools for shaping light without adding additional sources. They fill shadows, enhance highlights, and balance contrast, making them valuable in both studio and natural light portrait photography.
Best Lighting for Different Portrait Types
Different portrait styles demand different lighting approaches to support mood, purpose, and subject interaction. A lighting setup that works well for a professional headshot may not suit a fashion or family portrait. Understanding how lighting adapts to each portrait type allows photographers to create images that feel intentional, emotionally aligned, and visually balanced across a wide range of scenarios.
Headshots
Headshot lighting focuses on clarity, approachability, and accurate representation. For corporate headshots, lighting should be clean, soft, and evenly balanced. The goal is to present the subject as professional and trustworthy, avoiding harsh shadows or dramatic contrast that could distract from facial expression.
Creative headshots allow more flexibility in lighting style. While still maintaining flattering exposure, photographers can introduce directional light, contrast, or subtle shadows to reflect personality or industry. Artists, performers, and entrepreneurs often benefit from lighting that adds depth and character without overpowering the face.
Light placement is critical for headshots. A soft key light positioned slightly above eye level creates natural shadows that define facial features while keeping the eyes bright. Fill light or reflectors help reduce contrast and maintain a polished look, especially in corporate settings.
Background lighting also plays a role in headshots. Keeping the background slightly darker or evenly lit prevents distraction and keeps attention on the subject. Consistent, controlled lighting ensures headshots look professional across different platforms and uses.
Family Portraits
Family portraits benefit from soft, even lighting that flatters all subjects equally. Since multiple people are involved, lighting must be broad enough to cover everyone without creating uneven exposure or harsh shadows on individual faces.
Soft light sources such as diffused natural light or large modifiers work best for family photography. This type of lighting smooths skin tones and minimizes imperfections, creating a warm and welcoming feel. It also helps maintain consistency when subjects move or change positions.
Even lighting is especially important for children, who tend to move frequently. Broad, forgiving light reduces the risk of unflattering shadows and exposure issues. Keeping light levels moderate also ensures a relaxed atmosphere during the shoot.
Outdoor family portraits often rely on open shade or softly filtered sunlight. Indoors, window light combined with reflectors produces natural-looking results. The emphasis remains on connection and emotion, supported by lighting that feels gentle, balanced, and unobtrusive.
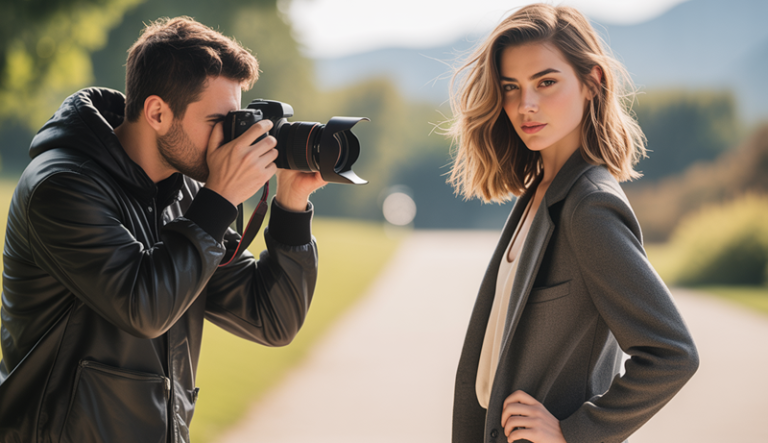
Fashion Portraits
Fashion portraits often embrace bold, high-contrast lighting to highlight clothing, textures, and styling. Unlike traditional portraits, fashion lighting is not always about softness but about visual impact and creative expression.
High-contrast lighting adds drama and structure, emphasizing fabric details and strong poses. Hard light sources or controlled directional lighting are commonly used to create sharp shadows that enhance the overall aesthetic of the image.
Stylized lighting setups allow photographers to experiment with angles, colors, and intensity. Side lighting, backlighting, or multiple light sources can be used to create dynamic compositions that complement the fashion concept. Shadows become design elements rather than flaws.
Consistency and precision are essential in fashion photography. Lighting must remain controlled to ensure garments and makeup appear as intended. This approach results in striking images where lighting supports the artistic vision and elevates the subject beyond a simple portrait.
Low-Light & Moody Portraits
Low-light and moody portraits rely on intentional shadow placement and selective illumination. These portraits focus on emotion, atmosphere, and depth rather than full facial visibility, making lighting choices especially critical.
Single-light setups are commonly used to create moody portraits. One controlled light source allows photographers to shape shadows carefully, drawing attention to specific facial features while leaving other areas in darkness. This simplicity enhances emotional impact.
Shadow control is key in low-light portraits. Adjusting light distance, angle, and intensity determines how much detail is revealed. Small changes can dramatically affect mood, making careful observation essential during setup.
Low-light portraits often benefit from minimal background illumination. Dark or textured backgrounds combined with focused lighting create separation and depth. When executed well, this lighting style produces powerful, expressive portraits that feel cinematic and intentional.
Common Portrait Lighting Mistakes to Avoid
One of the most common portrait lighting mistakes is using light that is too harsh. Strong, direct light creates unflattering shadows, exaggerated skin texture, and blown highlights, especially on the face. This often happens when light sources are placed too close or used without diffusion, resulting in portraits that feel overly sharp and uncomfortable.
Another frequent mistake is placing the light at the wrong angle. Lighting positioned too low or directly overhead can create unnatural shadows under the eyes, nose, and chin. Poor light direction can distort facial features and reduce depth, making portraits appear flat or unbalanced.
Ignoring the background lighting is also a common issue. A well-lit subject against a distracting or overly bright background pulls attention away from the face. Conversely, a background that is too dark without separation can cause the subject to blend in. Balanced background lighting helps maintain focus and visual clarity.
Overlighting the face is another problem many photographers encounter. Using too many light sources or excessive fill light removes natural shadows that give the face shape. While shadows should be controlled, eliminating them entirely results in flat and lifeless portraits.
Mixed color temperatures often go unnoticed but can ruin an image. Combining daylight with artificial light without correction creates unnatural skin tones that are difficult to fix in post-processing. Maintaining consistent color temperature ensures a clean, professional look.
Finally, relying on a single lighting setup for every subject limits creativity and effectiveness. Different face shapes, skin tones, and portrait styles require thoughtful lighting adjustments to achieve the best results.
Recommended Portrait Lighting Gear (Beginner to Pro)
Choosing the right portrait lighting gear depends on experience level, shooting environment, and creative goals. For beginners, simple and affordable tools help build confidence without overwhelming complexity. As skills grow, more advanced equipment offers greater control, consistency, and creative flexibility for professional-quality portraits.
Beginner photographers often start with natural light and basic accessories. Reflectors are an essential first purchase, as they help control shadows and enhance existing light. Entry-level LED panels or ring lights are also popular for their ease of use, allowing beginners to see lighting effects in real time while learning light placement.
Intermediate photographers benefit from adding off-camera flash to their setup. Speedlights offer portability and increased power, making them suitable for both indoor and outdoor portraits. Paired with affordable modifiers like umbrellas or small softboxes, speedlights provide more control and versatility compared to continuous lighting alone.
For advanced users and professionals, studio strobes become the preferred choice. These lights deliver consistent output, fast recycle times, and compatibility with a wide range of modifiers. Larger softboxes, beauty dishes, and grids allow precise light shaping for high-end portrait work.
Light stands and mounting accessories are just as important as the lights themselves. Sturdy stands ensure safety and stability, while adjustable mounts allow flexible positioning. Quality support gear helps maintain consistency across shoots and protects valuable equipment.
As photographers progress, investing in reliable lighting gear enhances workflow and creative freedom. The right tools support better results, making portrait lighting more predictable, efficient, and visually impactful.
Frequently Asked Questions (FAQs)
What Is The Best Lighting Setup For Portrait Photography?
The best lighting setup for portrait photography depends on the subject, environment, and desired mood. You achieve the most flattering results by using soft, directional light that adds depth without harsh shadows. Natural window light, softboxes, or diffused strobes are ideal for creating balanced exposure, natural skin tones, and clear facial definition. The key is controlling light direction and softness rather than relying on expensive equipment.
Is Natural Light Or Artificial Light Better For Portrait Photography?
You can create excellent portraits with both natural and artificial light. Natural light offers realism and softness, making it ideal for lifestyle and outdoor portraits. Artificial light provides consistency and full control, especially in studios or low-light conditions. Choosing the best lighting for portrait photography depends on whether you need flexibility and control or a natural, ambient look.
What Is The Best Time Of Day For Natural Portrait Lighting?
You get the most flattering natural light during early morning or late afternoon. These times provide soft, angled light that reduces harsh shadows and enhances skin tones. Midday light can be challenging, but you can manage it using open shade or diffusion to maintain even exposure and avoid strong contrast.
How Do You Avoid Harsh Shadows In Portrait Photography?
You avoid harsh shadows by softening the light source and adjusting its angle. Using diffusers, softboxes, or sheer curtains spreads light evenly across the face. Positioning the light slightly above eye level and adding reflectors helps fill shadows while preserving natural depth and facial structure.
What Light Modifiers Are Best For Portrait Photography?
You achieve better control and softer results with modifiers like softboxes, umbrellas, beauty dishes, and reflectors. Softboxes and umbrellas create even lighting, beauty dishes enhance facial structure, and reflectors help balance shadows. The best choice depends on the portrait style, subject, and lighting environment.
How Many Lights Do You Need For A Portrait Setup?
You can create professional portraits with just one light. A single light source combined with reflectors is often enough for headshots and moody portraits. Adding a second or third light allows greater control over background, hair, and separation, but simplicity often leads to more natural and effective results.
Conclusion
Lighting is the foundation that defines mood, depth, and emotion in every portrait. When light is understood and applied intentionally, it enhances facial features, balances shadows, and brings out natural expressions. From natural window light to controlled studio setups, thoughtful lighting choices help transform ordinary images into compelling portraits.
Developing strong lighting skills takes observation, practice, and experimentation. Learning how different light sources, angles, and modifiers affect a subject allows photographers to adapt to various portrait styles and environments. With experience, lighting becomes less technical and more creative, supporting the story behind each image.
Mastering the Best Lighting for Portrait Photography is not about owning expensive gear, but about making informed decisions that suit the subject and purpose. When lighting works in harmony with composition and expression, portraits feel authentic, polished, and visually impactful.