How to Use a Disposable Camera in 7 Easy Steps
To use a disposable camera, first load the film by pulling it across and securing it inside the camera. Advance the film after each shot by turning the wheel until it clicks.
Frame your photo carefully and hold the camera steady. Get close to your subject and use the built-in flash in low light.
Keep track of your remaining shots with the counter. Finally, wind the film completely once done and take it for development.
You’ll find more tips to help you capture great moments.
Key Takeaways
- Load the 35mm film properly inside the camera and advance it until a click confirms it’s ready to shoot.
- Hold the camera steady, compose your shot through the viewfinder, and keep subjects within 5 to 10 feet for clear focus.
- After each photo, advance the film by turning the scroll wheel until it clicks to avoid double exposures.
- Use the flash in low-light conditions by sliding the flash button and waiting 2 to 5 seconds for it to charge.
- Once all shots are taken, rewind the film completely, then take the camera to a lab or store for developing.
Load the Film Into Your Disposable Camera
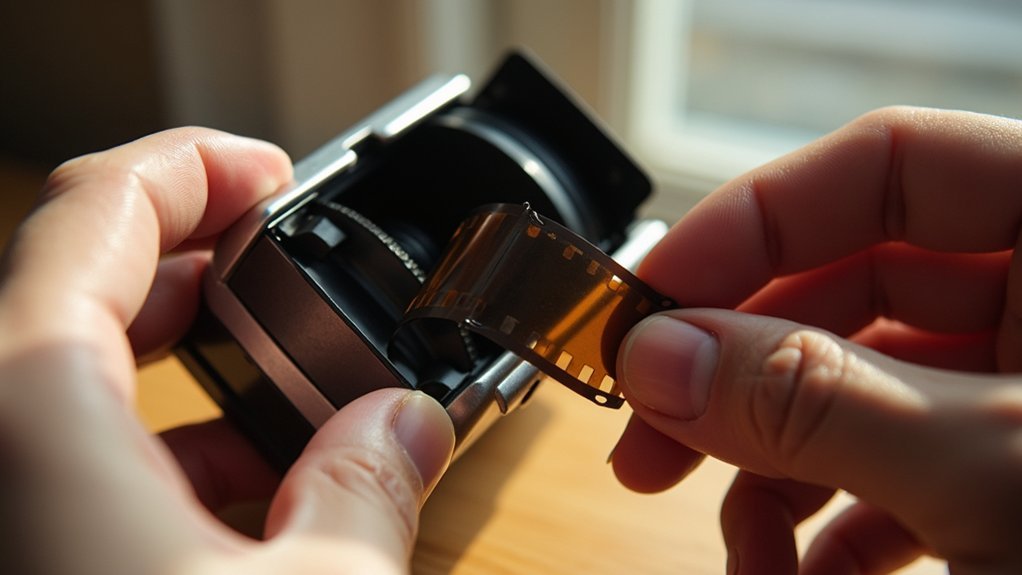
To load the film into your disposable camera, start by opening it carefully. Detach the side latches and the hidden latch inside the battery compartment to access the film compartment.
Take your 35mm film roll and place it inside, making sure the film aligns with the advance gear and is properly seated to avoid misalignment. Pull the film across the compartment and attach it to the spool, keeping tension to prevent tearing.
Place the 35mm film carefully, align it with the advance gear, and secure it tightly to prevent tearing.
Press down to secure the film firmly in place.
Next, turn the scroll wheel to advance the film until you hear a click, confirming the film is ready.
Finally, check that the shutter is cocked before closing the camera so you don’t waste shots on exposed film segments.
Advance the Film Properly Before Shooting
Before you take each shot, make sure to advance the film by turning the scroll wheel on the right until it clicks and stops.
This step is essential to avoid accidentally exposing the same frame twice and losing your perfect moments.
Keep an eye on the frame counter, too, so you don’t run out of film when you need it most.
It’s a simple habit that can save you a lot of frustration!
Film Advancement Technique
Advance the film on your disposable camera by turning the scroll wheel on the right side until you hear a click. This signals it’s ready for the next shot.
Always advance the film immediately after taking photos to avoid missing that perfect moment.
Disposable cameras typically allow for 27 exposures, so keep an eye on the small dial near the shutter trigger to check the remaining frames. If you find the camera won’t take a picture, double-check that you’ve advanced the film enough by reviewing the scroll wheel’s position.
Properly advancing the film guarantees each shot is captured on a fresh frame, which prevents overlaps or wasted exposures.
This careful technique helps assure smooth film processing and successful photo development later on.
Importance of Advancing
Making certain you properly advance the film after each shot keeps your disposable camera ready for the next picture. After taking photos, always turn the scroll wheel until it won’t turn any further.
This simple step guarantees the camera next exposes a fresh frame, so you don’t miss capturing the perfect shot.
Disposable cameras come with a limited number of exposures, so it’s important to advance your film right away to maximize the photos you have left.
If you don’t advance the film, the camera won’t activate for the next shot, causing missed moments.
Common Advancement Mistakes
If you don’t turn the scroll wheel fully after each shot, your disposable camera won’t be ready for the next picture. One of the most common mistakes is failing to advance the film properly. This can cause overlapping images or blank frames.
Always make sure you’re turning the scroll wheel on the right until it stops, ensuring proper engagement before you take a picture.
Look at the top of the camera to check the number of remaining frames so you don’t run out unexpectedly.
Since disposable cameras have a limited number of exposures, advancing the film correctly after each shot is crucial. If the film doesn’t advance smoothly, double-check the alignment of the film advance gear before proceeding.
This way, you avoid issues when you get your film developed.
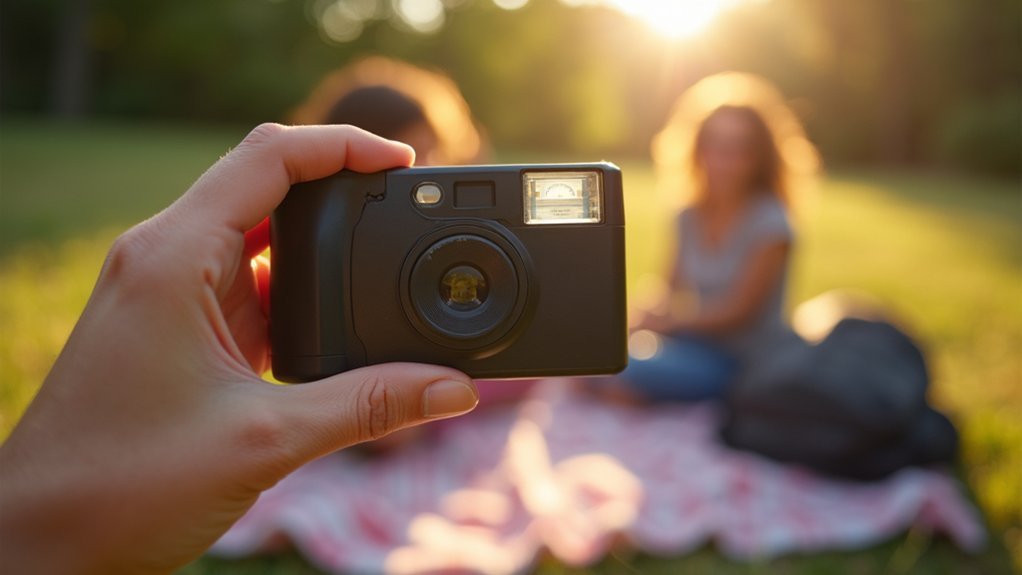
Frame Your Shot and Hold Your Disposable Camera Steady
When you frame your shot, hold your disposable camera steady with both hands to prevent blurry photos, especially in low light.
Use your dominant eye to look through the viewfinder and carefully compose your image.
Pay attention to the composition and keep your subject within 5 to 10 feet, since fixed lenses need this distance for clear focus.
Make certain you hold the camera so your fingers don’t cover the lens.
Take your time to frame your shot well before pressing the shutter button, as disposable cameras have limited exposure.
Keeping the camera steady while considering distance and composition guarantees sharper photos and better use of each exposure.
Get Close and Mind Lighting for Better Disposable Camera Photos

To capture clear details with your disposable camera, try to get within 5 to 10 feet of your subject since the lens is fixed. It really helps to be close enough so everything comes out sharp.
Also, keep an eye on your lighting. If it’s low light, go ahead and use the flash. But when you’re outdoors in bright sunlight, it’s best to avoid direct sun hitting your subject to keep your photos nicely balanced.
Don’t forget to position your subject carefully and watch out for any shadows. Little things like that can make your shots look way better!
Optimal Subject Distance
Getting the distance right is key to capturing sharp and well-lit photos with a disposable camera. For ideal distance, position your subjects about 5 to 10 feet away to guarantee the fixed lens captures enough detail.
Keep your subjects front and center in the frame to achieve balanced composition and avoid cutting off important parts. When shooting in low light, get as close as possible, ideally within 8 to 36 feet, so the flash can illuminate your subjects effectively.
Pay attention to lighting by having subjects face away from bright light sources to reduce harsh shadows.
Don’t hesitate to experiment with angles and perspectives while maintaining this distance to create dynamic, engaging photos that truly capture the moment.
This approach helps you make the most of your disposable camera’s capabilities.
Effective Lighting Tips
Anyone aiming for crisp, well-lit photos with a disposable camera should always use the flash in low-light conditions. The flash is effective for subjects 8–36 feet away, but to capture detailed images, get as close as possible, ideally within 5 to 10 feet.
In well-lit environments, position your subject facing away from the light source to avoid harsh shadows and overexposed highlights. When shooting at night, the flash becomes essential. Remember, lighting direction impacts your photo’s quality.
| Lighting Condition | Ideal Distance | Tips |
|---|---|---|
| Low Light | 8–36 feet | Use the flash |
| Daylight | Close as possible | Face subject away from sun |
| Night | Close as possible | Flash is critical |
Follow these tips to improve your disposable camera photos every time.
Turn On and Use the Flash on Your Disposable Camera
Although disposable cameras are simple devices, using the flash correctly can make a big difference in your photos.
To turn on the flash, slide the button located near it on your disposable camera. Once you press it, wait 2 to 5 seconds for the flash to charge. This is usually shown by a red light.
Turn on the flash by sliding its button and wait 2 to 5 seconds for the red charging light.
The flash works best for subjects 8 to 36 feet away, especially in low-light settings. Remember, the flash automatically turns off after each photo, so you’ll need to turn it on again for every shot.
Avoid using the flash for mirror selfies, as it can cause harsh reflections.
Always verify the flash is fully charged before you use it to get well-lit, clear photos.
Keep Track of Your Remaining Shots on the Disposable Camera
Most disposable cameras offer around 27 shots, so you’ll want to keep an eye on the small dial or window that shows your remaining frames. This mechanical counter helps you monitor the exposure count, ensuring you don’t run out of film in the camera unexpectedly.
As you handle the camera, be mindful not to advance the film unintentionally, which can reduce your available shots.
Keeping track of your remaining frames lets you plan and engage in strategic shooting, helping you compose each photo carefully instead of rushing.
Finish Your Roll and Develop Your Disposable Camera Film
When you’ve taken all the photos on your disposable camera, make certain to wind the film completely to secure it before development. This step guarantees the used film is safely stored inside the camera, preventing exposure loss.
Next, take your camera to a local store or photography lab that offers film developing services. Many drug stores with photo departments handle disposable cameras, and costs typically range from $8.00 to $20.00.
Visit local stores or photo labs to develop your disposable camera, with prices usually between $8 and $20.
If no local options are available, consider mailing your camera to a remote lab. Development times vary; some labs offer same-day service, while others take longer, so plan accordingly.
Once developed, you’ll receive your photos to enjoy the memories captured. Properly finishing the roll and choosing the right develop service keeps your images safe and vibrant.
Frequently Asked Questions
Can I Reuse a Disposable Camera After the Film Is Developed?
You can’t reuse a disposable camera after the film is developed because it’s designed for single use only.
Once you finish all the shots and get the film processed, the camera is no longer functional for taking pictures.
However, you can keep it as a keepsake or recycle it.
If you want to keep shooting, you’ll need to buy a new disposable camera or switch to a reusable camera with replaceable film.
How Long Can Disposable Camera Film Be Stored Before Developing?
Coincidentally, you can store disposable camera film for about two years before developing it, but for the best results, aim to develop it within a year of shooting.
If you keep it in a cool, dry place, you might stretch that to five or six years, though image quality could suffer.
Avoid extreme heat or sunlight while storing.
Once you’ve exposed the film, don’t wait too long. Develop it soon to keep your photos sharp and colorful.
Is It Safe to Open the Disposable Camera Before the Film Is Fully Used?
No, you shouldn’t open the disposable camera before using all the film.
Doing so exposes the film to light, which ruins any unexposed pictures.
The camera’s design protects the film until you finish shooting, so wait until all your shots are taken.
Once done, you can safely open it to remove the film for development.
Opening it early risks damaging the camera and losing your photos.
Can Disposable Cameras Be Used Underwater or in Extreme Weather?
You can use disposable cameras underwater only if they’re specifically waterproof models, like the QuickSnap waterproof.
It handles depths up to 17 feet. Regular disposable cameras aren’t built for water or extreme weather.
So, avoid exposing them to such conditions to prevent damage.
Always check the camera’s specifications before using it underwater or in harsh environments.
Protect your camera from extreme temperatures to keep the film safe and your pictures clear.
What Should I Do if My Disposable Camera Gets Damaged Before Developing?
If your disposable camera gets damaged before developing, don’t open it. You could ruin the film by exposing it to light.
Instead, check for visible damage like cracks or water exposure and store it in a dry, safe place.
When you take it to the lab, let the staff know about the damage. They might be able to salvage some images, but keep in mind that not all photos may be recoverable.
Conclusion
Using a disposable camera might seem simple, but mastering these steps turns snapshots into memories. Remember, each click is a chance, a moment frozen in time.
So, load your film carefully, frame your shots thoughtfully, and don’t rush the process. With patience and attention, you’ll capture images that tell your story beautifully.
After all, a disposable camera is more than just a gadget; it’s your creative companion waiting to reveal magic.